
Images are very powerful presentation materials. They help to draw the attention of other people, explain visually a certain concept, and make your slides look interesting. Adding images in PowerPoint would certainly do wonders for your presentation, but knowing how to insert, crop, or mask your images can enhance your PowerPoint presentation.
In this tutorial, I will share with you a few easy and efficient steps on how to work with images in PowerPoint.
How to Add Images in PowerPoint
Inserting an image into the slide in PowerPoint is really easy. Here’s how it’s done in a few clicks:
1. Open Your PowerPoint Presentation: Go to the slide where you would like to place the image.
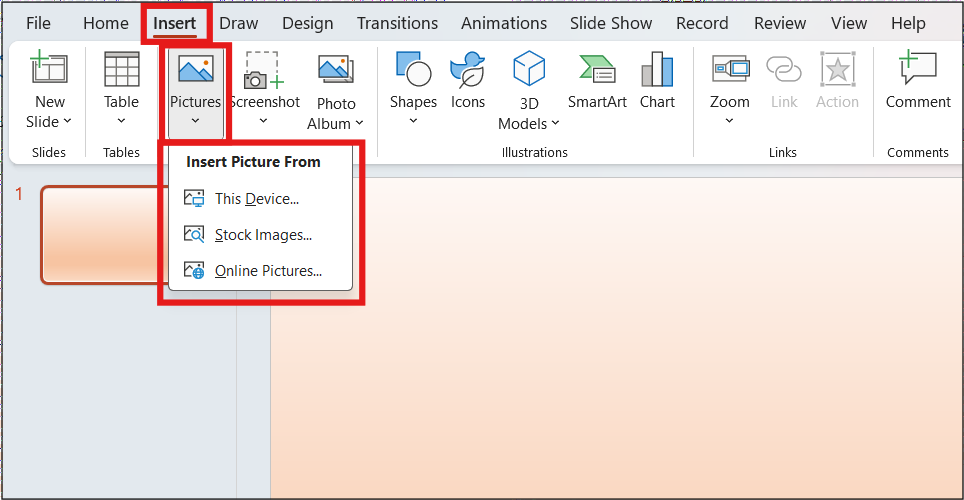
2. Insert the Image:
- Click on the “Insert” menu.
- Click on “Pictures” under this menu and select the source from the list of devices, internet sources, or stock images.
- Now you have selected your picture, click the “Insert” button and voilà! Your picture will magically materialize on your slide.
Pro Tip: Want to make your presentation look sharp? Use professional presentation templates! You can easily download many templates online. Most of these templates come complete with picture placeholders so you simply plug in your own graphics!
Crop Images in PowerPoint
Sometimes you want only a part of the picture on your slide. Using crop can reduce an image and only display the part you want. Here’s how you crop down an image in PowerPoint:
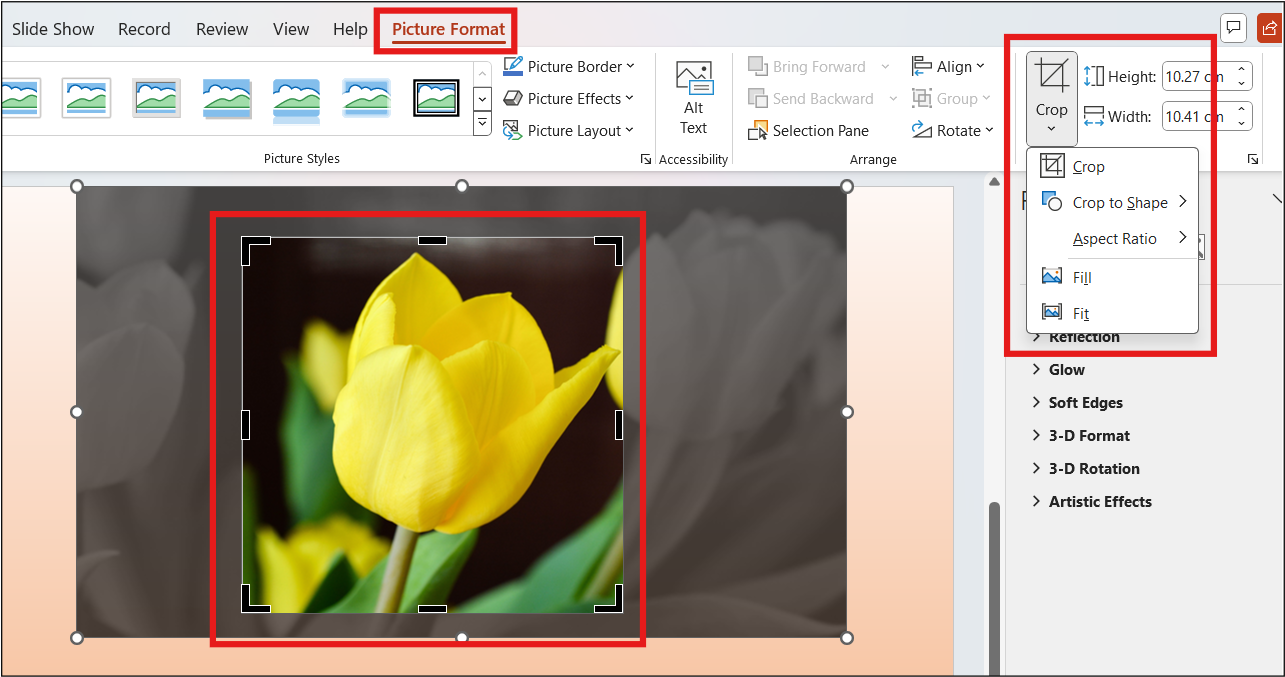
- Select the Image: After pasting your picture, first click on the picture to select it.
- Picture Tools Format Tab: At the top, click on the bottom tab underneath “Picture Tools”: “Format”.
- Crop the Image: Click the Crop button in the toolbar.
- You will now see the black crop handles surrounding your image. Get these handles and drag them inward to remove all those parts of the image you don’t want.
- When you’re happy with this, tap the Enter key or click outside the image to apply the crop.
Pro Tip: If you’re working with multiple images and need more editing options, check out my detailed post on How to Edit Images in Your PowerPoint Presentation.
Masking Images with Shapes in PowerPoint
Masking an image entails the process of placing it in a specific shape. It is one way of creating much fun for you while adding some coolness to your slides, causing your images to stand out. How to mask an image with shape in PowerPoint:
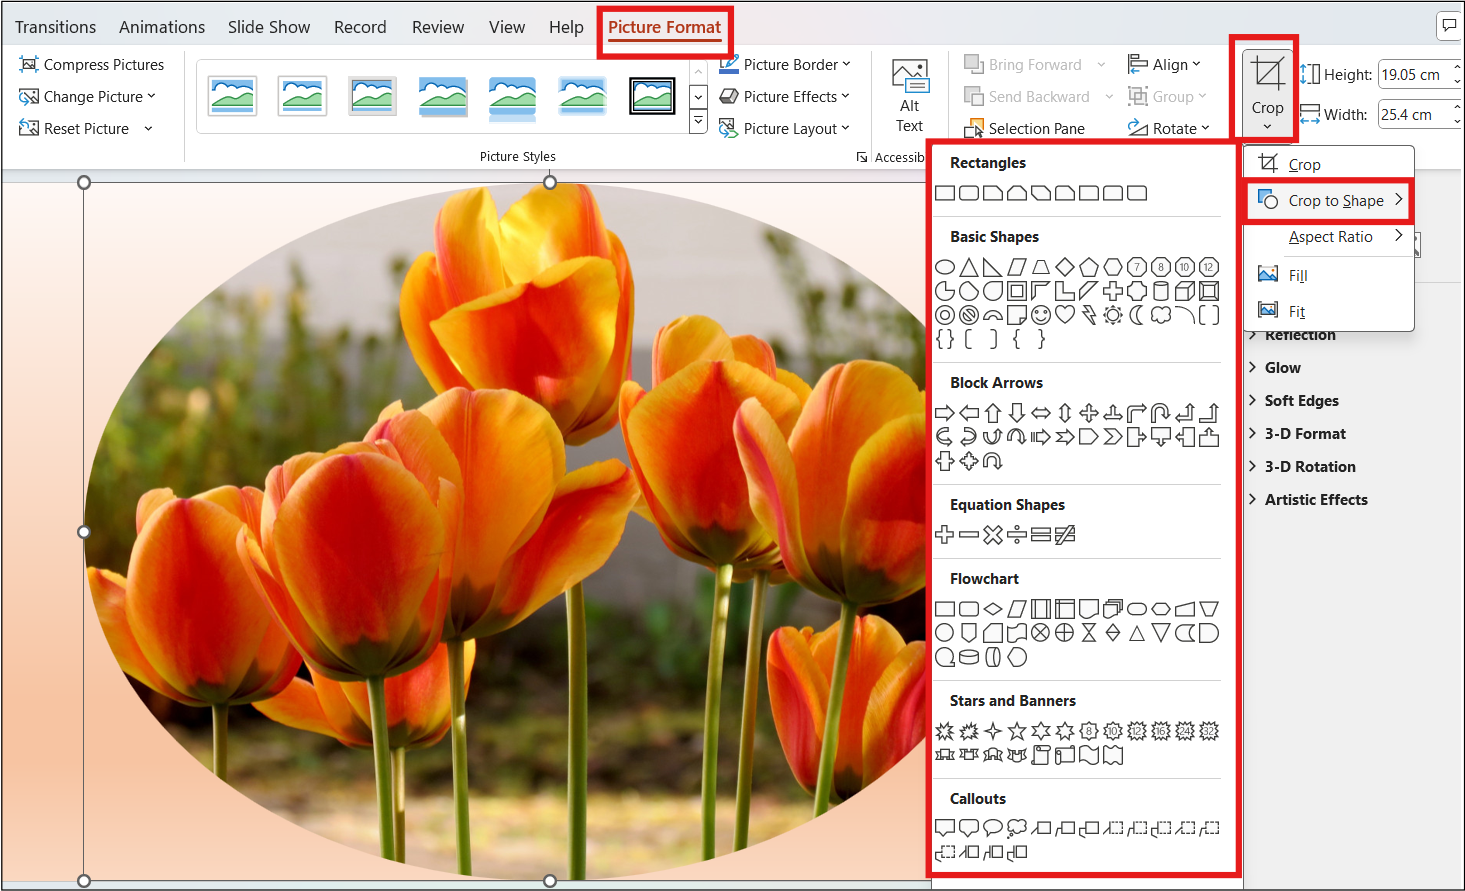
- Insert Your Image: Insert the required image into the slide.
- Choose a Shape to Mask the Image:
- Click on the image, then navigate to the “Picture Tools Format” tab.
- In the “Crop”, you will see a downward arrow, click that to see the “Crop to Shape.”
- Now you can see several shapes from where you can select a circle, triangle, star, etc. This will provide you with an image of that shape.
- Crop and resize the image: Once your picture has been cropped into shape, size, and positioning so that all the important parts of your picture come through, you’re done.
This trick really can work magic for your slides-they seem custom-designed with little effort.
Tips for Working with Images in PowerPoint
- Preserve Aspect Ratio: If you need to resize images, hold down the Shift key so your aspect ratio will be preserved and your images do not get stretched out or distorted.
- Make sure to use good resolution and of good quality, so the image will be clear on a big screen.
- Align Images Consistently: Now it’s time to line up those images! PowerPoint has a fantastic “Align” feature at the “Format” tab, which makes sure that your images align perfectly with your slides.
For more awesome tips, go to our Tips & Tricks page and uncover some other fantastic hacks that can make your PowerPoint presentation stand out!
And if you also use Google Slides, you may like to read my post on How to Insert, Crop, or Mask Images in Google Slides for a similar tutorial on that platform.
Conclusion:
Whether you are just starting to craft your presentation or perfecting your presentation skills, knowing how to align images, crop images, and mask images in PowerPoint makes all the difference. You can create engaging presentations sure to capture the attention of an audience. Finally, for that touch of the business professional, do not hesitate to throw in a few of those slick pre-design templates.
If this post helped you, then do check the rest of the posts for even more ideas on the topic, and keep leveling up your presentations! Thanks for reading!


