Images are powerful tools for grabbing attention and conveying information in a clear and engaging way. However, sometimes a busy background can distract from your message. When crafting a compelling PowerPoint presentation, one of the most effective ways to grab your audience’s attention is by using slides with clean, distraction-free backgrounds. This blog will guide you through the process of removing backgrounds in PowerPoint, step-by-step. We’ll also explore some helpful tips and tricks for achieving the best results.
Why Remove or Change Backgrounds in PowerPoint Slides?
There are several advantages to removing the default background from PowerPoint slides:
- Enhanced Clarity: A clean background allows your content to take center stage, improving readability and focus for your audience.
- Design Freedom: Removing the background gives creative possibilities. You can choose a solid color, gradient, image, or even a video as your new background, creating a visually engaging presentation that aligns with your brand or theme.
- Professional Polish: A presentation with a custom background instantly conveys a sense of professionalism and attention to detail.
Removing the Slide Background in PowerPoint: A Step-by-Step Guide
Ready to customize your slides? Here is a method for removing the background in PowerPoint:
Step 1: Open Your PowerPoint Presentation
Start by opening the PowerPoint presentation where you wish to remove the slide background. Navigate to the slide that requires editing.
Step 2: Access the Design Tab
Navigate to the top menu and select the Design tab. Here, you’ll find various options to customize the appearance of your slides.
Step 3: Choose Format Background
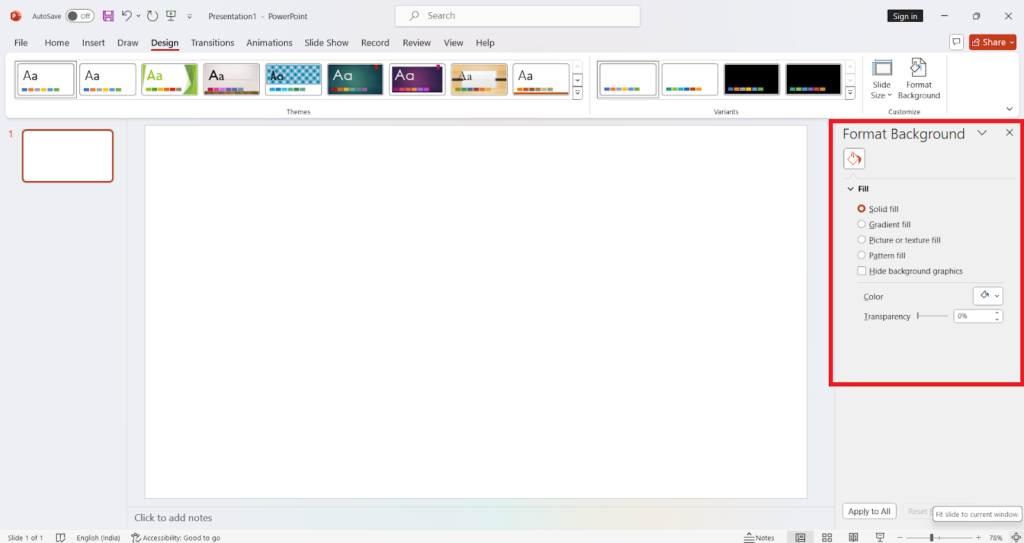
On the far right of the Design tab, you’ll see the Format Background option. Click on this to open the Format Background pane.

Step 4: Solid Fill or Hide Background Graphics
In the Format Background pane, you have two main options to remove your background:
- Remove Background: To remove the background, select the “Solid Fill” option and choose a white color (or any other color that matches your desired background). Alternatively, you can select “No Fill” to remove the background entirely, creating a transparent look.
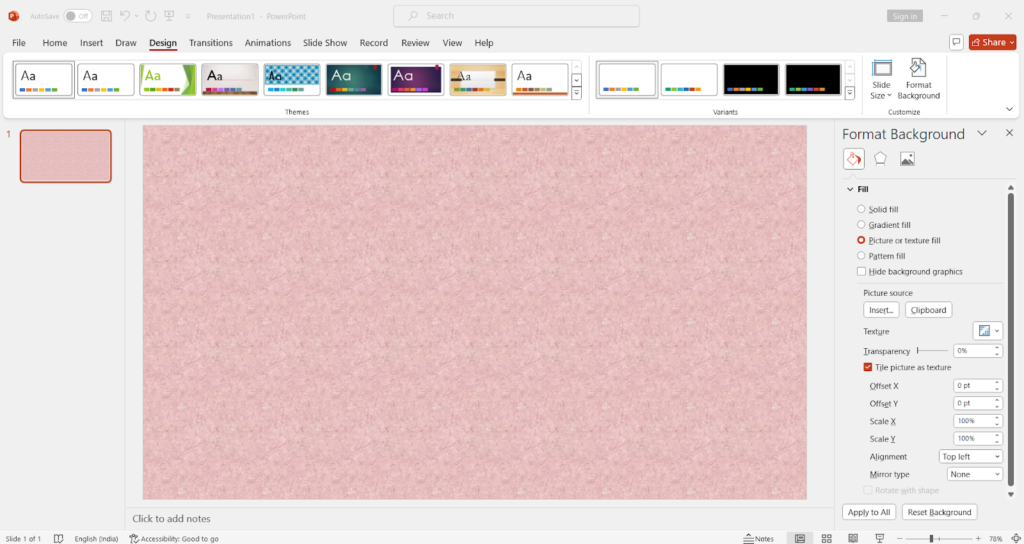
- Change Background: To change the background, you have several options. You can use a “Solid Fill” with a different color, a “Gradient Fill” for a more dynamic look, a “Picture or Texture Fill” to use an image or texture, or choose a “Pattern Fill” to incorporate a pattern into your slide background.

- Hide Background Graphics: If your slide has default graphics or a design template that you wish to remove, check the box labeled Hide Background Graphics. This will remove any pre-set graphics, allowing your content to take center stage.
Step 5: Apply the changes to all slides or only specific ones
Once you’ve made your selection, you can choose to apply the background change to all slides by clicking Apply to All, or only to the current slide by closing the pane.
Step 6: Save Your Changes
After adjusting the background, save your presentation to ensure that your changes are not lost.
Tips for a Professional Finish
Removing or changing the background of your slides can drastically improve your presentation, but there are additional tips to ensure a polished result:
- Consistency: Make sure the new background aligns well with the overall theme and color scheme of your presentation.
- Contrast: Ensure that the text and images on your slides contrast well with the new background to maintain readability.
- High-Quality Images: If using a picture or texture fill, always use high-resolution images to avoid pixelation.
Discover More at Slide Egg
If you often use Google Slides for your presentations, knowing how to edit background images and colors can be equally beneficial. For a step-by-step guide, check out our detailed article on how to edit background images and color in Google Slides. This guide provides comprehensive tips to help you enhance your Google Slides presentations with custom backgrounds and colors.
For those eager to dive deeper into PowerPoint’s capabilities, Slide Egg offers a dedicated PowerPoint Tips and Tricks page. It’s your go-to resource for enhancing your PowerPoint proficiency.
Conclusion
Removing the background from a slide in PowerPoint is a straightforward process that can dramatically improve the visual impact of your presentation. Following these simple steps will help ensure your message is conveyed clearly and effectively. And for more PowerPoint techniques and inspiration, Slide Egg is just a click away!


