
Making visually appealing PowerPoint presentations is like a challenge, but it doesn’t have to be. An easy powerful trick to enhance your slides is making an image transparent. It is a simple effect that will really help to smoothly integrate your pictures with the background, focus attention on text, or even give your slides a more polished professional look. In this blog, we walk you through the steps about how to make a picture transparent on PowerPoint.
Why Use Transparent Pictures in PowerPoint?
Before I dive into the steps, let’s quickly cover why you would ever want to create a transparent picture.
- Focus on Content: A transparent picture lets you overlay text over an image, not congesting your audience.
- Flexibility in Design: Helps you place images overlapped, add overlays, and create depth in your slides.
- Pro Look: Transparent images allow your presentation to look more professional and visually appealing.
Let’s get started.
Step-by-Step Instructions: How to Create a Picture Transparent on PowerPoint
1. Insert the Image
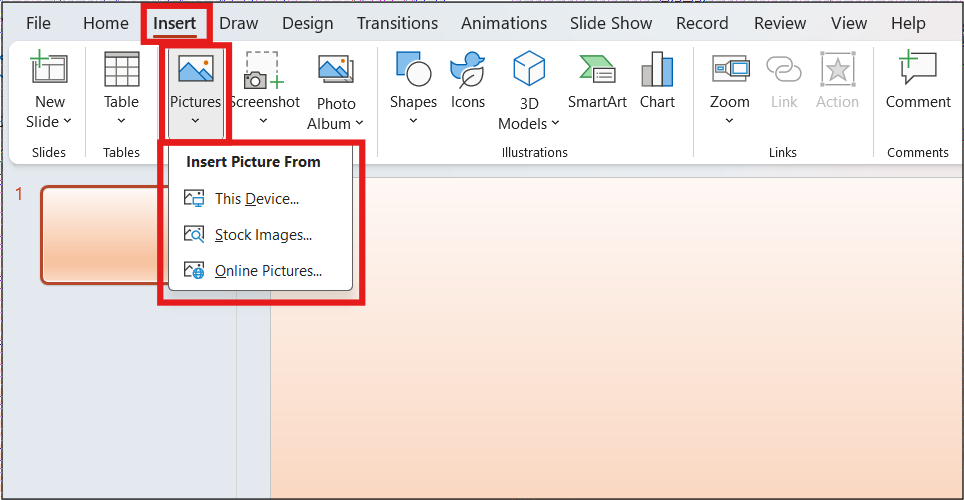
First of all, you need to insert the image that you want to be semi-transparent. Open your PowerPoint slide where you want to have the image. Click on the Insert tab then select Pictures, and insert the image from your device.
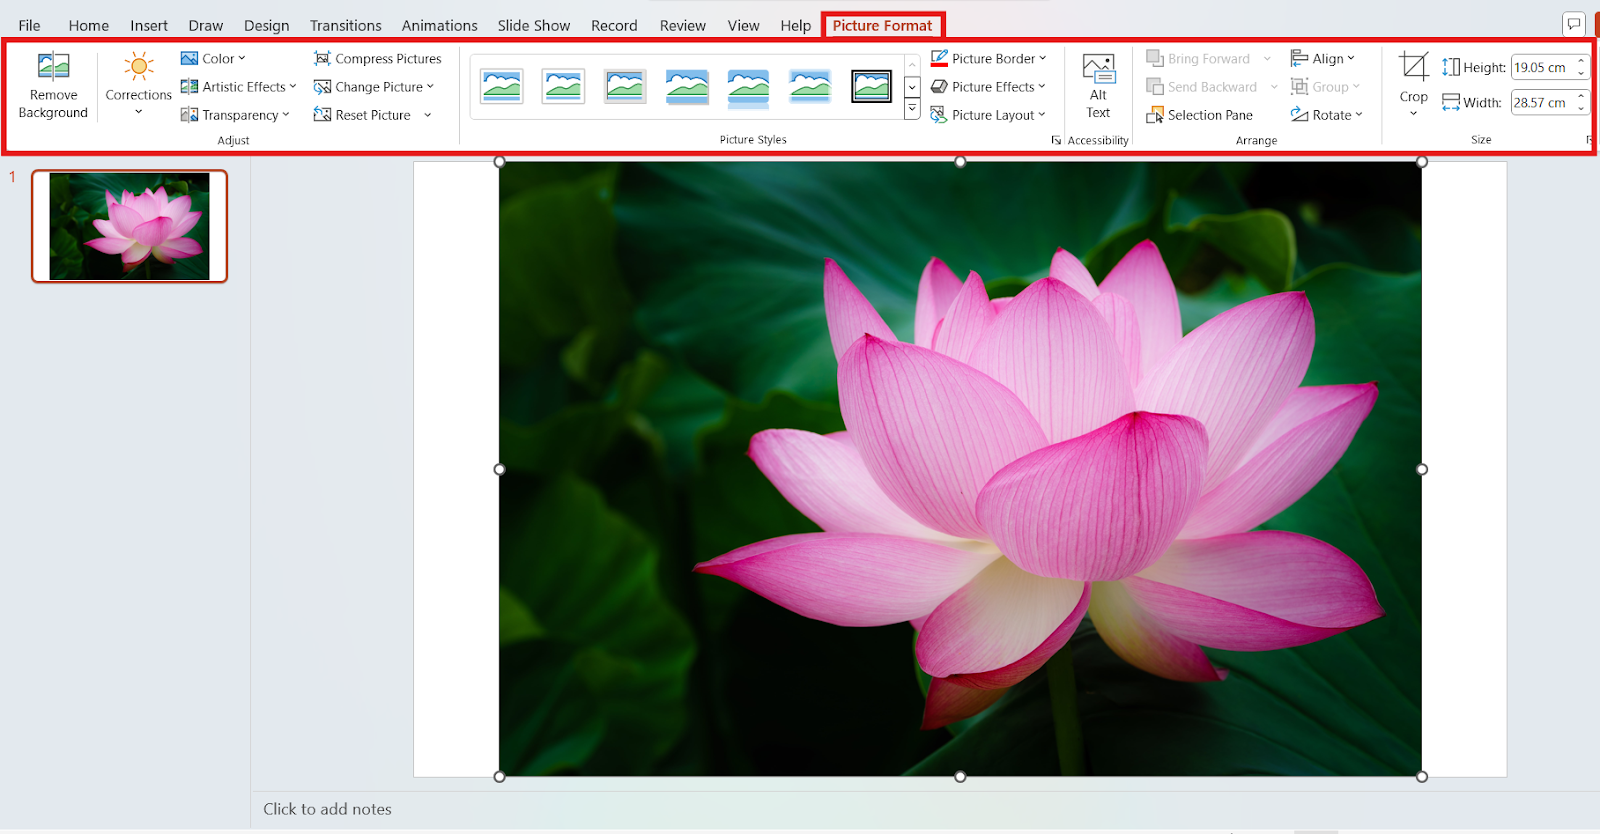
Step 2: Select the Picture
Click on the image in your slide. Doing so will display the Picture Format tab at the top of your window.
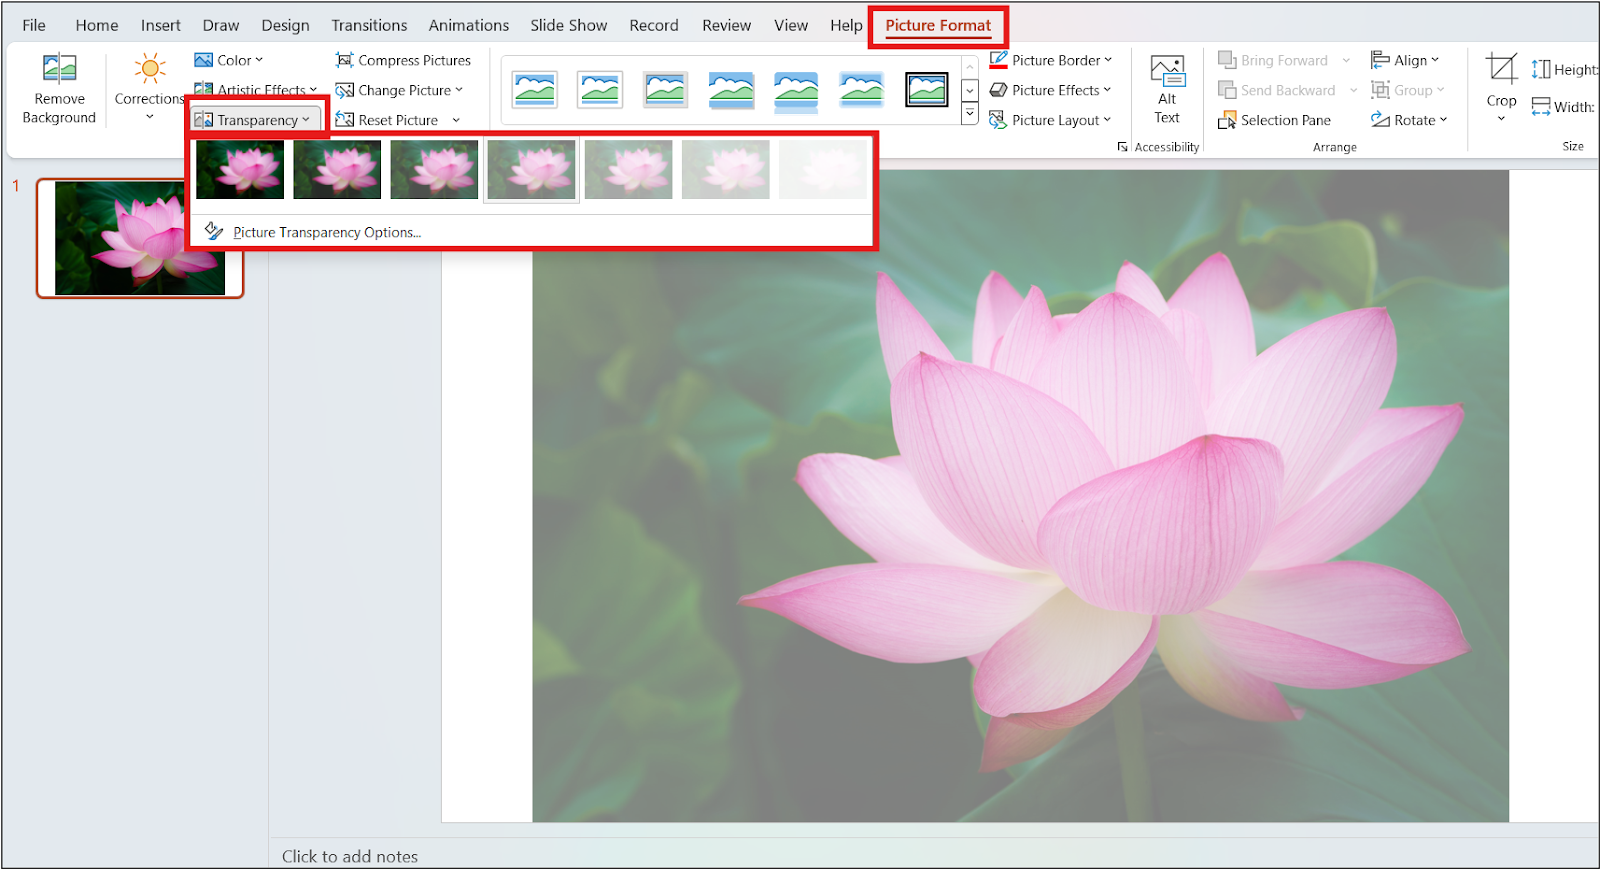
3. Open the Transparency Tool
In the tab, you can find the Transparency option in the Picture Format, in the Adjust group. Click on it, and there will be a dropdown with the various levels of transparency. Just opt for the one that will work best for your design, and you’re good to go! You’ve got yourself a transparent image.
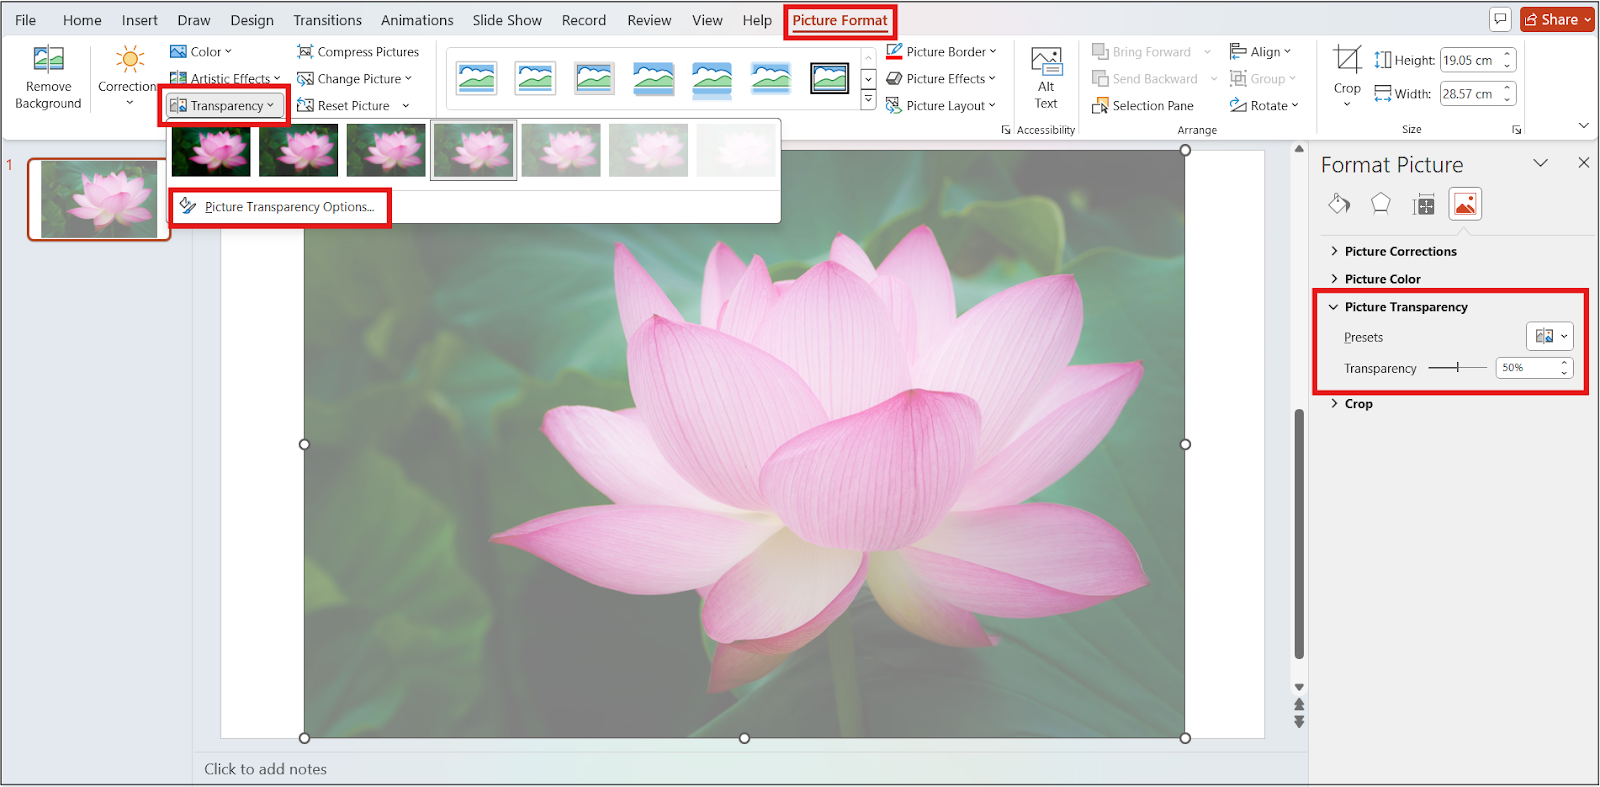
4. Fine-Tune with More Options
If you want more control over the transparency, you can hit Picture Transparency Options at the bottom of the dropdown. It pops open a new side panel where you can slide the level of transparency to get the desired effect.
5. Layering and Positioning
Now that your picture is transparent, you can layer it behind the text or images. Try out different positioning to create amazing visual effects.

And that’s it! In only three easy steps, you’ve learned how to make a picture transparent in PowerPoint.
One of the ways to spice up your presentations is by making an image transparent. You probably know that you can edit images directly within PowerPoint without using any more complicated software. Be it brightness or cropping and applying filter-PowerPoint does it all for you. Do you want to know how to edit the images in your PowerPoint presentation? Take a deep look inside our comprehensive tutorial on how to do so.
Bonus Tip: Use of Readymade Professional Templates
If you really want to take your game to the next level of presenting, consider using professional PowerPoint templates. It can save you hours of work and still deliver perfect slides.
Other Fun Ways to Work with Images in PowerPoint
Once you get the hang of transparency, why not? PowerPoint makes it possible to crop or mask images with perfect design. Whether it is fitting an image into a specific shape or creating borders uniquely yours, the choices are nearly endless. These techniques added to your presentation skills make all the difference and put your head and shoulders apart from the crowds.
And if you feel adventurous, check out our list of presentation hacks to leave you turning into a PowerPoint pro in no time!
Conclusion
Learning to make an image transparent on PowerPoint is an extremely simple yet very powerful tool that makes your presentation look dramatically better. While it’s highly useful to make key parts of your content stand out, it opens up as much opportunity for creativity in design. So, go ahead and try the effect of transparency to bring your slides to life!