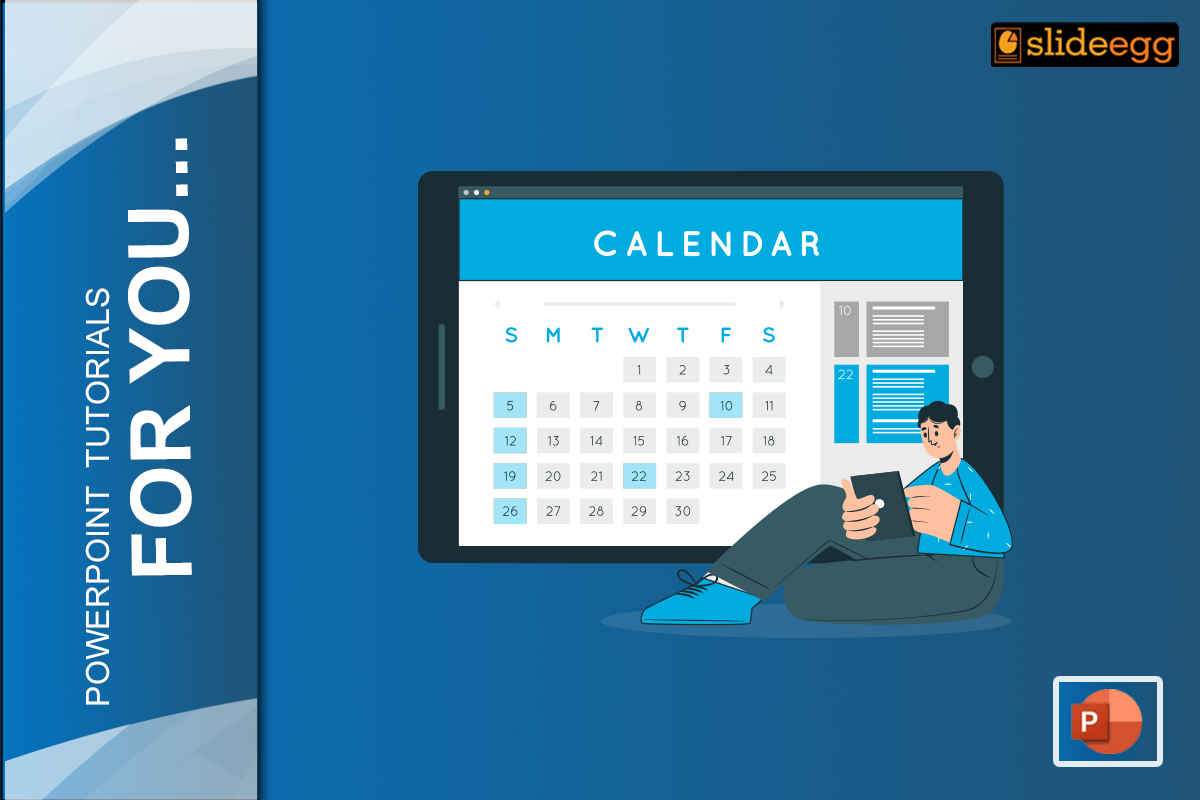
You may never imagine that such a complicated calendar can be made easily in PowerPoint. Do you know? It is not a complicated process, and you don’t have to be a designer to create one. Want to create a personal planner, a work schedule, or just a fun calendar for the family? PowerPoint can make all of them. But how? In this blog, we explain step by step. At the end, you’ll know exactly how to make a calendar that looks very professional in no time.
Why Make a Calendar Using PowerPoint?
PowerPoint is very flexible to work with. Whereas doing word processing or working with a graphic design tool, you can easily work with shapes, images, and text, really move things around, change colors, and fit everything just like you want it to look. And, in most cases, most of the users already know how to use this tool, so this really can be an excellent choice for a first-timer.
Step-by-Step for Designing a Calendar
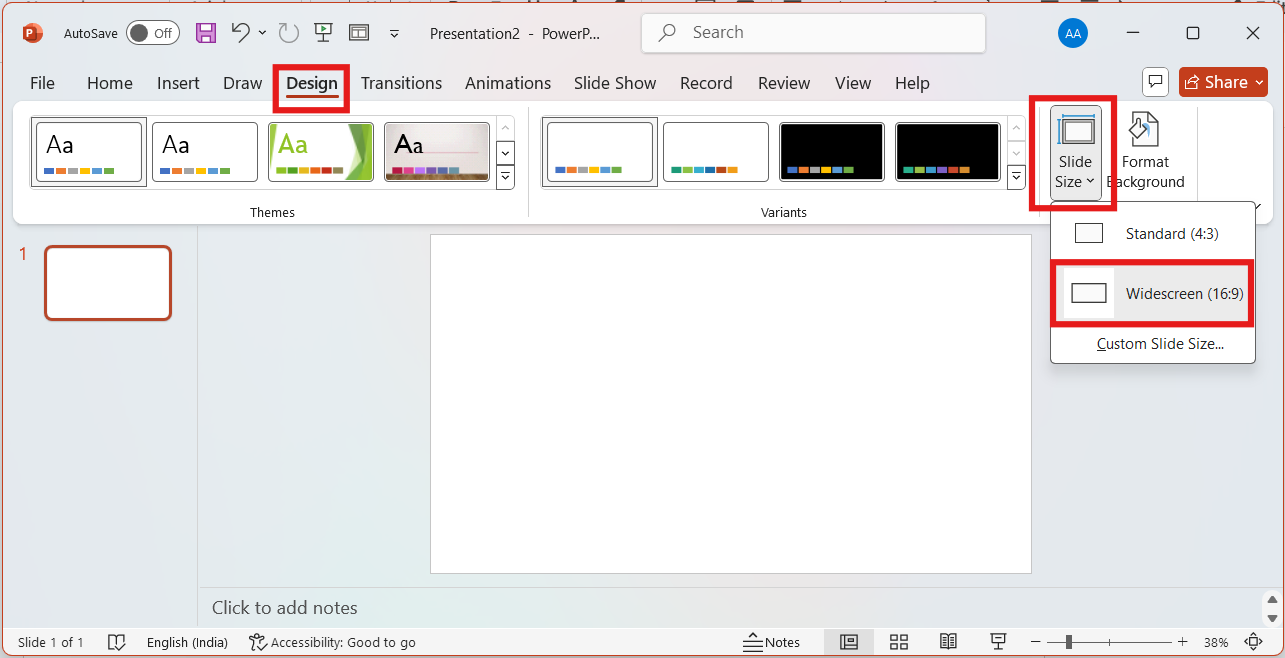
Step 1: Open PowerPoint and Set Up Your Slide
- Open PowerPoint, then create a new presentation on a blank slide. You can do this by selecting New Presentation from the home screen. Once you have got your blank slide in front of you, it’s time to change the layout so that it suits a calendar design.
- Choose the Design tab, then select the slide size. Fill the whole page of this calendar by choosing “Widescreen (16:9)” which fills the page well whether you print it out or display it on a screen.
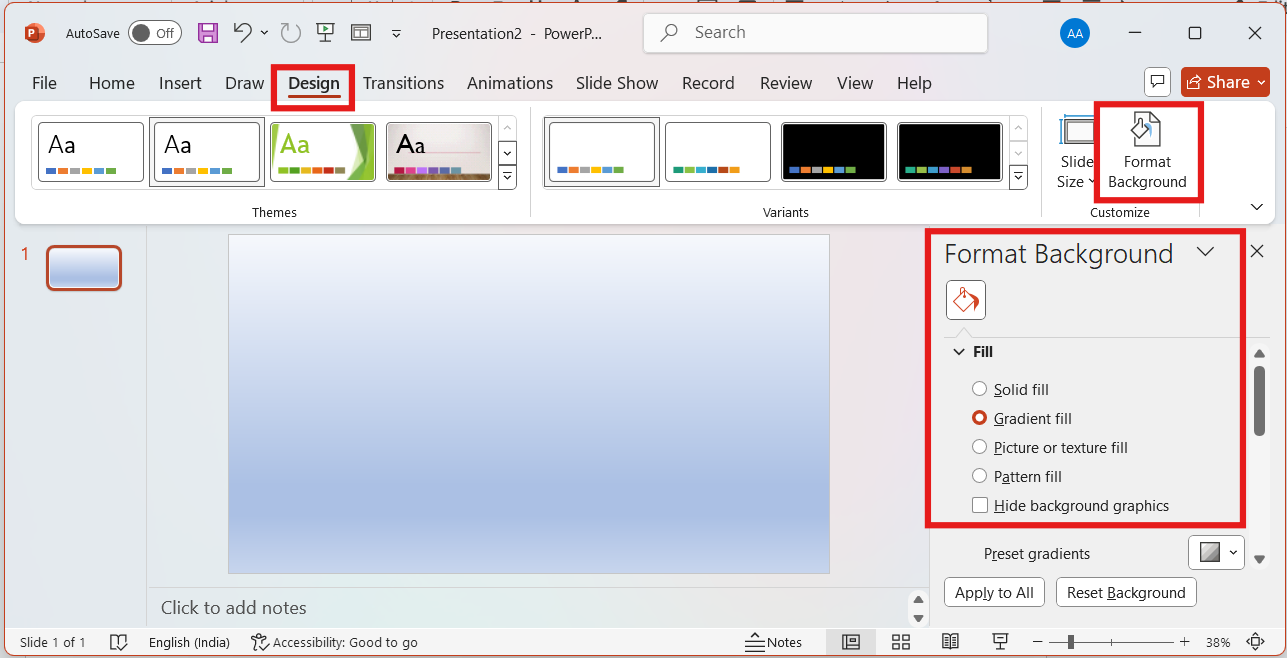
- Change the background color to a light or neutral color. You do that by right-clicking on the slide then selecting format background and clicking on a color not to compete with your text or numbers.
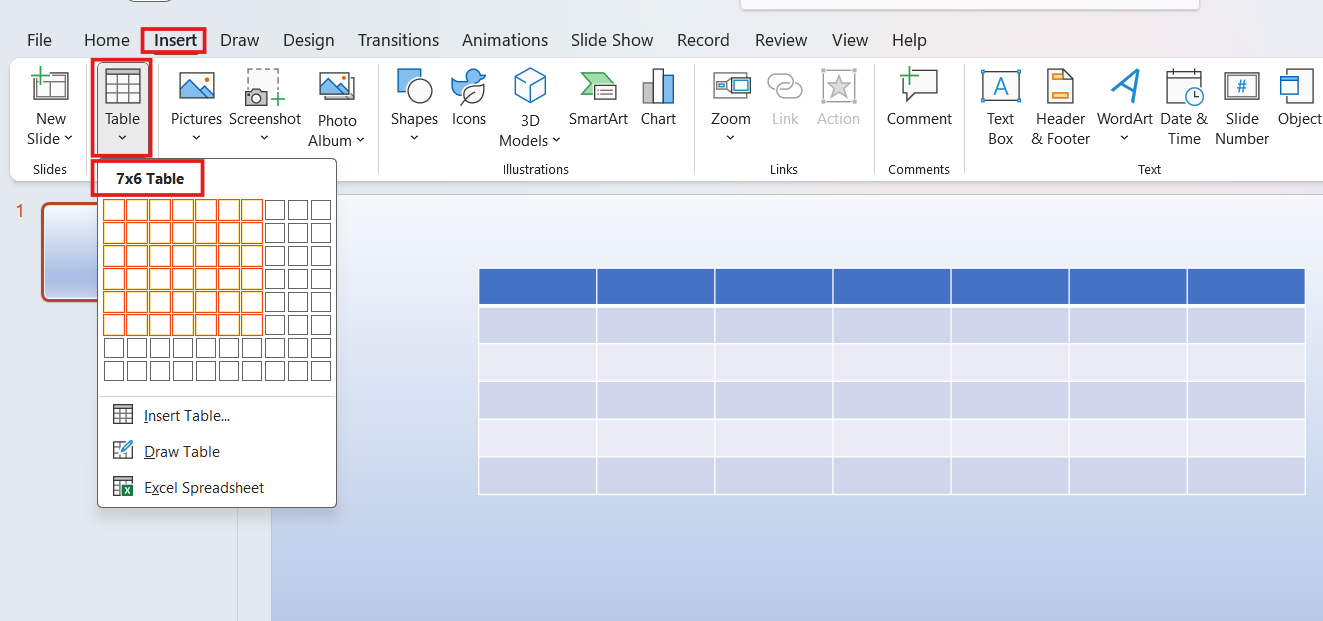
Step 2: Make a Table for Your Calendar Grid
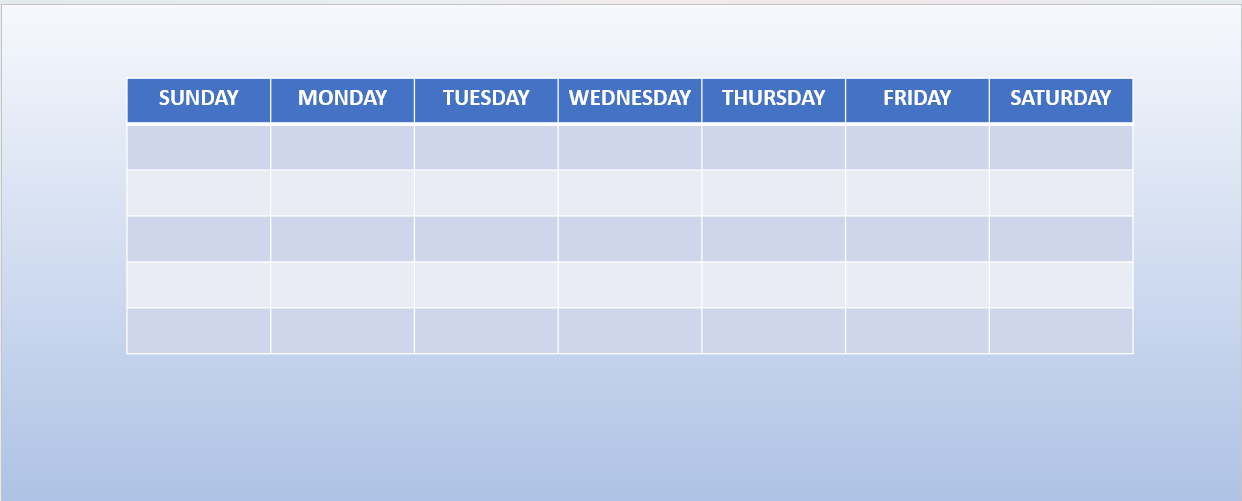
A calendar is basically a grid. So, next, you’ll make a table that will be the foundation for your calendar. To do this:
- On the Insert tab, click on the Table button. For a simple month-to-month calendar, use a 7×6 grid, which is 7 columns for days of the week and 6 rows to include all your days.
- Place the table on your slide and drag it full size so that you have enough space. You can resize at any time later.
If you prepare a calendar with customized specifics for showing to the company, you can play with the sizes of tables too. But if you’re creating a calendar to track project milestones, you will, of course, have fewer columns and rows.
Step 3: Label the Days of the Week
Now it is time to add day names in the first row.
- Highlight the first row of your table and type in Sunday, Monday, Tuesday, and so on across the first seven cells.
- Make this centered. You could also try making this text bold for maximum effect.
- You can also experiment with fonts and colors to match your needs.
Step 4: Add the Dates
With the table set up and now that you’ve labeled the days of the week, you can put the dates in. You can go into the calendar for your specific month and do this manually in each cell. Simply click on a cell, type the date, and hit enter.
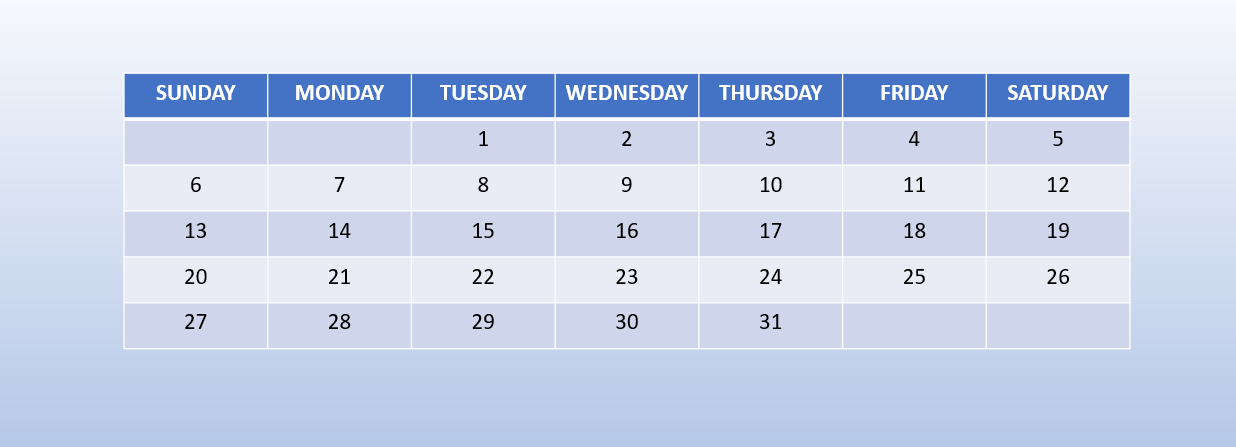
Pro tip: If you plan to create a calendar by year, you probably will want to make a slide per month. That way, each slide will display the grid for one month.
Step 5: Customize Your Calendar
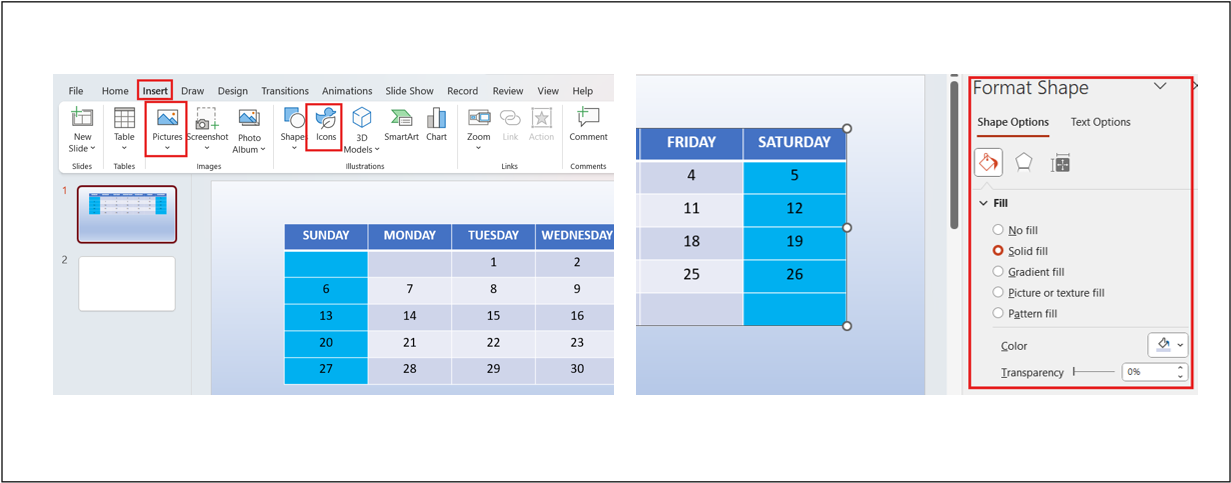
- Add pictures or icons for holidays, birthdays, or other special events. Just click over in the tab Insert, and then click on Pictures or Icons, and just drag those onto your calendar.
- Color-code some dates for easy reference, or even highlight weekends or some deadlines. Just select the cell, right-click, and select Format Shape to change the fill color to identify it among the rest of the dates.
- If it is a calendar for school or work, apply the color-coding scheme to arrange everything in such a way that everything can be read at a glance.
Step 6: Save and Share Your Calendar
Once you are satisfied with your finished calendar, save and share it!
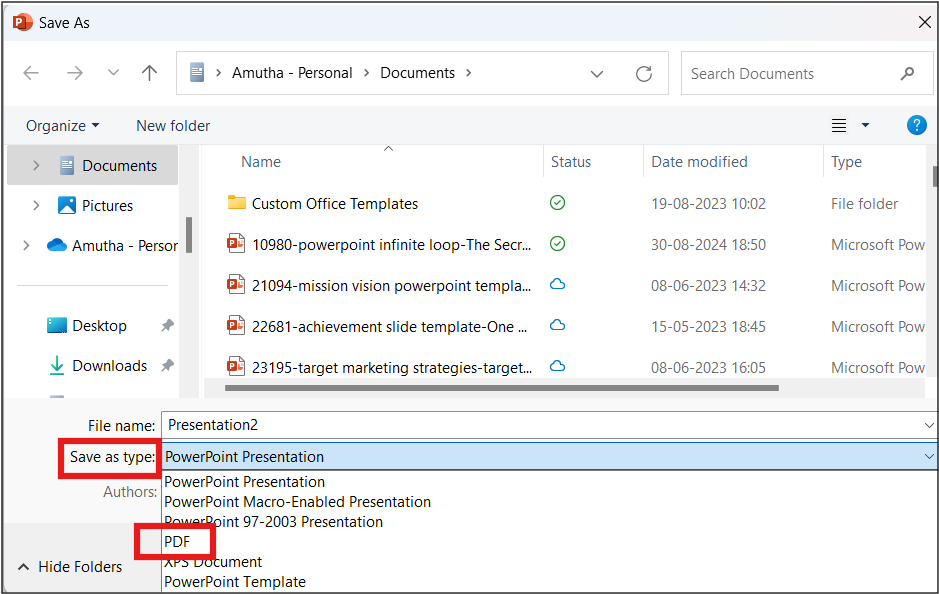
Save as a PowerPoint file in case you are going to need to go back into edit sometimes or even to add notes.
When you want to share it or print it, click on File > Save As, and then choose PDF from the Save as type box. Now you have a high-quality version of your calendar that’s ready to print.
Bonus Tip:
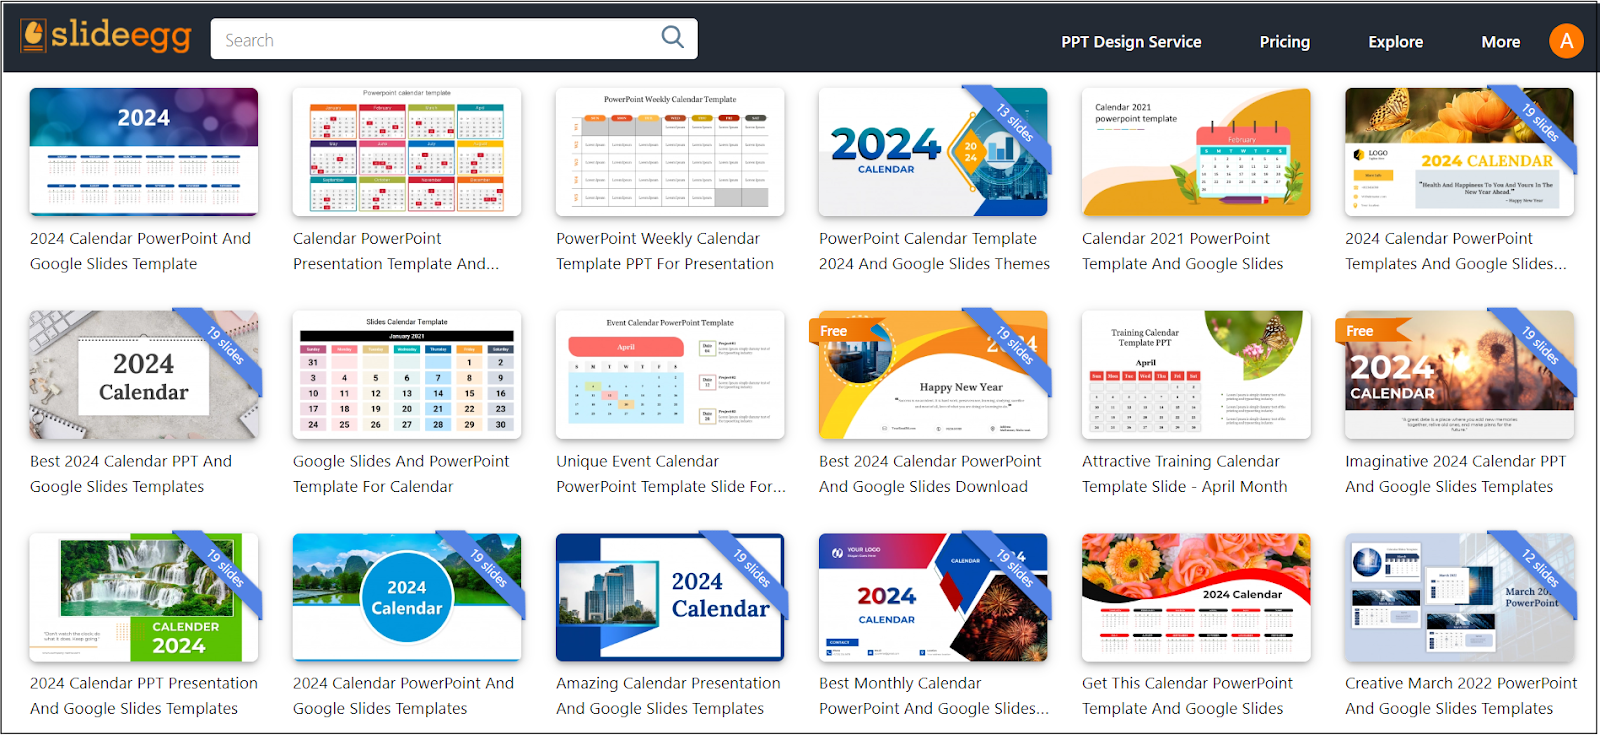
If you are short of time, or you want a slightly more professional, finalized look, you can always use the online calendar PowerPoint templates. These are already pre-designed, so you just have to plug in your dates and customize them as required. A huge time-saver and professional finish!
More Presentation Hacks!
Ever learn cool tricks to make your presentation pop off? Be sure to check out our tips & tricks page for even more helpful hints and tips. Want to know, too, how to create a calendar in Google Slides? Well, we got a nifty Google Slides calendar tutorial that might help you out!
Conclusion
Creating a calendar in PowerPoint is one of the simple fun things to do and easy to be on the go whether at school, at work, or personal. With all the flexibility that PowerPoint offers, you can very easily design a calendar that fits the requirements of use and comes out seamlessly within a few minutes. Now that you know how to create a calendar in PowerPoint, go ahead and try it, and you’ll be surprised at just how easy it can be!