“Good data can tell a story. Great tables can make it unforgettable.”
Tables are your best companion when it comes to structuring data and making your slides look neat and professional. They not only organize your content but also add a visual appeal that’s hard to miss.
Let’s dive into some simple steps to create and format tables in PowerPoint, ensuring your audience stays engaged and informed.
Starting with the Basics: Creating a Table
Creating a table in PowerPoint is as easy as pie. Follow these steps:
- Open your presentation: Fire up PowerPoint and open the slide where you want to insert the table.
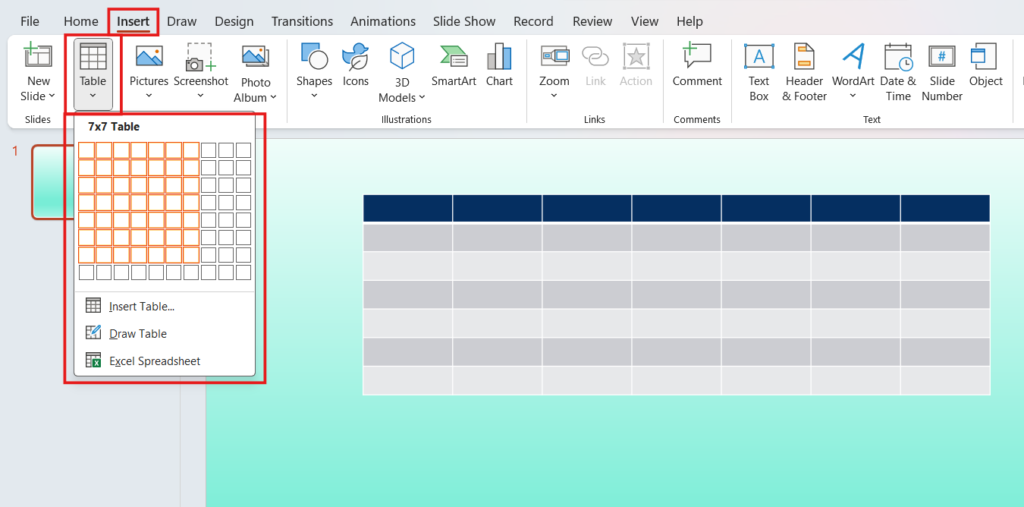
- Insert a table: Go to the “Insert” tab on the ribbon. Click on “Table” and choose the number of rows and columns you need. Just like that, your table will appear on the slide.
Formatting Your Table: Making It Look Good
Now that your table is there, let’s make it look fabulous.
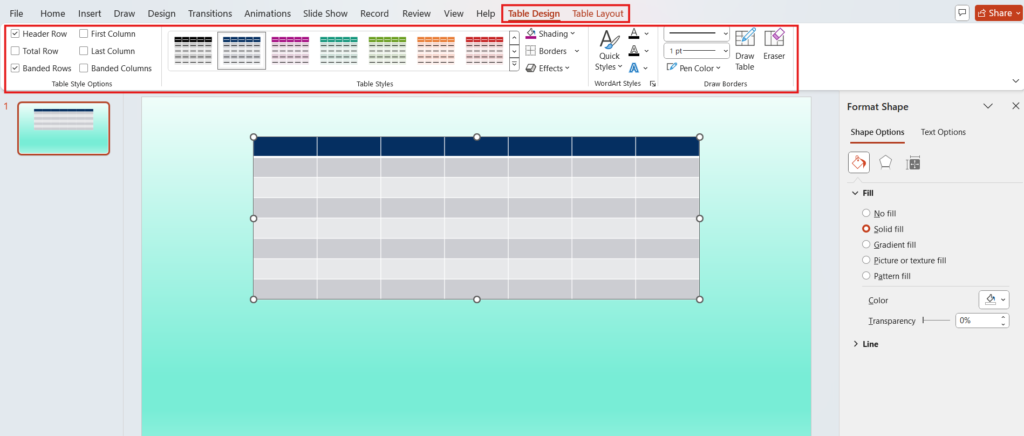
- Selecting the Table: Click on the table. A new set of tabs will appear on the ribbon— “Table Design” and “Layout.” These tabs will help you with formatting.
- Table Style Options: Under the “Table Design” tab, you’ll see a gallery of table styles. Scroll through them and pick one that suits your presentation’s theme. This is a quick way to give your table a polished look.
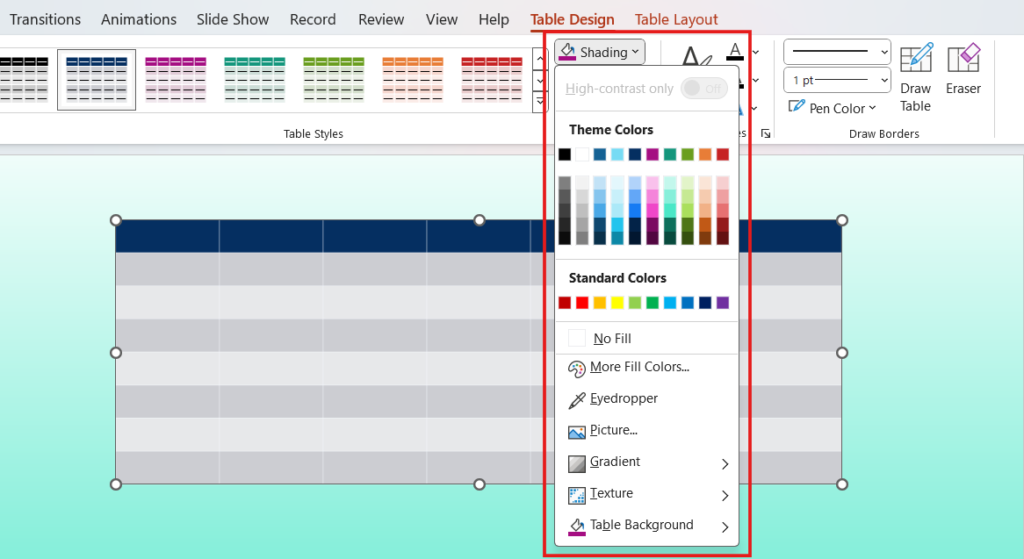
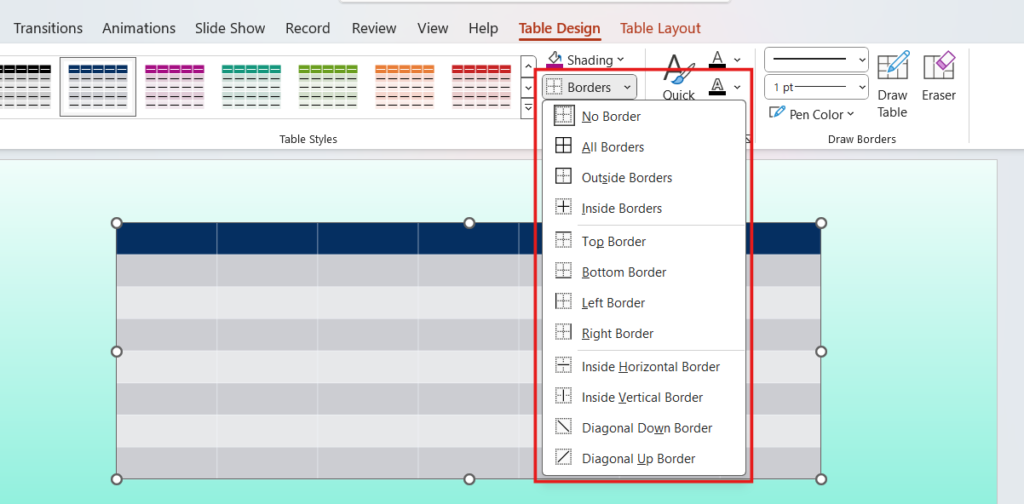
- Shading and Borders: If you want to get creative, you can customize the shading and borders. Still, on the “Table Design” tab, use the “Shading” button to change the background color of cells. The “Borders” button allows you to add or remove borders around cells.
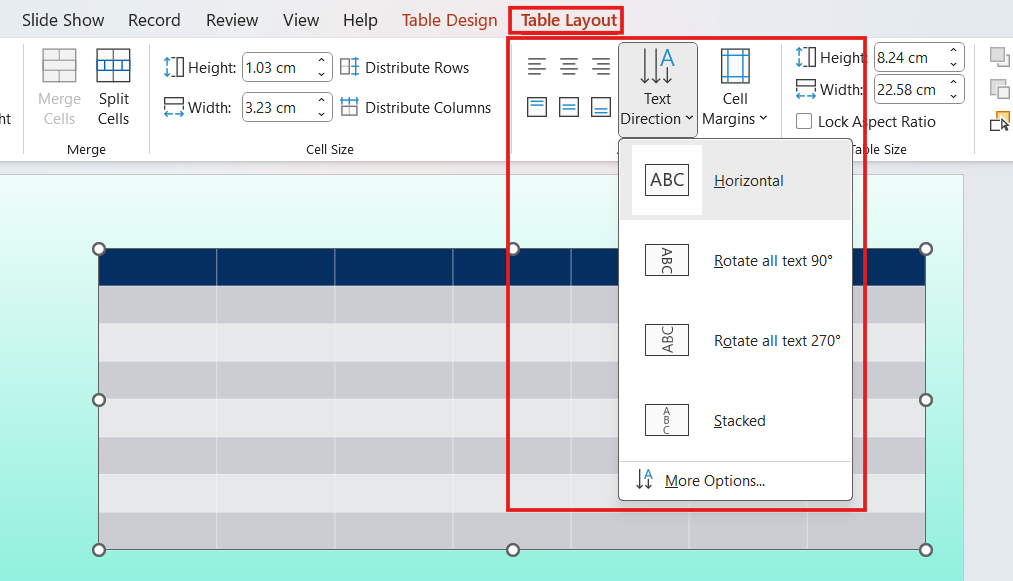
- Text Alignment: Go to the “Layout” tab and use the alignment options to position your text within the cells. Centered text often looks neater.
Pro Tips for a Stellar Table
- Consistent Formatting: Keep your table’s formatting consistent with the rest of your slides. Use the same fonts and colors.
- Avoid Clutter: Don’t overcrowd your table with too much information. It’s better to split data into multiple tables if necessary.
- Premade Templates: If you’re short on time or want a head start, try using table presentation templates available online. They often come with pre-designed tables with neat formatting that you can easily customize.
By the way, if you’re also working with Google Slides, you might want to check out my guide on How to Easily Add and Edit Tables in Google Slides for some handy tips.
Wrapping Up
Creating and formatting tables in PowerPoint is a piece of cake once you get the hang of it. Remember to keep your tables clean, simple, and consistent with your overall slide design. Dive in and start creating tables that not only organize your data but also add a touch of class to your presentations.
