
Watermarks are a great way to add some professionalism and brand identity to your PowerPoint presentations. They’re subtle, but they leave an impact. In this guide, we will show you how to create a watermark in PowerPoint using very simple steps. In addition, we’ll share a few tips to make your slides stand out even more.
What is a Watermark?
Before we get into the steps, let’s talk about what a watermark is. Watermarks are usually images or text that have been placed on the back of your slides. This is often used for branding or copyright purposes but can also add a professional design element. Think of it as a soft logo or a word that is present, but not distracting.
Why Add Watermarks to PowerPoint?
- Branding: Adding your company logo or tagline to each slide keeps your brand front and center without being dominant.
- Security: Watermarks prevent unauthorized use of your slides by others, and make it clear who owns the content.
- Professional Touch: Well-placed watermarks add extra professionalism and polish to any presentation.
Step-by-Step to Create a Watermark in PowerPoint
Step 1: Open PowerPoint and Choose Your Slide
Open the PowerPoint file where you need to add the watermark. You can apply it to all the slides or a single slide based on your needs.
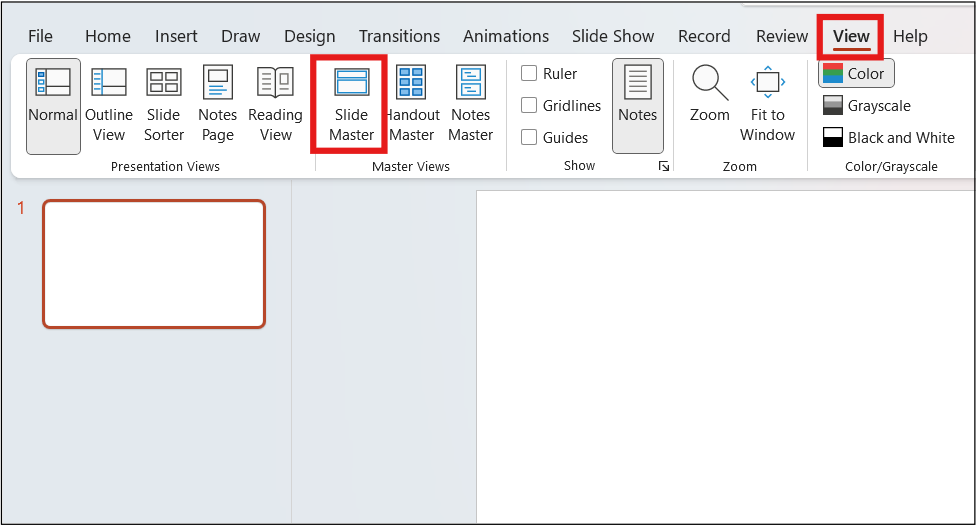
Step 2: Go to the Slide Master
- To add a watermark to all slides:
– Navigate to the “View” tab in the menu and choose “Slide Master.”
– This will open the master layout, which controls the design for your entire presentation.
- If you only want the watermark on one slide, you can skip the Slide Master and add it directly to that specific slide.
Step 3: Insert the Watermark Text or Image
- Text Watermark:
– Click on the “Insert” tab.
– Select “Text Box” and type the text you want (e.g., “Confidential” or your company name).
– Customize the font style, size, and color according to your preferences. For a watermark, it’s best to use a light color and reduce the opacity to make it blend into the background.
- Image Watermark:
– Go to the “Insert” tab again, and choose “Pictures.”
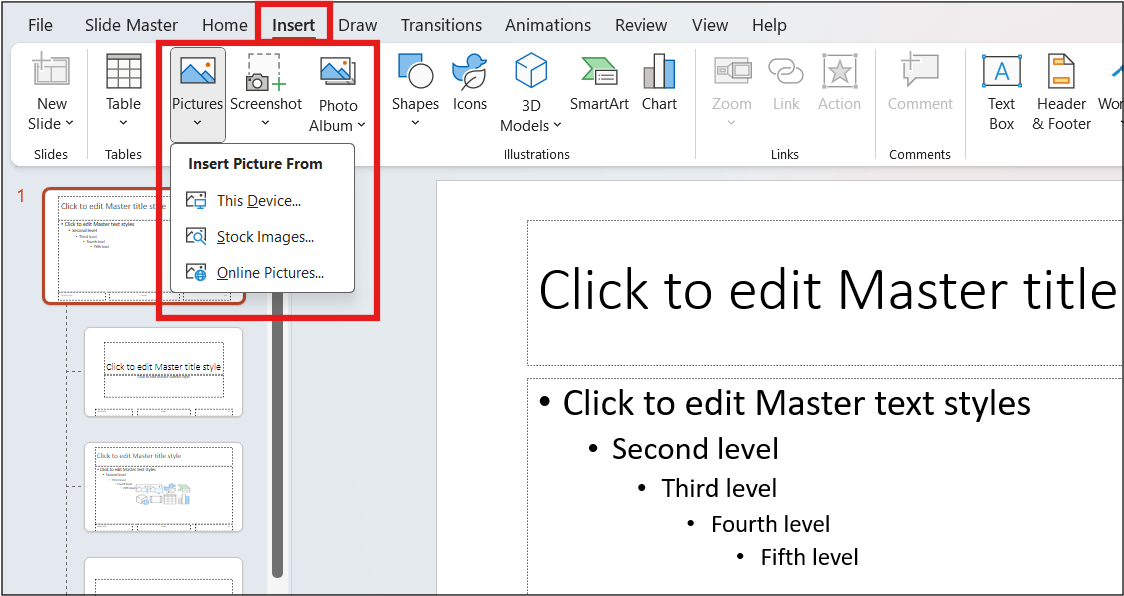
– Select the image you want to use (like a logo or a design element) and insert it.
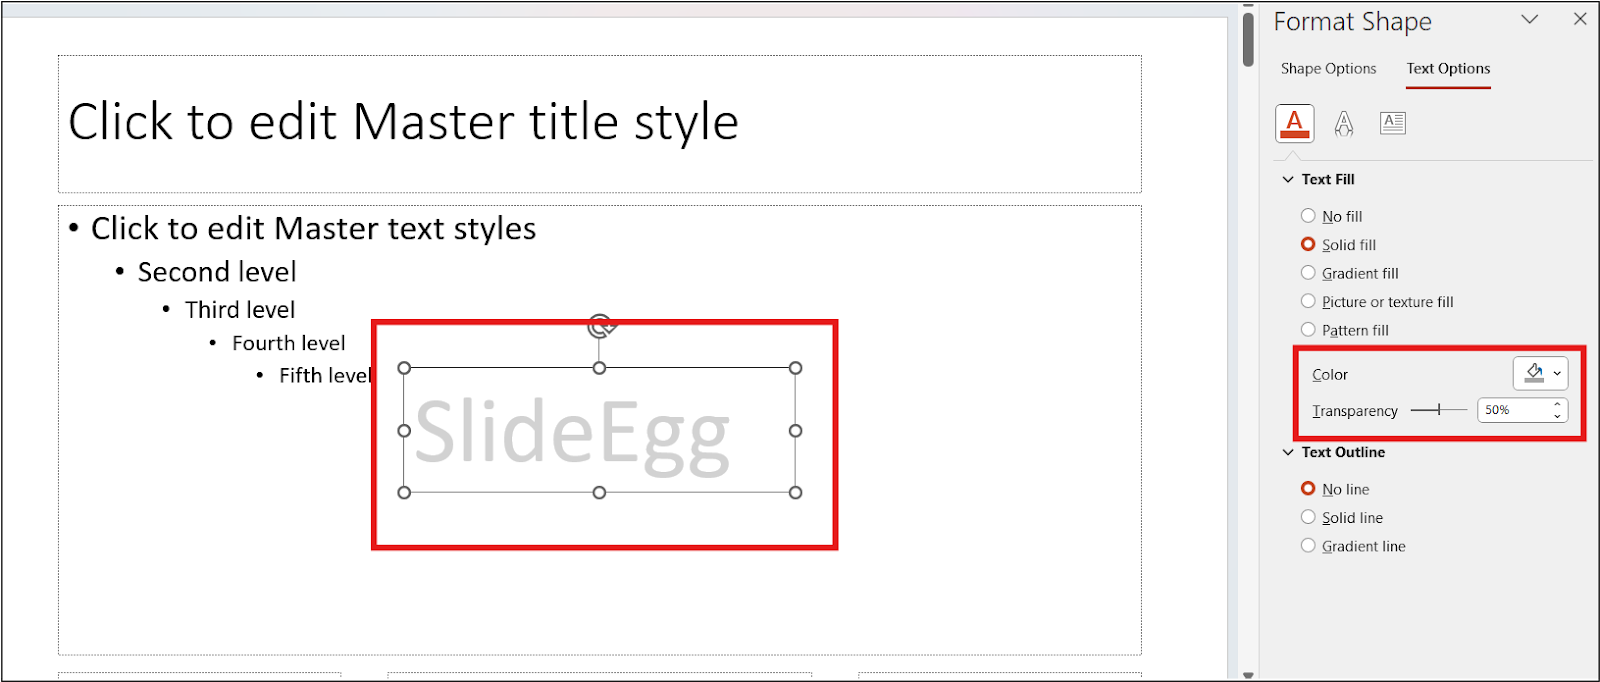
Step 4: Adjust the Watermark Position and Transparency
- Position: Drag and drop the watermark to where you want it. The center of the slide is the most common spot, but you can place it wherever it looks best.
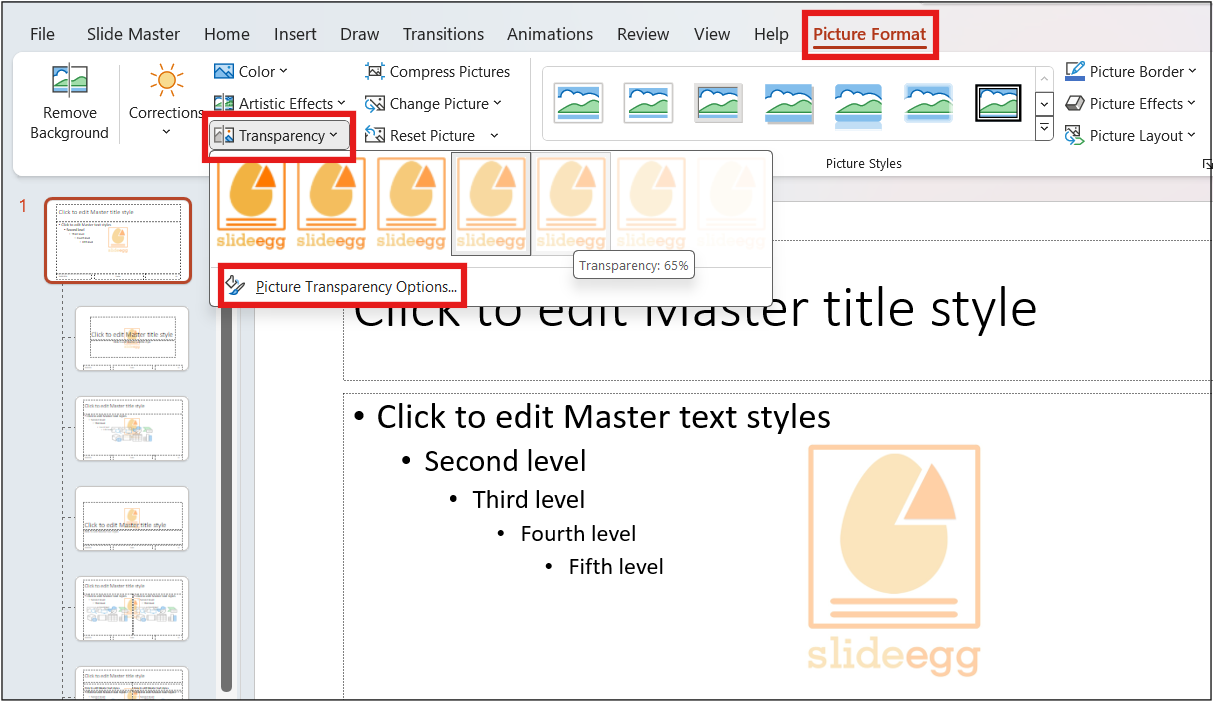
- Transparency: Right-click the text or image and choose “Picture Format” or “Format Shape.” You’ll see an option to adjust transparency. You can also get the option to reduce the transparency below the main menu bar. For a watermark, aim for about 50% transparency so that it’s visible but doesn’t distract from your main content.
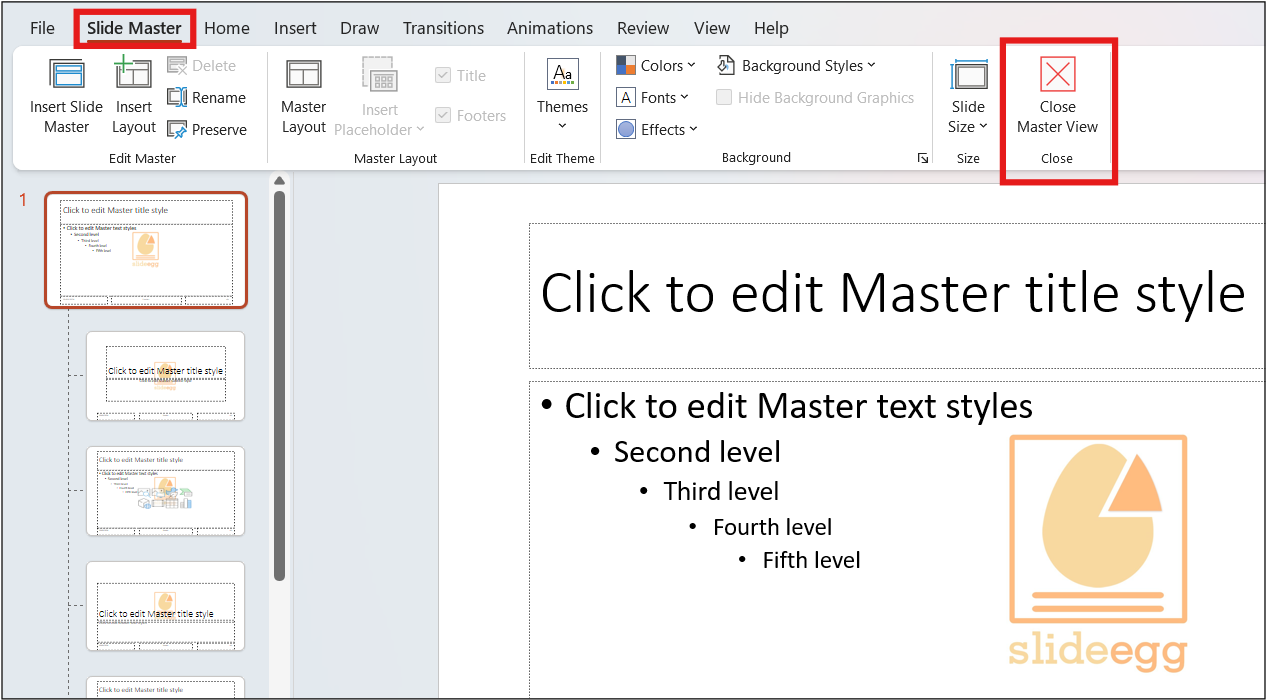
Step 5: Apply and Exit Slide Master
Once your watermark looks good:
- If you’re in Slide Master view, click “Close Master View” to return to your slides.
- If you added the watermark to a single slide, you’re good to go!
That’s it. You’ve just added a watermark to your PowerPoint presentation!
Other Handy Presentation Tips
Sometimes, you may need to remove a watermark from a presentation. Check out our blog on “how to remove a watermark in PowerPoint” to learn the steps.
If you’re someone who works on Google Slides too, visit our blog on “how to add a watermark in Google Slides“! This can come in handy if you switch between PowerPoint and Google Slides for your presentations.
For more tips & tricks on how to enhance your presentations and make them stand out, be sure to check out our page dedicated to presentation hacks.
Final Thoughts
Watermarks are an easy yet effective way to improve the look of your PowerPoint slides. They’re simple to create, and once you master them, you’ll be adding watermarks to all your presentations in no time! Whether it’s for branding, protection, or simply adding a design element, this guide should help you create the perfect watermark for your slides. Happy presenting!