“Great design is in the details.” When it comes to presentations, even the smallest tweaks—like adjusting spacing or indentation—can make your slides look professional and visually appealing. This blog will break down how to change indentation, spacing, and line spacing in PowerPoint, step by step.
Why Formatting Matters in PowerPoint
Before we get technical, let’s talk about why this matters. Proper indentation and spacing:
- Make your content more readable.
- Help organize ideas visually.
- Give your slides a polished, professional feel.
It’s not just about aesthetics; formatting helps your audience understand and remember the information better.
Step 1: Adjusting Indentation in PowerPoint
Indentation is essential for creating a clean hierarchy of information. Whether you’re working with bullet points or text blocks, adjusting indentation helps organize content efficiently.
For Bullet Points:
- Select the text or bullet point you wish to adjust.
- Navigate to the “Home” tab on the ribbon.
- In the “Paragraph” group, click on the “Increase Indent” or “Decrease Indent” button.
For Text Blocks:
- Select the text box.
- Go to the “Format” tab.
- Use the options in the “Paragraph” group to adjust the indentation.
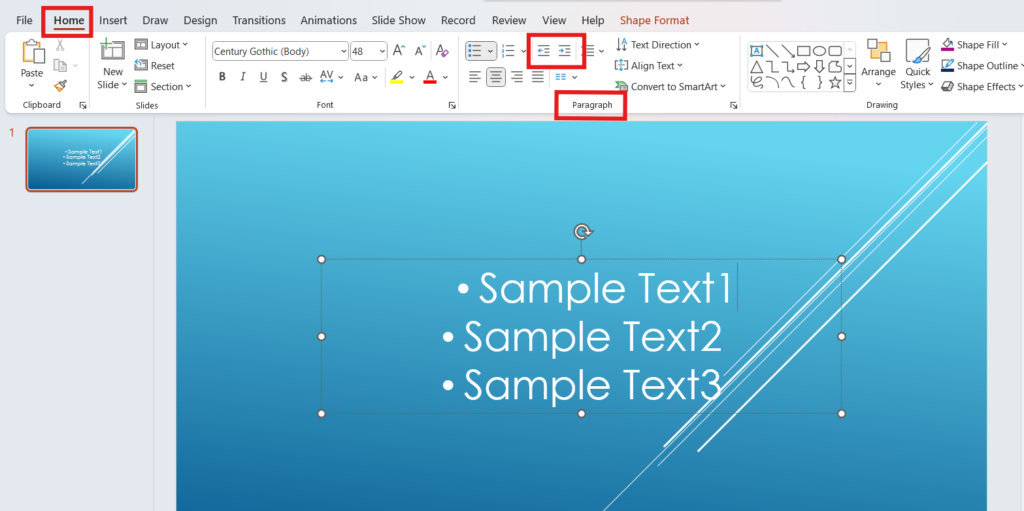
For a finer touch, you can use the ruler at the top of your slide to drag the indent markers manually. This method is great for achieving precise alignment.
Step 2: Changing Spacing Between Lines
Line spacing refers to the space between lines within a paragraph. Proper line spacing significantly enhances readability, particularly for dense text.
How to Change Line Spacing:
- Highlight the text you wish to adjust.
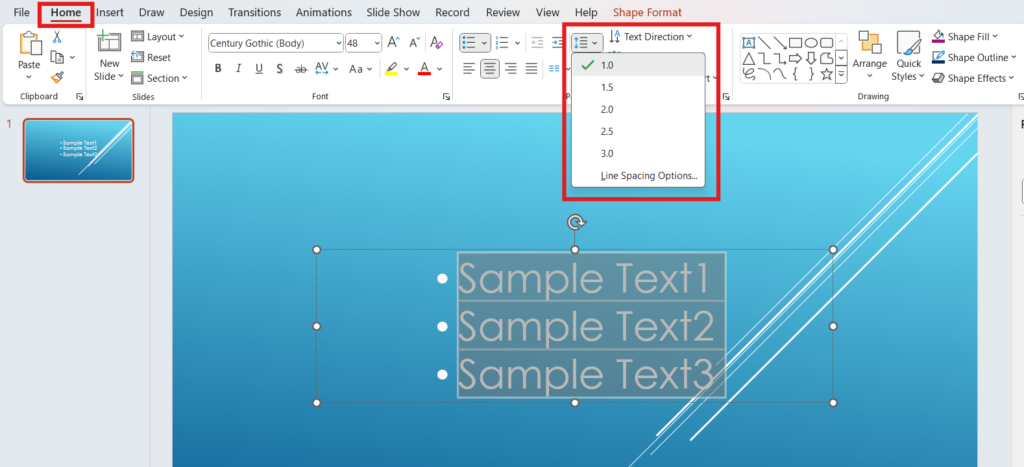
- Go to the “Home” tab, and click on the “Line Spacing” button within the “Paragraph” group.
- Select a line spacing option (e.g., Single, 1.5, or Double), or click on “Line Spacing Options” for more customization.
Custom Line Spacing:
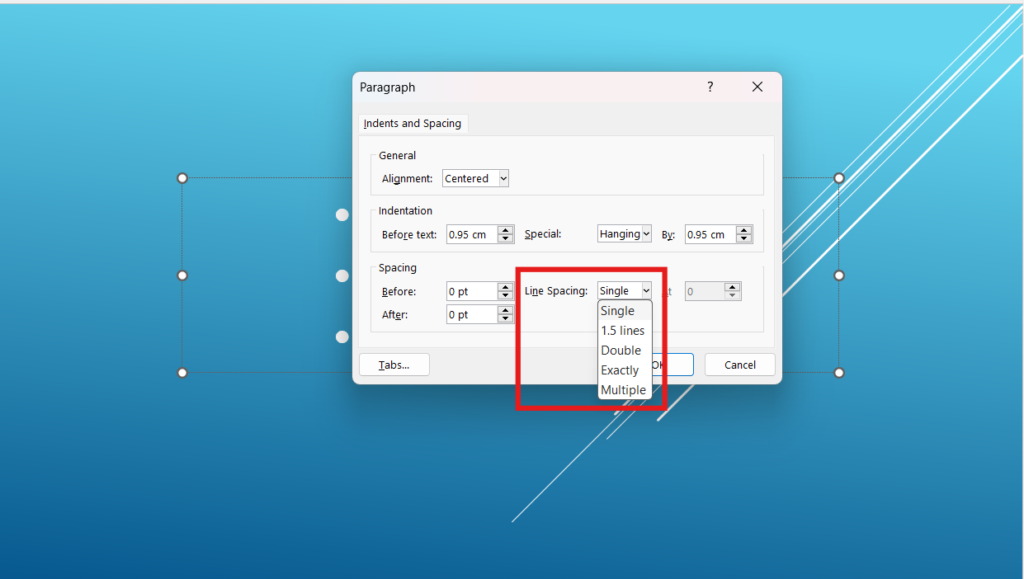
In the dialog box that appears, you can:
- Set spacing to “Single,” “1.5 lines,” or “Double.”
- Specify exact spacing for a more tailored look.
Experiment with different spacing options to find one that makes your text clear and visually appealing.
Step 3: Adjusting Paragraph Spacing
Spacing before and after paragraphs is often overlooked but can make a big difference in the overall layout of your slide.
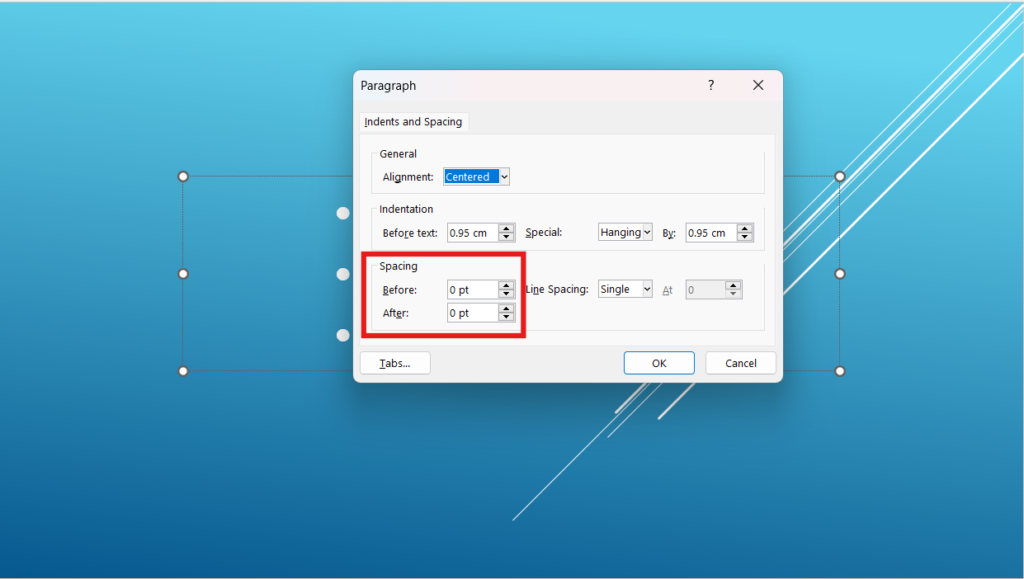
Adjust Paragraph Spacing:
- Highlight the paragraph(s) you want to adjust.
- Click the “Line Spacing” button in the “Paragraph” group under the “Home” tab.
- Choose “Line Spacing Options” to open a dialog box.
- Set specific spacing for “before” or “after” paragraphs.
Pro Tips for Professional PowerPoint Templates
Using professional PowerPoint templates available online can drastically reduce the time spent on formatting and ensure your presentations always look polished. These templates often come pre-loaded with optimal indentation, spacing, and line spacing settings, so you don’t have to tweak them much.
Moreover, while you’re getting those line and paragraph spacings just right, don’t forget to check out our blog on “How to change indentation, spacing, and line spacing in Google Slides“. It offers equally helpful tips and ensures that your skills are transferable across platforms.
Incorporating these techniques into your presentations will make a noticeable difference. Remember, the key to a compelling presentation isn’t just the content but also how it’s laid out. So go ahead, play around with these settings, and watch your slides transform into a visual treat!


