A picture is worth a thousand words, but a picture with the right effects is priceless! PowerPoint presentations are a powerful tool for conveying information, and images play a crucial role in making them engaging. Adding effects to your images can transform a dull slide into a visual masterpiece. This guide will walk you through the process of applying various effects to images in PowerPoint.
Basic Image Editing: A Quick Refresher
Before applying effects, it’s essential to have a good-quality image. If your image needs adjustments, you can easily edit it within PowerPoint. To learn more about basic image editing tools, check out our blog on how to edit the images in your PowerPoint presentation.
Step-by-Step Guide to Applying Image Effects
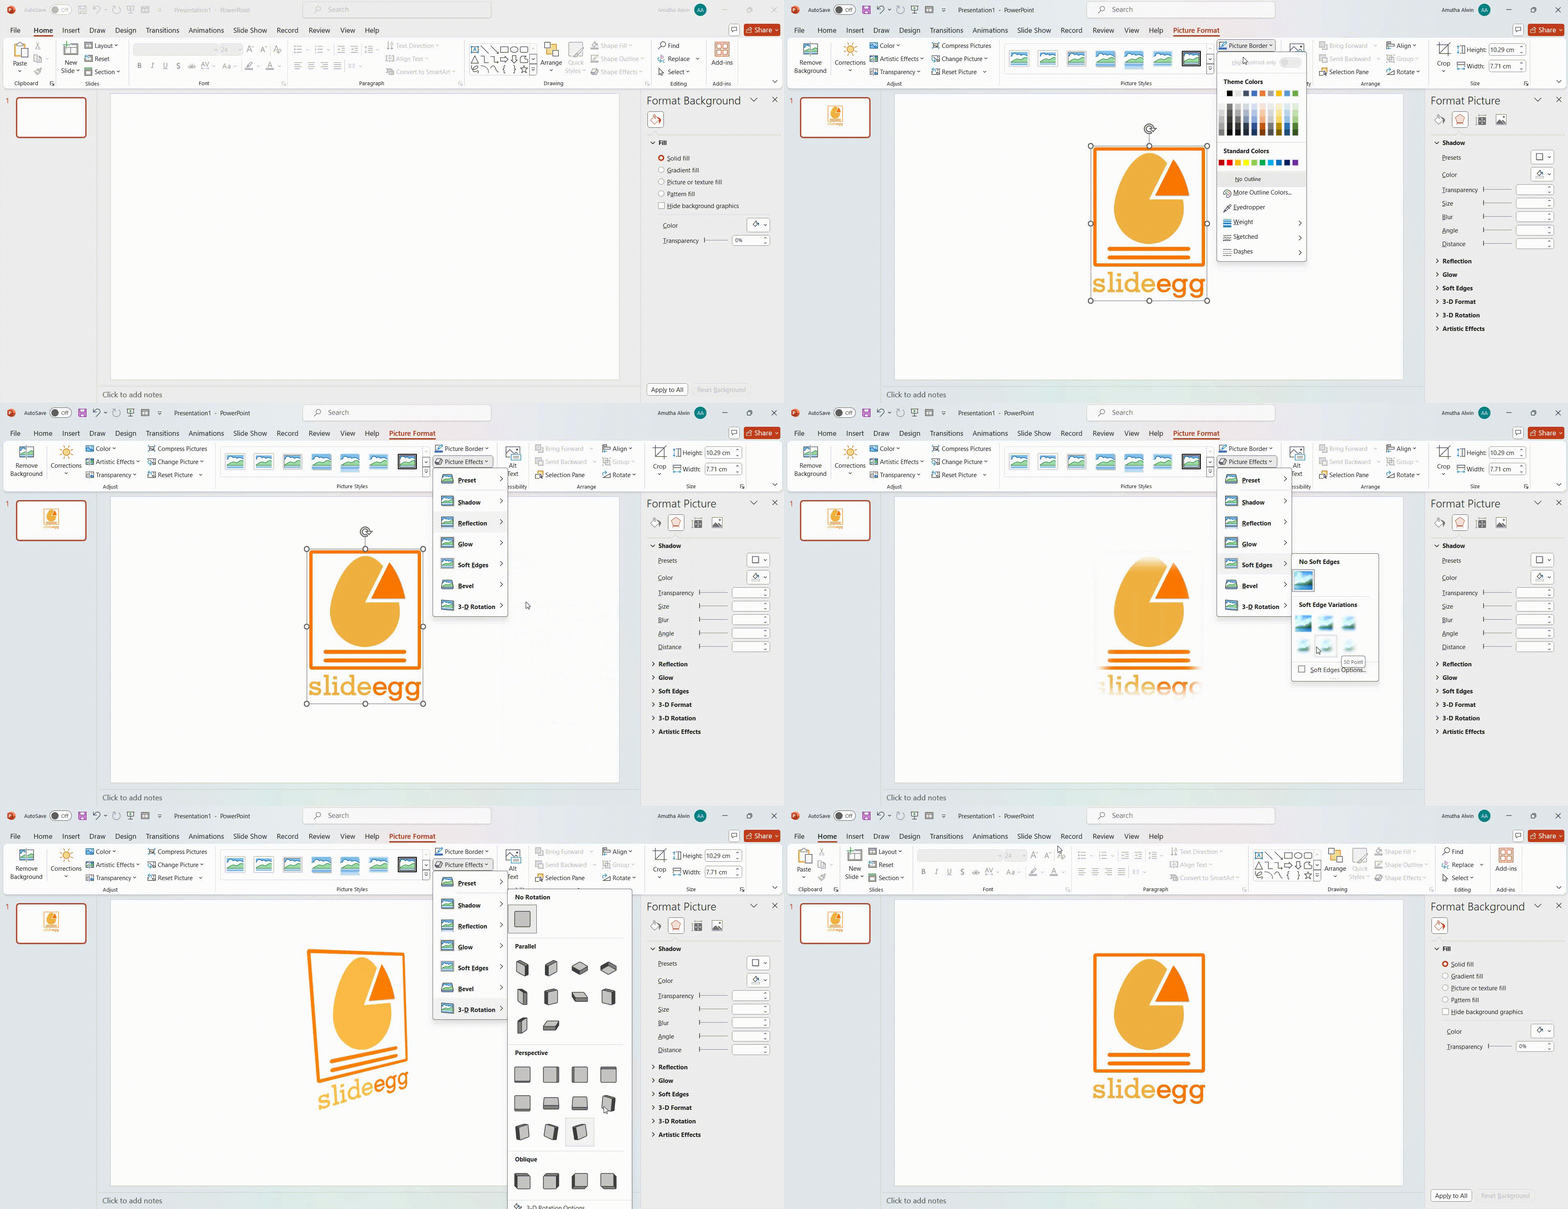
- Select Your Image: Click on the image you want to modify. This will activate the Picture Format tab on the ribbon.
- Access the Picture Effects: In the Picture Format tab, locate the “Picture Effects” group. You’ll find options like Shadow, Reflection, Glow, Soft Edges, Bevel, and 3-D Rotation.
- Experiment with Different Effects: Hover your mouse over each effect to see a preview of how it will look. Click on the effect to apply it.
- Fine-Tune Your Effects: Most effects have options to customize their appearance. Click on “Options” to adjust settings like color, transparency, size, and angle.
- Consider Other Image Enhancements: To further enhance your image, explore options like color correction, artistic effects, and compressions. Learn how to recolor an image in PowerPoint for a unique look from our blog post.

Common Image Effects and Their Uses
- Shadow: Adds depth and dimension to your image, making it appear to float above the slide.
- Reflection: Creates a realistic reflection of the image, often used for product images or to enhance the overall look.
- Glow: Adds a soft, luminous effect around the image, drawing attention to it.
- Soft Edges: Creates a blurred edge around the image, softening its appearance and blending it with the background.
- Bevel: Adds a 3D effect to the image edges, giving it a raised or embossed look.
- 3-D Rotation: Rotates the image in 3D space, creating an interesting perspective.
Additional Tips
- Use high-quality images for optimal results.
- Consider using professional PowerPoint templates to create a cohesive look.
- Ensure your presentation is compatible across various devices, it’s important to test it thoroughly.
Going Beyond PowerPoint: Image Effects in Google Slides
While PowerPoint is a popular choice, Google Slides offers its own set of image editing tools. If you prefer using Google Slides, you can explore similar image effects. Check out our blog on How to Apply Image Effects in Google Slides to learn more.
Conclusion
Mastering image effects can significantly elevate your PowerPoint presentations. By following these steps and experimenting with different features and techniques, you can craft visually captivating slides that will leave a memorable impact on your audience. Remember, practice makes perfect!
Want to learn more presentation hacks? Visit our tips & tricks page for additional insights and inspiration.


