Creating a banner in PowerPoint may not be the first thing that comes to mind, but PowerPoint can actually be a fantastic tool for designing professional-looking banners. When designing a banner for an event, for social media, or a website, this guide will walk you through the process step by step. So let’s get to work!
Why PowerPoint for Banner Design?
You might be wondering: why PowerPoint? This platform offers a wide range of customizable features that enable you to create a beautiful banner without any advanced stuff, including Photoshop. You can work with shapes, text, and images to make a banner that’s ready to use on social media or printed for special occasions.
Another good reason to use PowerPoint is that there are numerous professional templates available online and your design work will speed up that much more. And if you already know PowerPoint, the learning curve is almost nonexistent!
Step-by-Step Guide to Making a Banner in PowerPoint
Step 1: Banner Size Setting
You need to set the slide size for the banner you are going to design. Follow these steps carefully:
- Launch PowerPoint and open a blank slide.
- Open the Design tab.
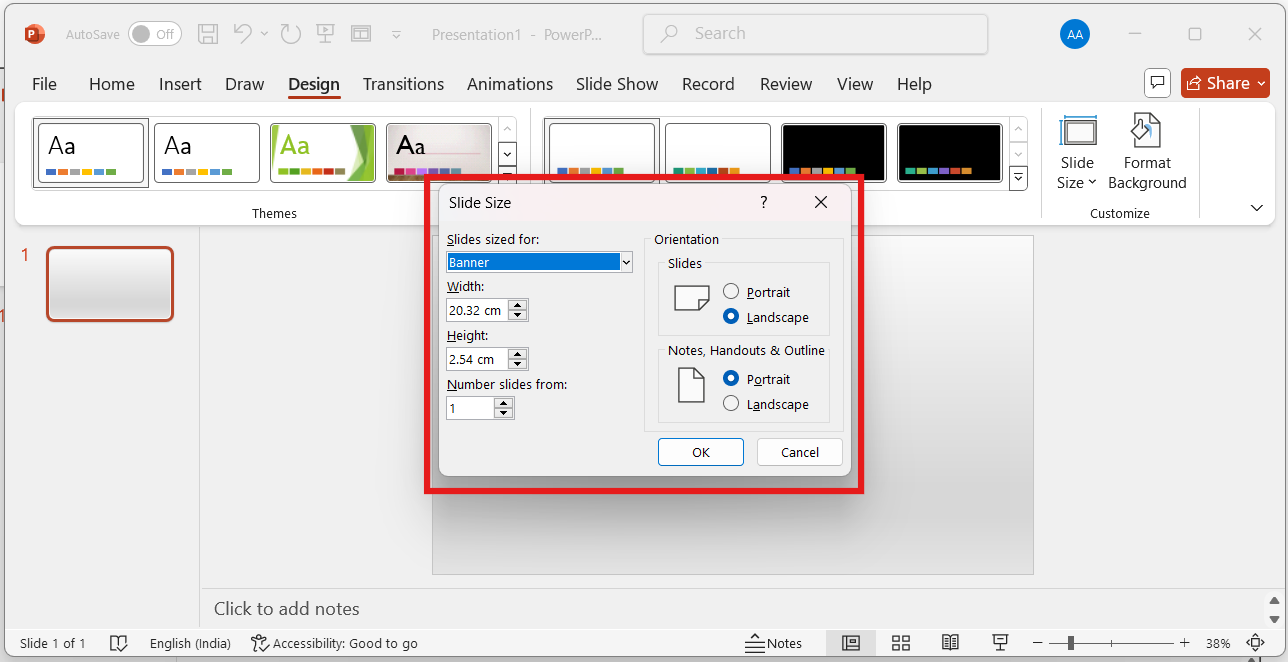
- Click the Slide Size option (usually on the far right), then click on Custom Slide Size.
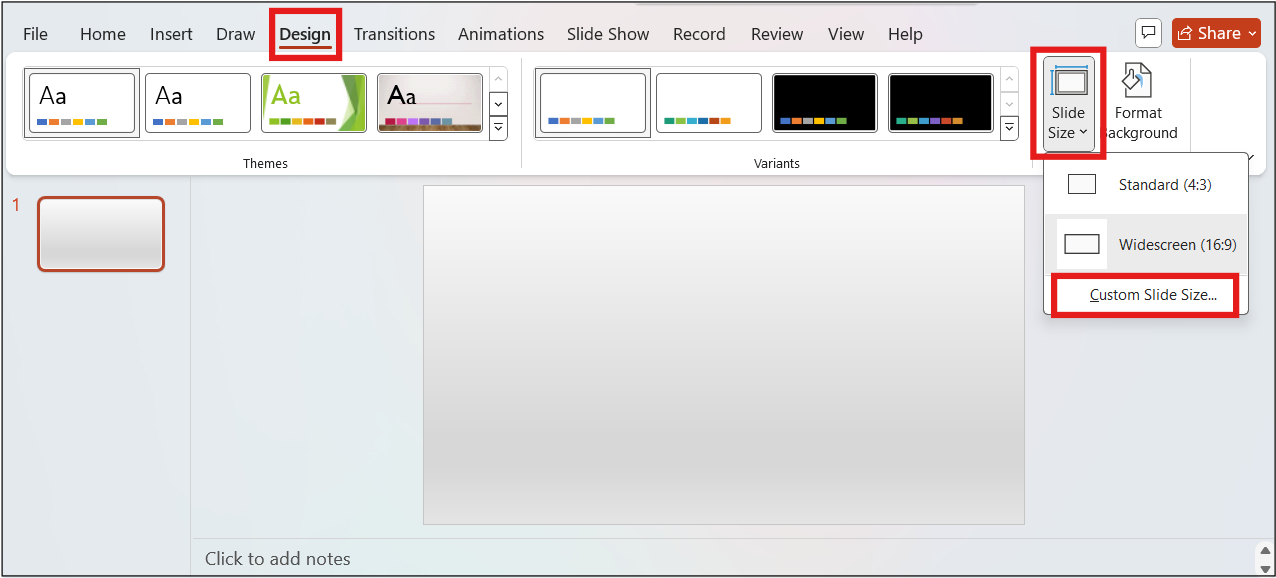
- You will specify the width and the height in the dialog box according to where you would like to post your banner. For example, social media banners are set differently than in a website header. If you don’t know what size, refer back to the platform you’re using for the recommended size.
Tip: banner size is usually measured in 1200×300 pixels if you have a website or as big as 1600×900 pixels for a platform such as Facebook.
2. Select a Background
The background of your banner may make or break the design, so you will want to choose wisely. PowerPoint offers quite a few choices:
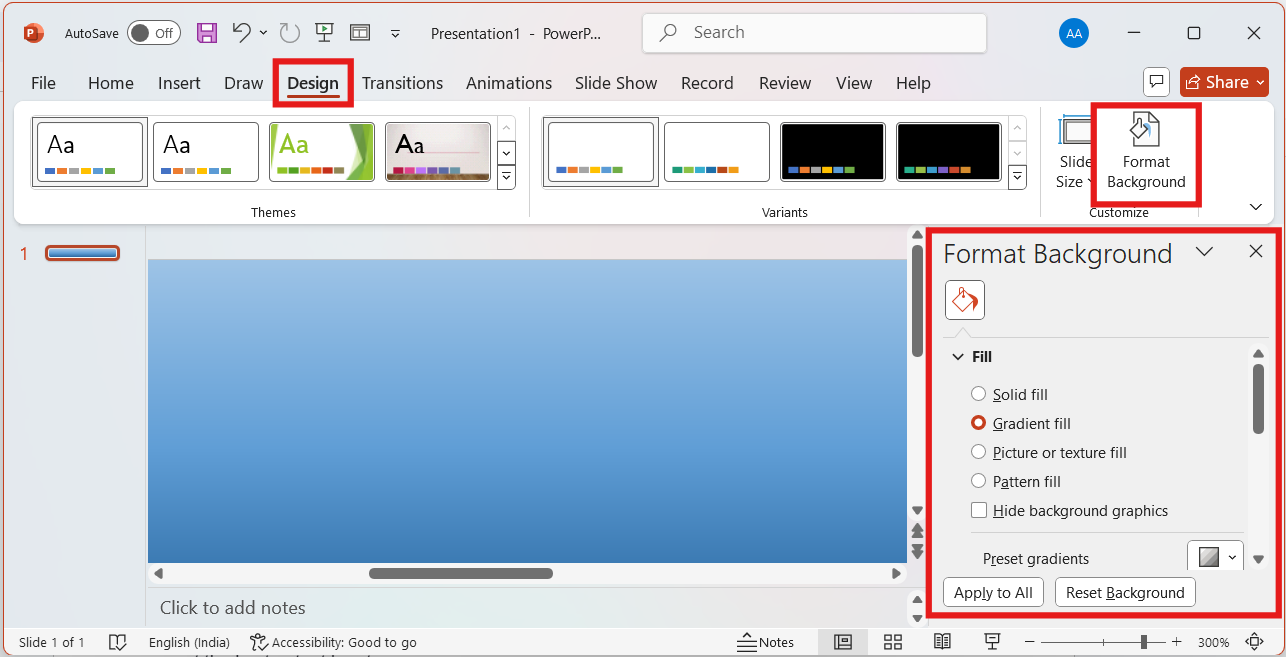
- Use Solid Colors: On the Design tab, click Format Background to fill the slide with a solid color.
- Gradient Background: A gradient background is a subtle color blend. Apply a gradient fill for a more vibrant and dynamic appearance.
- Images: You can even add an image as a background. Choose Insert > Images, then look through your device for a picture you’d like to add or pick one of the choices of Stock Images right within PowerPoint.
Do note that your background will not overwhelm your text. So it’s better kept simple so that you get the best output in return.
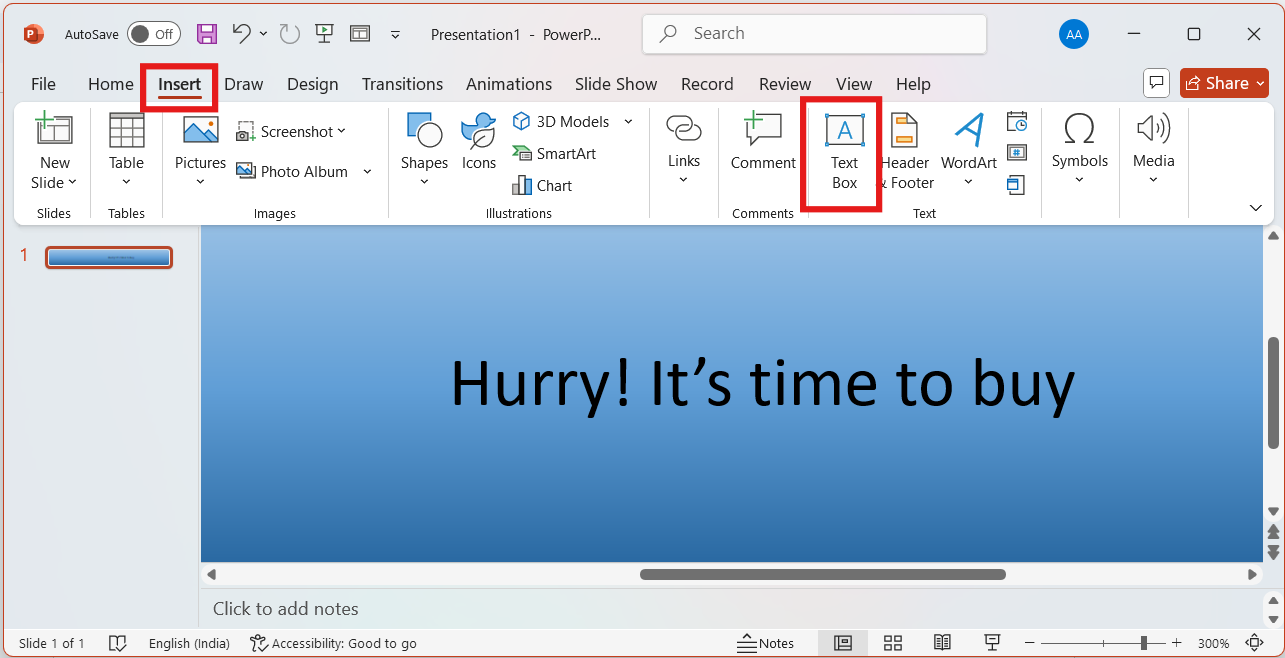
3. Add Text
Now, you need to type your text for your banner. To do this:
- Click the Insert tab, then click on the Text Box and insert a place where you will put your text box.
- Insert your message for your banner to get more attention from people. It can be headlines or even a short phrase for advertisement.
- Highlight your text with Fonts, Sizes, and Colors. Some of the useful fonts include Arial, Calibri, and Veranda.
Pro Tip: Center your text. Going down to the Format tab and using the Align tools, align everything so it looks balanced.
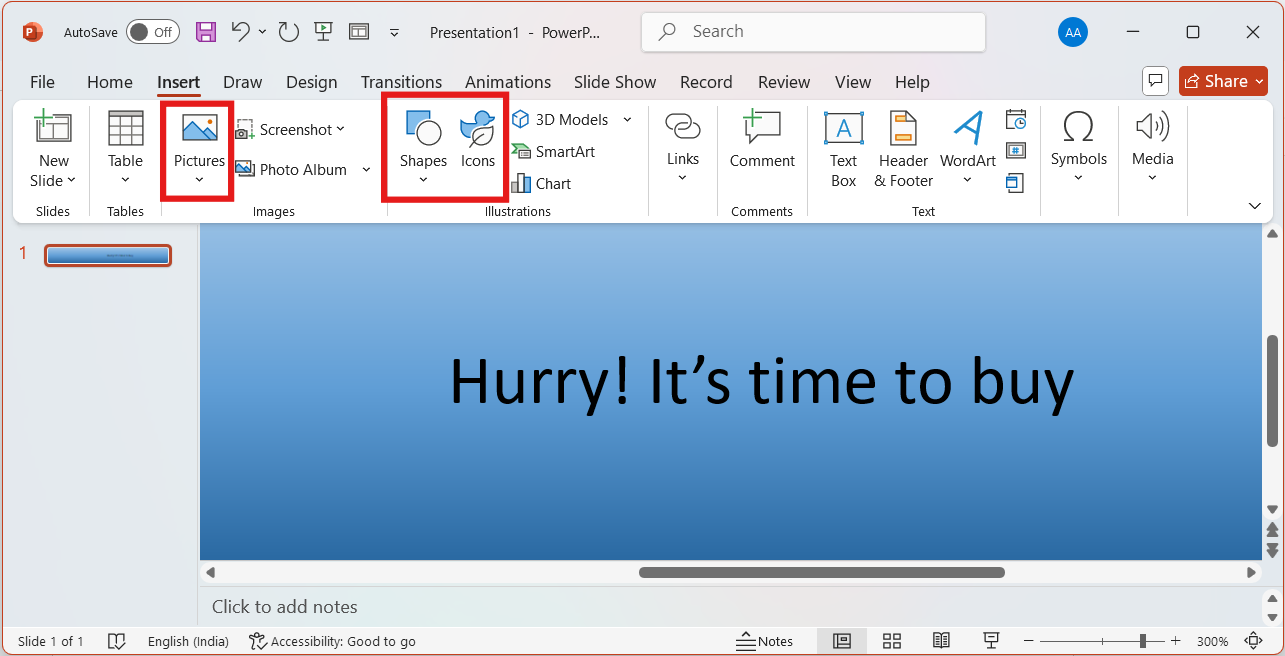
4. Insert Graphics and Icons
Banners become more interesting if there are good graphics and icons. PowerPoint gives you lots of varieties of graphics and icons to add to your banner:
- Shapes: From the Insert tab, click on Shapes and see hundreds of shapes to insert as you wish and give your design real visual appeal. You can also format them with colors and borders.
- Icons: There is a pre-existing icon library that accompanies PowerPoint, making the work highly convenient. Simply go to Insert > Icons, and you will find hundreds of free icons you could use for your design.
- Pictures: Use high-quality pictures that let the message be told. Click on a picture, then insert it using Insert > Pictures.
To get many more ideas, spend some time browsing professional presentation templates where you can also get a lot of pre-designed ones. That will save you some time and yet look professional.
5. Save Your Banner
When you are satisfied with how your banner turned out, save your banner. Here’s how:
- Open File > Save As.
- Under format, select either JPEG or PNG.
- Save the banner to a location on your device.
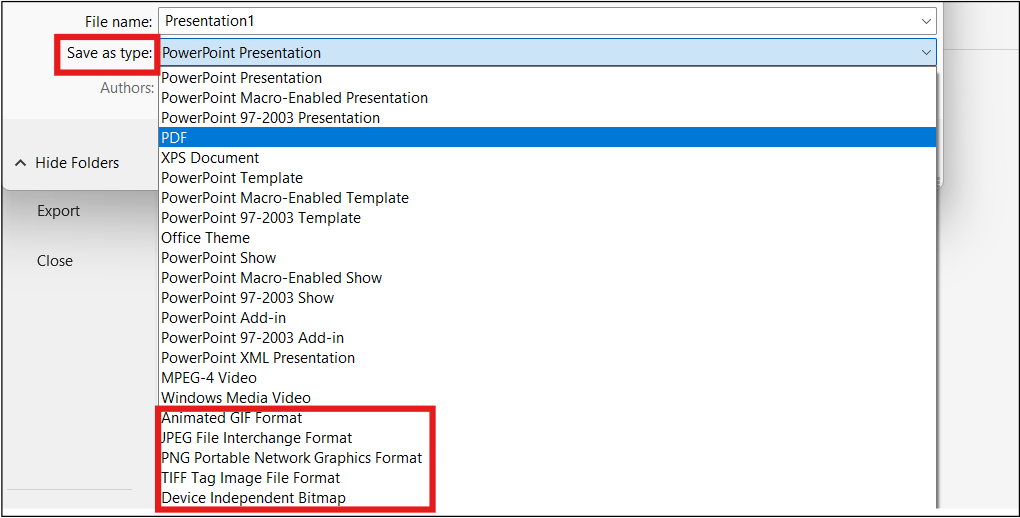
And now you’re set, with a prepared banner ready for use.
Bonus Tips to Create the Best Banner Ever
1. Less is More: A clean and readable banner is one where you don’t have too many of your elements in your design.
2. Good Quality Pictures: low-resolution pictures make your banner look low-grade quality. So, you can use high-quality pictures only.
3. Match the Fonts: You should have more than one font to pair them all together for a harmonious complement, like pairing a bold, decorative font together with a clean, simple type.
4. Balance Colors: Try to keep your palette to a couple of colors that mean something to your brand or theme. Too many colors just get in the way of the message.
Want to go further with PowerPoint? Learn how to make a poster in PowerPoint to have more ideas for your design, or, if you prefer an alternative tool, learn how to create banners using Google Slides.
Conclusion
Now that you know how to make a banner in PowerPoint, you can work on your next project and create some astounding designs. Be it that you are composing a social post, designing a website, or even conducting an event; PowerPoint has got everything you need to create banners very easily. And don’t forget that using professional templates can save so much time and really polish the designs. Go through our presentation tips and tricks for more design hacks and get your skills taken to the next level!


