Ever found yourself frustrated because your text and images just won’t align the way you want them to in Google Slides? Many users struggle with this because, unlike some other software, Google Slides doesn’t offer a straightforward text-wrapping feature. But don’t worry. There are several clever techniques you can use to achieve the same effect. In this guide, we’ll explore some simple and effective workarounds to help you achieve that polished look you’re aiming for.
Why Wrap Text?
Wrapping text around images or other elements can:
- Enhance Visual Appeal: It makes your slides look more polished and professional.
- Improve Readability: Properly aligned text is easier for your audience to follow.
- Efficient Use of Space: Maximizes the use of space on your slides, making them look less cluttered.
Solution 1: Using Text Boxes
One of the simplest methods to wrap text around an image is by using multiple text boxes.
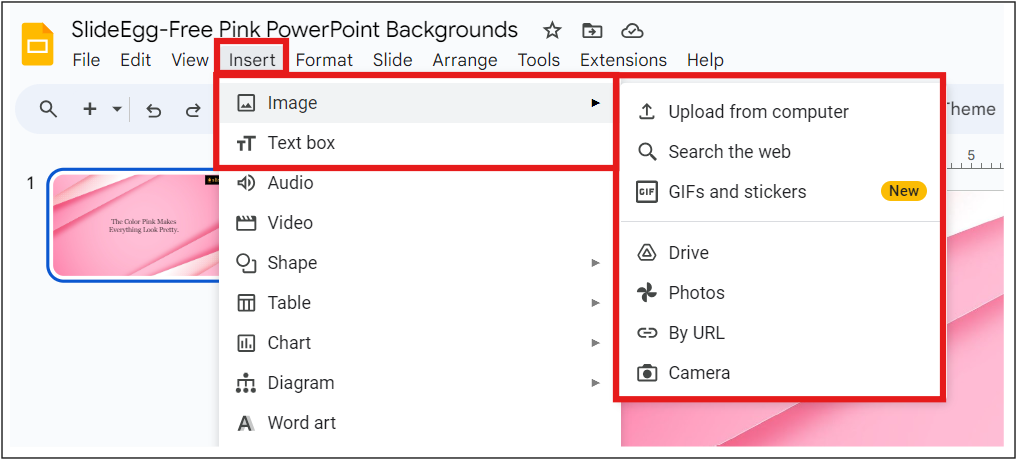
- Insert an Image: Go to “Insert” > “Image” and add the image you want.
- Position the Image: Resize and move the image to where you want the text to wrap around it.
- Add Text Boxes: Click “Insert” > “Text box” and create multiple text boxes around the image to fit your text.
- Align Text Boxes: Adjust the text boxes to make the text flow around the image naturally.
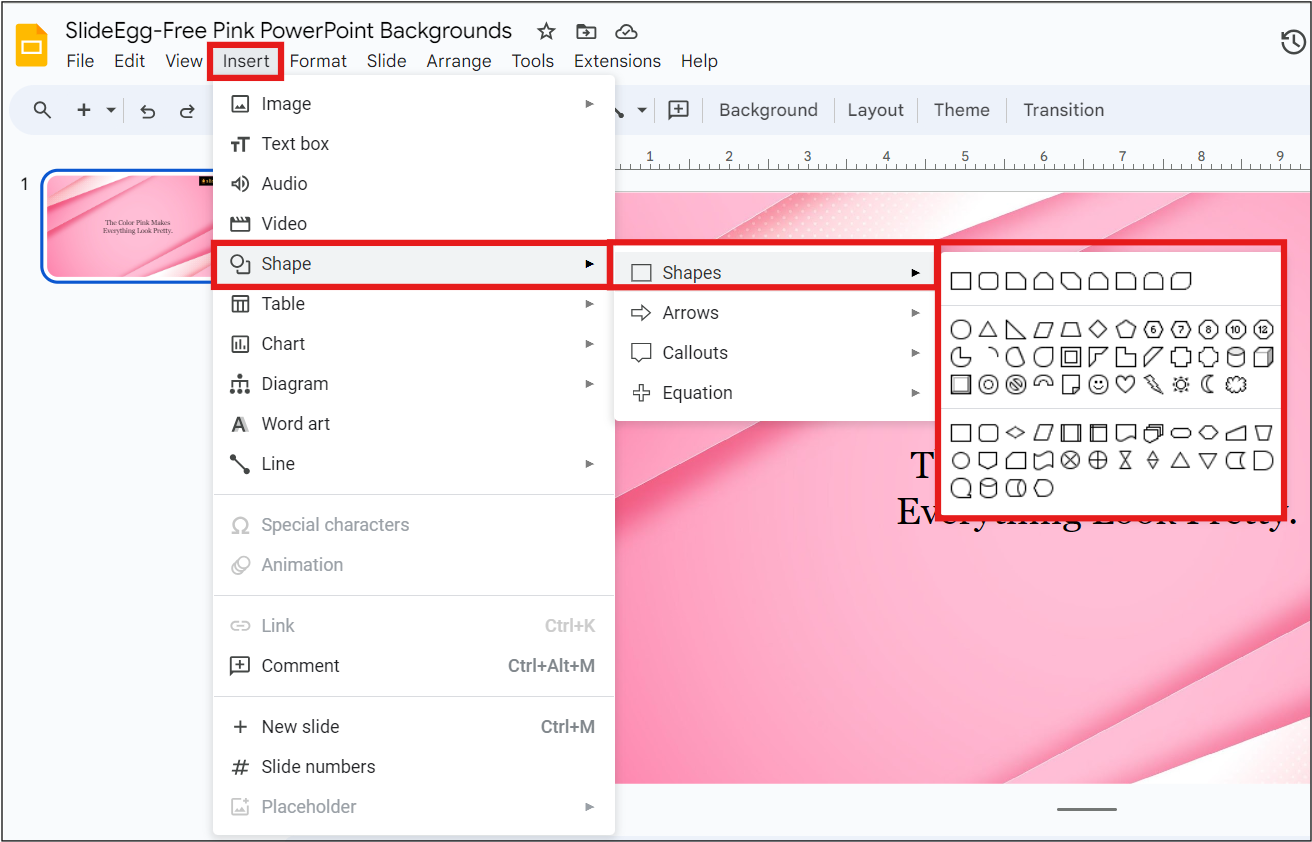
Solution 2: Using Shapes
It can be tedious to manually adjust each text box and shape. You might think, “Is there a quicker way to do this?”
Shapes can be a great alternative to create a text-wrapping effect without spending too much time.
- Insert a Shape: Click on “Insert” > “Shape” and choose the shape that best fits your layout.
- Add Text to Shape: Click inside the shape and type your text.
- Position and Resize: Move and resize the shape around the image to make the text fit snugly.
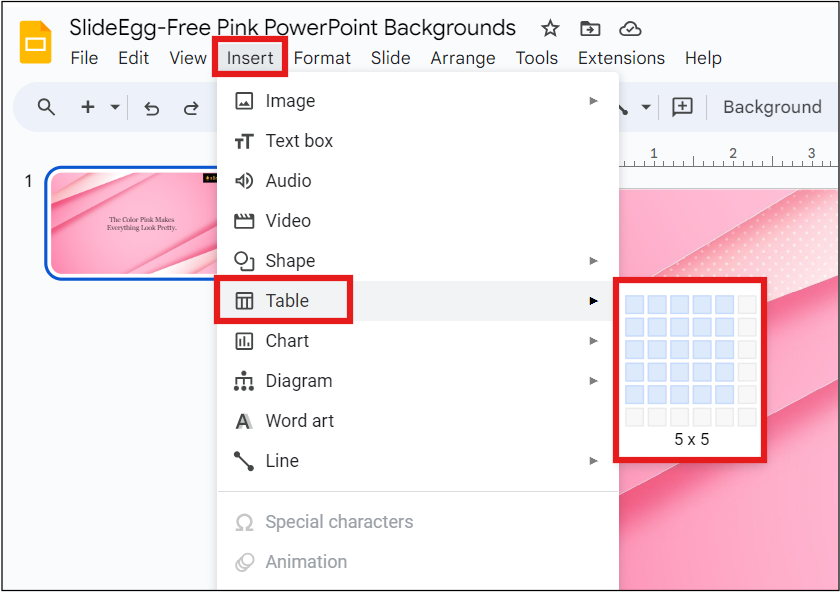
Solution 3: Using Tables
Even if you manage to wrap text, making it look professional is another challenge. You might ask, “What are the best ways to ensure my slides look polished?”
Tables can help you neatly organize text and images, giving a clean, professional look.
- Insert a Table: Click on “Insert” > “Table” and select the number of rows and columns.
- Distribute Content: Place your text and images in the table cells.
- Adjust Table Dimensions: Resize the cells to make the text wrap around the images effectively.
Solution 4: Layering
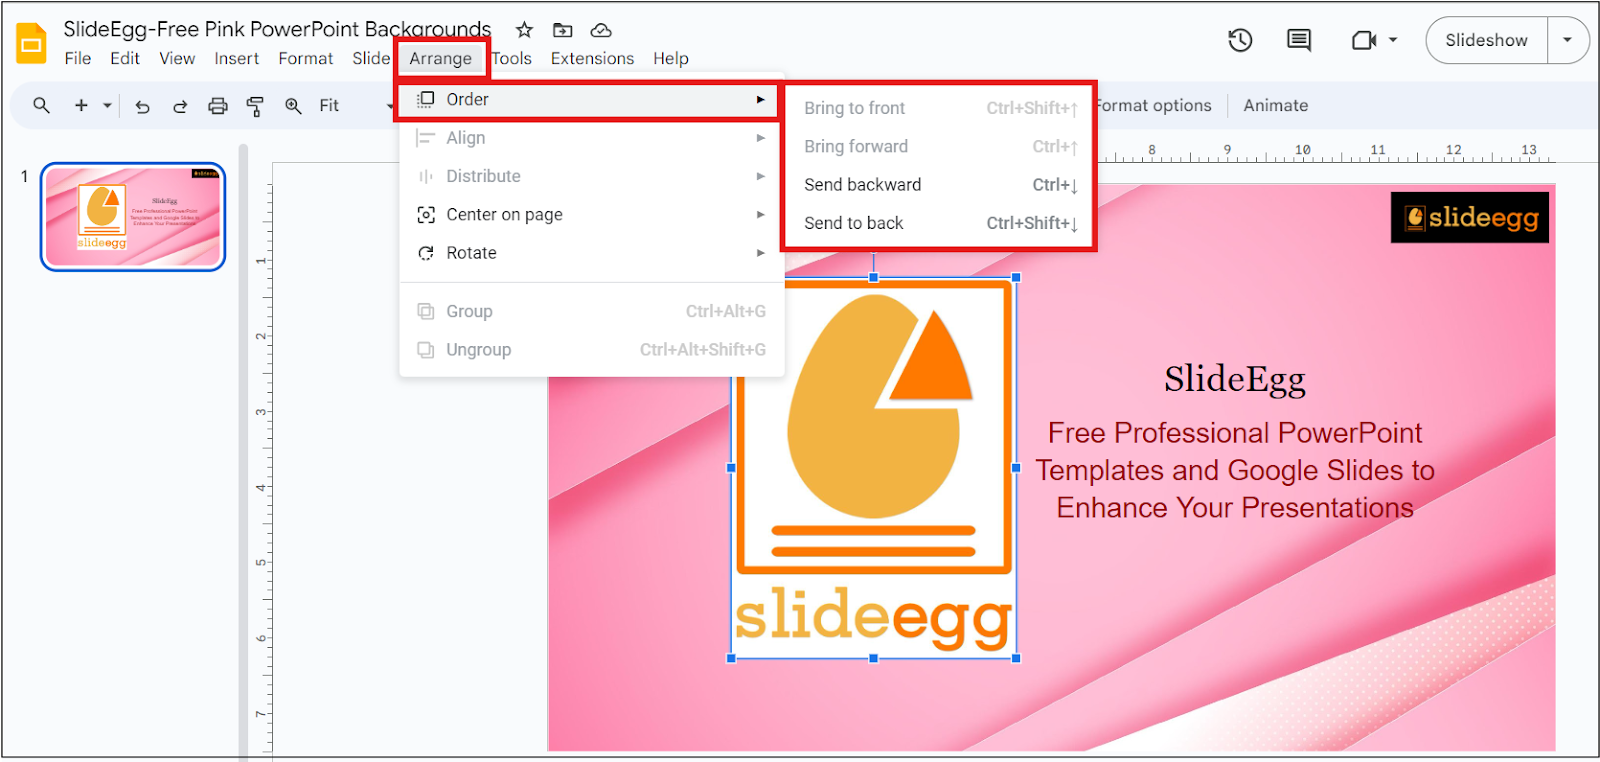
Layering elements can also create a visually appealing text-wrapping effect.
- Add Your Elements: Insert both text and image onto the slide.
- Arrange Layers: Click on the image, then select “Arrange” > “Order” to layer it in front of or behind the text as needed.
- Adjust Position: Move the text and image around to achieve the desired wrapping effect.
Tips for Better Presentation Design
- Consistent Fonts: Use easy-to-read fonts that align with your brand.
- Visual Hierarchy: Utilize headings, subheadings, and bullet points to structure your content.
- White Space: Avoid overcrowding your slides. Use white space to highlight key points.
Time-Saving Tip: Use Premade Google Slides Templates
If you’re short on time or design skills, consider using premade Google Slides themes available at SlideEgg. We offer a variety of free professionally designed themes. These can save you a lot of time and ensure your presentation looks cohesive and polished. Simply download a theme that suits your content, and customize it to fit your needs.
Further Learning
Want more tips on creating stunning presentations? Check out our Tips & Tricks page for a wealth of information. If you’re also working with PowerPoint, you’ll find our guide on How to Wrap Text in PowerPoint extremely helpful.
Conclusion
Wrapping text in Google Slides doesn’t have to be a headache. With these simple techniques and a bit of creativity, you can achieve a professional look that enhances your presentations. Try these methods, explore free themes, and make your next presentation stand out!