| ✅ Quick Tips: How to Transfer Google Slides Ownership ✔️ Open your Google Slides file. ✔️ Click Share in the top-right corner. ✔️ Add the new owner’s email (if not shared already). ✔️ Click the dropdown beside their name. ✔️ Select Make owner. ✔️ Confirm by clicking Done. |
Introduction: A Simple Task That Saves Big Time
“When you share knowledge, you grow it. When you hand it over, you empower someone else.”
Transferring ownership of a Google Slides file might sound tricky, but it’s super easy. You might want to do this when you’re leaving a job, changing teams, or simply handing off a project. If you don’t pass the ownership, the new person won’t have full control over the file.
And here’s the catch – only the current owner can make someone else the new owner.
Let’s walk through this together, step by step.
🌟What Does “Ownership” in Google Slides Mean?
When you’re the owner of a Google Slides presentation:
- You can delete it.
- You can stop sharing it with others.
- You can give editing rights or remove them.
- You can transfer ownership to someone else.
Basically, you’re the boss of that file.
📌Why You Might Want to Transfer Ownership?
Here are some common reasons:
- Leaving your school or company.
- Shifting to a new project or department.
- Giving someone else full control of the slides.
- Wanting to clean up your Google Drive.
📝Step-by-Step: How to Transfer Ownership of Google Slides
1. Share the presentation with the intended new owner:
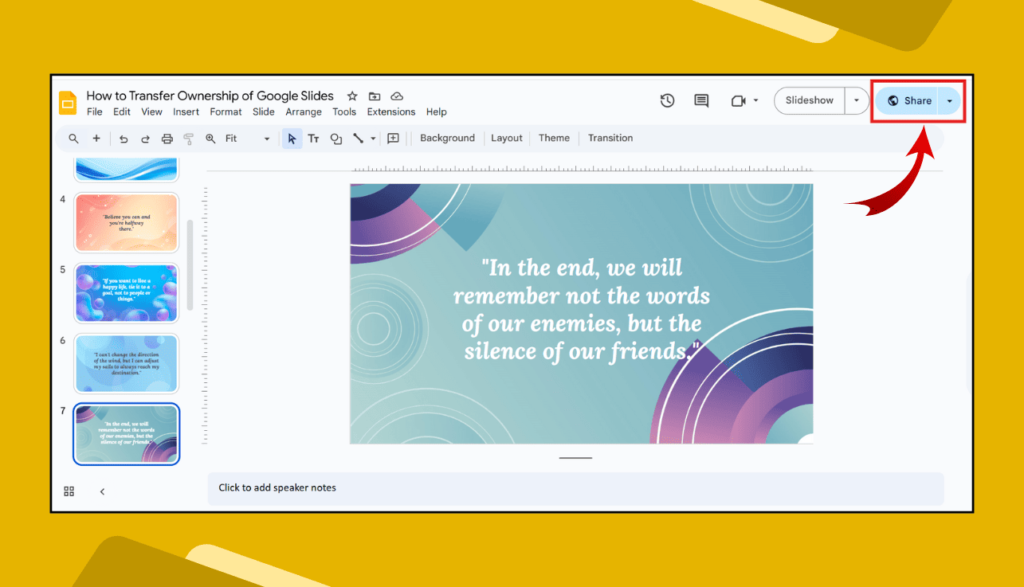
- Open your Google Slides presentation.
- In the top right corner, click the Share button.
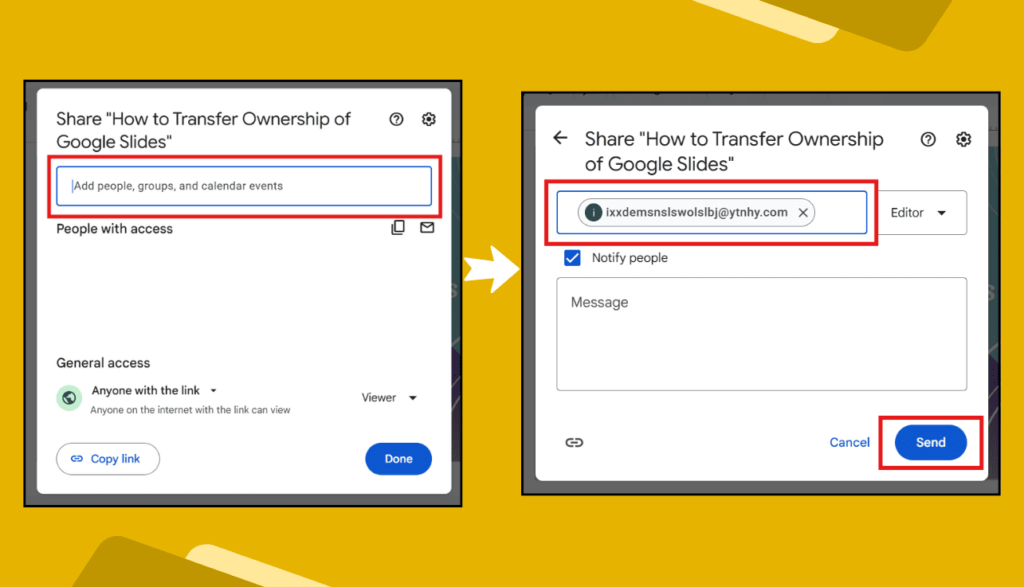
- In the “Add people and groups” field, enter the email address of the person you want to make the new owner.
- Grant them Editor access using the dropdown menu next to their name.
- Click Send.
2. Transfer ownership:
- Once the person has been added as an editor, click the Share button again.
- Find the name of the person you want to make the owner of the list of collaborators.
- Click the dropdown arrow next to their current permission level (which should be “Editor”).
- Select Transfer ownership.
- A confirmation window will appear. Click Yes to confirm the transfer.

📌 Important Note:
The person you designated will receive an email notification about the ownership transfer request. Once they accept, they will become the new owner of the Google Slides presentation. You will be downgraded to an editor, and the new owner will have the ability to remove your access if they choose.
📌 Keep in mind:
- You can only transfer ownership to someone you have already shared the file with.
- If you are using a Google Workspace account (through work or school), you can typically only transfer ownership to someone within the same organization.
- The new owner needs to accept the ownership transfer for it to be complete (unless both accounts are within the same Google Workspace organization).
🔄 Can You Take Back Ownership?
Nope. Once you transfer ownership, only the new owner can give it back. So, be sure before you click that button!
🧠 Extra Tips for Smooth Transfer
📁 Organize first: Move the file to the correct folder before transferring.
🗂️ Check permissions: The new owner will have full control.
📬 Use the correct email: Double-check the Gmail ID.
🧾 Let the new owner know: So, they don’t miss the ownership request email.
❓Frequently Asked Questions (FAQs)
Q1: Can I transfer ownership of a Google Slide to a non-Gmail user?
A: No, the new owner must have a Google account.
Q2: I don’t see the “Make owner” option. What’s wrong?
A: You can’t transfer ownership to someone outside your company/school if you’re using a Google Workspace account.
Q3: Will I still have access after transferring ownership?
A: Yes, unless the new owner removes you.
Q4: Can I transfer ownership of multiple slides at once?
A: You’ll have to do it one file at a time. There’s no bulk option.
Q5: What happens if I delete the file after transferring ownership?
A: You won’t be able to delete it anymore—it’s no longer yours.
🧾 Final Thoughts
Transferring ownership of Google Slides is one of those things that’s simple—but super useful. Whether you’re handing over a school project or shifting a work presentation to your teammate, these easy steps make sure everything goes smoothly.
Just follow the steps, and you’re good to go.