| 🔥 Quick Tips to Put an Image Behind Text in Google Slides 1️⃣ Insert an Image – Click “Insert” → “Image” → Choose a file. 2️⃣ Resize & Position – Adjust the image to fit your slide. 3️⃣ Send to Back – Right-click the image → Click “Order” → Choose “Send to back”. 4️⃣ Adjust Transparency (Optional) – Click on the image → “Format Options” → Adjust transparency for a cool effect. 5️⃣ Add & Style Your Text – Insert text box, change color if needed for better visibility. That’s it! Now, let’s dive into the details. |
Introduction
An image can make or break a presentation. When used right, it grabs attention, sets the mood, and makes your slides look polished. But if your text is hard to read over the image, it can turn into a mess.
The solution? Placing the image behind the text the right way. It’s a simple trick, but it makes a huge difference. In this guide, I will show you exactly how to do it—easily and quickly.
Let’s get started! 👇
📌 Step 1: Add & Style Your Text
Now, let’s add your text.
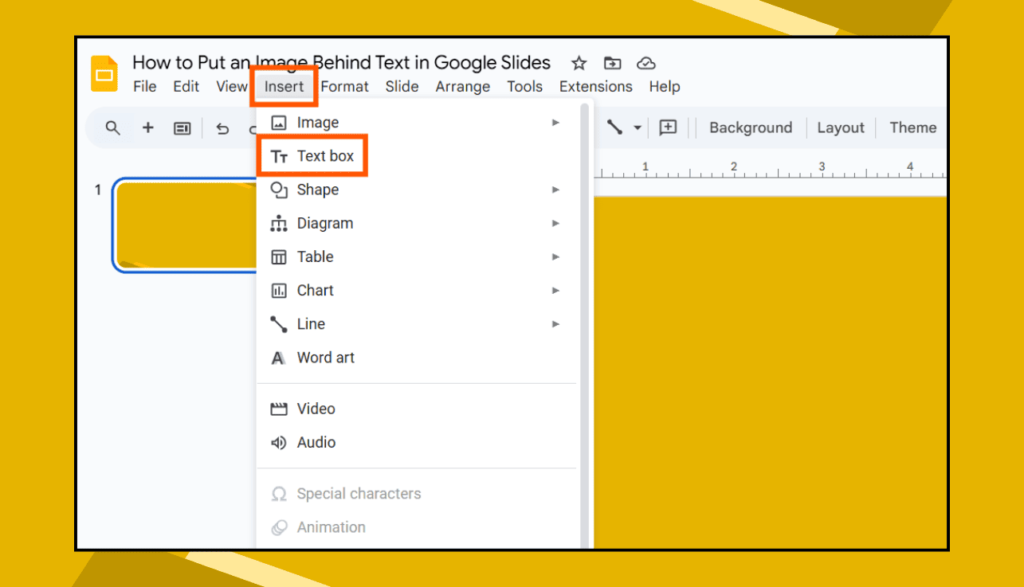
- Click “Insert” → “Text box”.
- Type your text inside the box.
- Change the font, color, and size so it stands out.
- Move the text to a good position on the slide.
💡 If the text is hard to see:
- Change the text color (White or Black usually works best).
- Add a text shadow for better visibility.
- Use a semi-transparent shape behind the text (Insert → Shape → Rectangle → Adjust Transparency).
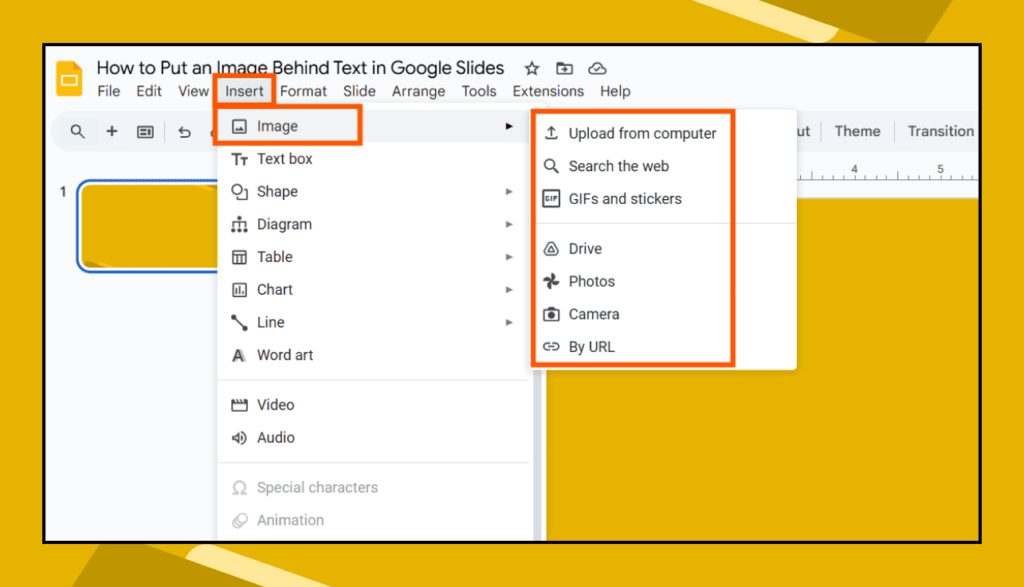
📌 Step 1: Insert an Image into Google Slides
Let’s get your image into the slide.
- Open your Google Slides presentation.
- Click on “Insert” in the top menu.
- Hover over “Image” → Choose where to upload from:
- Upload from the computer (if the image is saved on your device)
- Search the web (if you want to find an image online)
- Drive / Photos (if your image is saved in Google Drive or Google Photos)
- Select the image, and it will appear on your slide.
👉 Tip: Try to use a high-quality image that matches your slide’s theme!
📌 Step 2: Resize & Position the Image
Now that your image is on the slide.

You might need to resize or move it to fit properly.
🔹 Click on the image, then drag the corners to make it bigger or smaller.
🔹 Move it around to place it where you want.
💡 Pro Tip: If you want the image to cover the whole slide, drag it to fill the entire screen!
📌 Step 3: Send the Image to the Back
This is the magic step! You need to send the image behind your text.
- Right-click on the image.
- Hover over “Order” in the menu.
- Click “Send to back”.
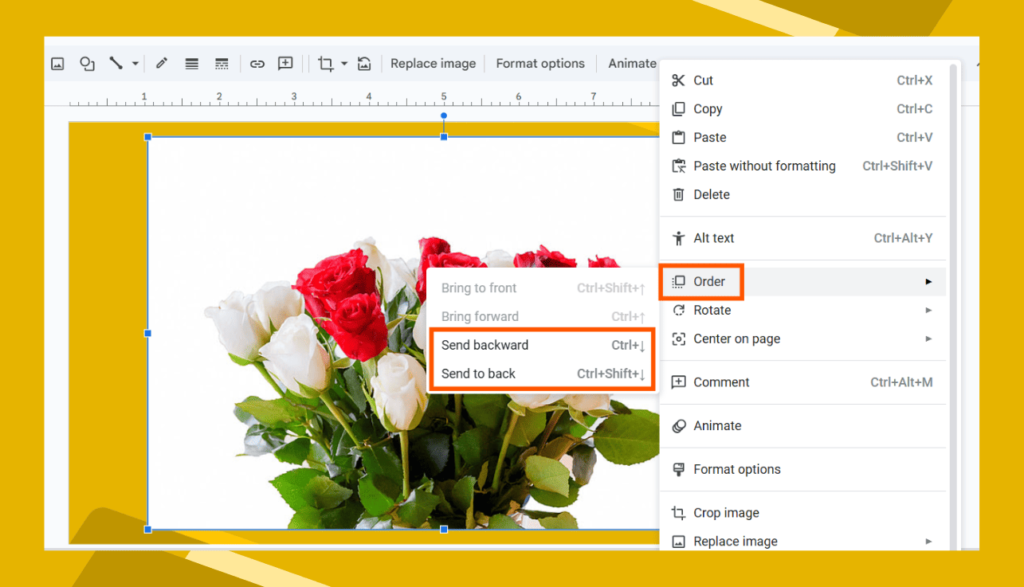
🎉 Boom! Your image is now behind everything on the slide.
📌 Step 4: Adjust Image Transparency (Optional)
If your text is hard to read, you can make the image slightly transparent.
- Click on the image.
- At the top, click “Format Options”.
- Expand the “Adjustments” tab.
- Move the Transparency slider to make the image lighter.
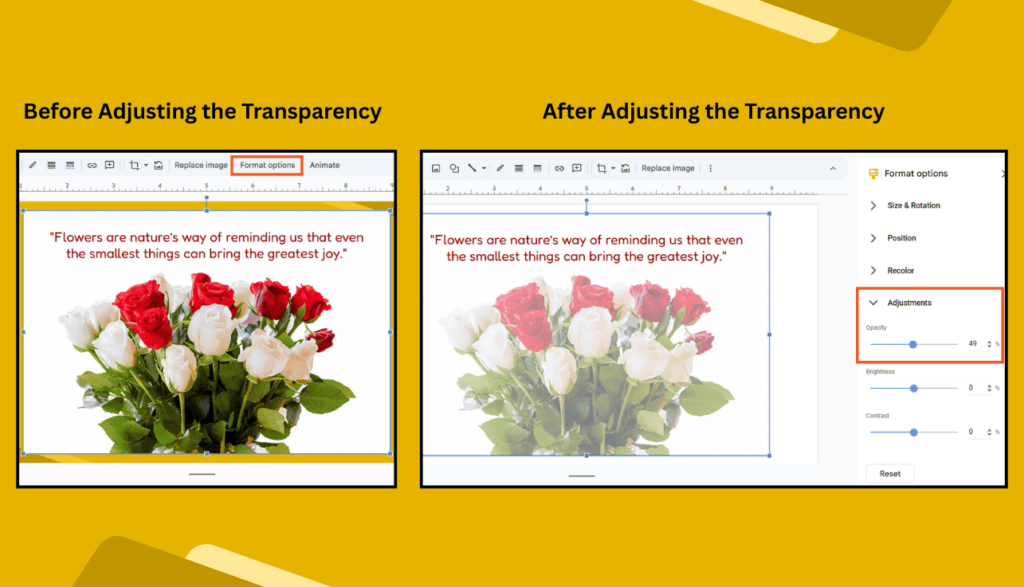
✅ This makes your text pop while keeping the image visible!
🎨 Bonus Tip: Use Slide Background for a Cleaner Look
If you want the image to be permanently behind everything (like a real background), follow this:
- Click “Slide” → “Change Background”.
- Click “Choose Image” → Upload your image.
- Click “Done”.
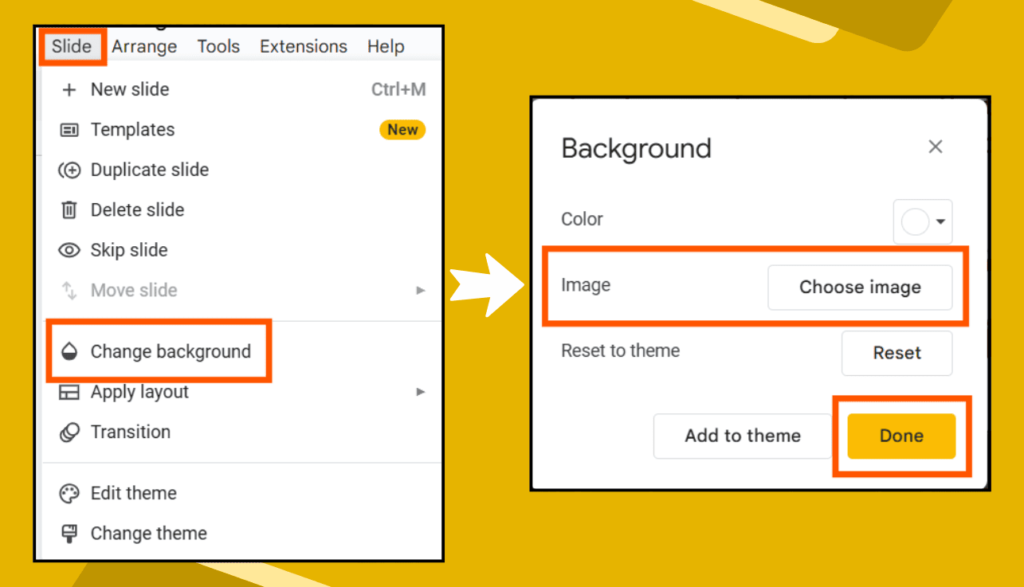
✅ This locks the image in place, so it won’t accidentally move!
🤔 FAQs (People Also Ask)
1. Why can’t I move my text in Google Slides?
Make sure you’ve added a text box (Insert → Text box) instead of typing directly on the slide. Also, check if the text is grouped with an object—if so, ungroup it.
2. How do I make my text stand out on a background image?
You can:
✔ Change text color to white or black
✔ Add a text shadow
✔ Use a semi-transparent shape behind the text
3. Can I lock the background image in Google Slides?
Yes! Set the image as slide background (Slide → Change Background → Choose Image) so it won’t move.
4. How do I remove an image from the background?
If the image is set as the background, go to Slide → Change Background → Reset. If it’s just an image, click on it and press Delete.
5. Can I put a GIF behind text in Google Slides?
Yes! Just insert a GIF the same way as an image and send it to the back. However, setting a GIF as a slide background won’t work—so you need to manually adjust it.
🚀 Final Thoughts
That’s it! Now you know how to put an image behind text in Google Slides like a pro. Whether you’re making a school project, a work presentation, or something creative, this trick makes your slides look way more professional and visually appealing.
Try it out and make your slides stand out!