Visual content is a powerful tool to engage your audience and convey your message effectively.
Google Slides offers a range of features to enhance your presentations, and one such feature is image transparency.
In this step-by-step guide, we’ll show you how to create transparent images using external tools and seamlessly incorporate them into your Google Slides presentations.
To Make An Image Transparent By Using The Format Options Menu In Google Slides:
1. Start a new Google Slides presentation or open an existing one.
2. On a slide in your presentation, choose an image that is already there.
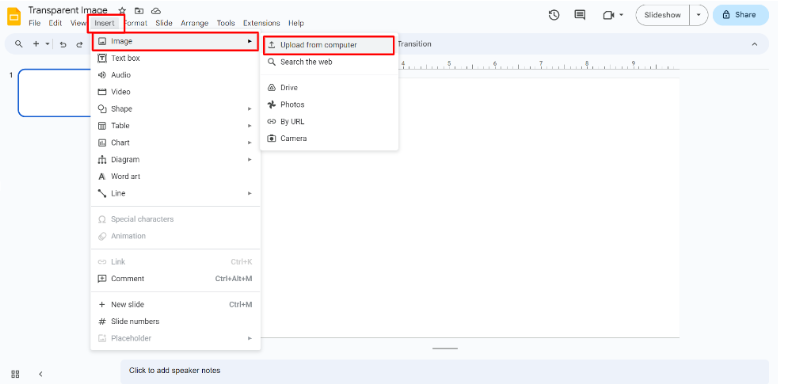
3. Alternatively, you can upload a picture by choosing one of the upload options under Insert > picture.

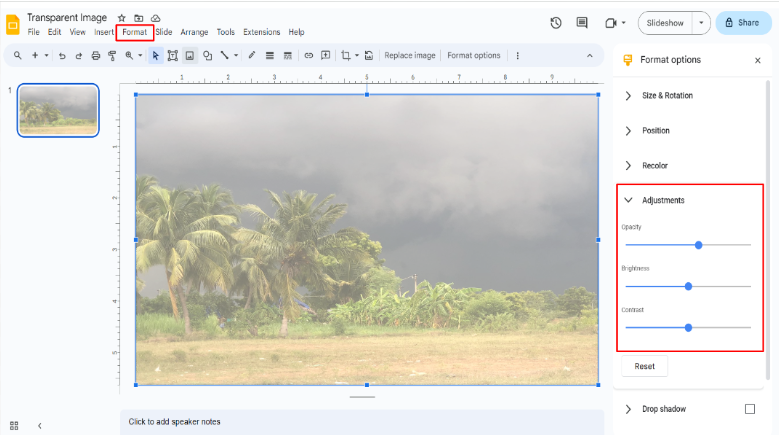
4. Press the Format choices button in the toolbar with the image selected. You may also right-click the image and choose Format options.
5. Open the Adjustments section of the Format Options menu that will appear on the right.

6. You can use the slider to change the transparency level. Moving it to the right will make it more transparent while moving it to the left will make it less transparent.
This method allows you to easily adjust the transparency level of an image, but you’ll need to play with the slider to find the right level for your image.
To Make A Shape Transparent In Google Slides:
1. You may make a shape translucent by opening your Google Slides template and choosing the desired format.
2. On the taskbar, look for the Fill Color drop-down menu.
3. Choose Transparent under the Fill Color options.
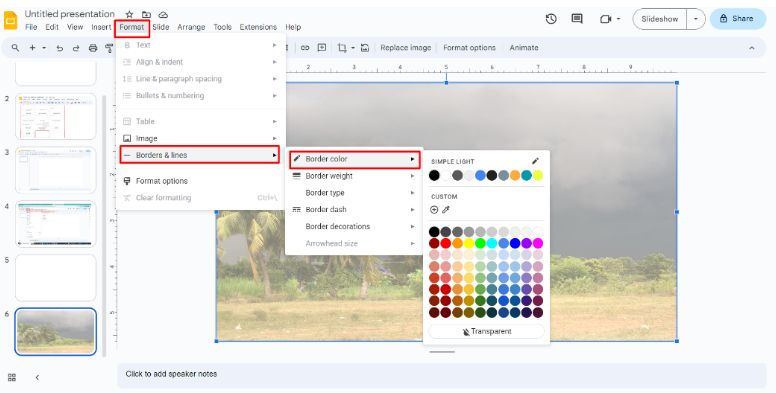
4. The shape will now be entirely transparent, but the border will still be visible. Choose your desired color from the Border Color drop-down option on the taskbar to adjust the border’s size and color.
5. Choose a size from the Border Weight drop-down menu to alter the border’s size.

6. You can also change the style of the border by pressing the Border Dash drop-down menu and choosing the style you want to use.
Conclusion
Adding transparent images to your Google Slides can significantly enhance the visual appeal and engage your audience more effectively. By following these step-by-step instructions, you can create stunning visuals and deliver a compelling message through your presentation. Keep exploring Google Slides’ features to make your presentations even more captivating and impactful!


