| 💡 Quick Tips for Bubble Letters in Google Slides ✅ Use WordArt – The easiest way to create bubble-style text. ✅ Pick a Bold Font – Thick, rounded fonts work best. ✅ Outline Your Letters – Add a border for a bubble effect. ✅ Use Bright Colors – Make your text pop. ✅ Group Your Letters – Keep them together for easy movement. |
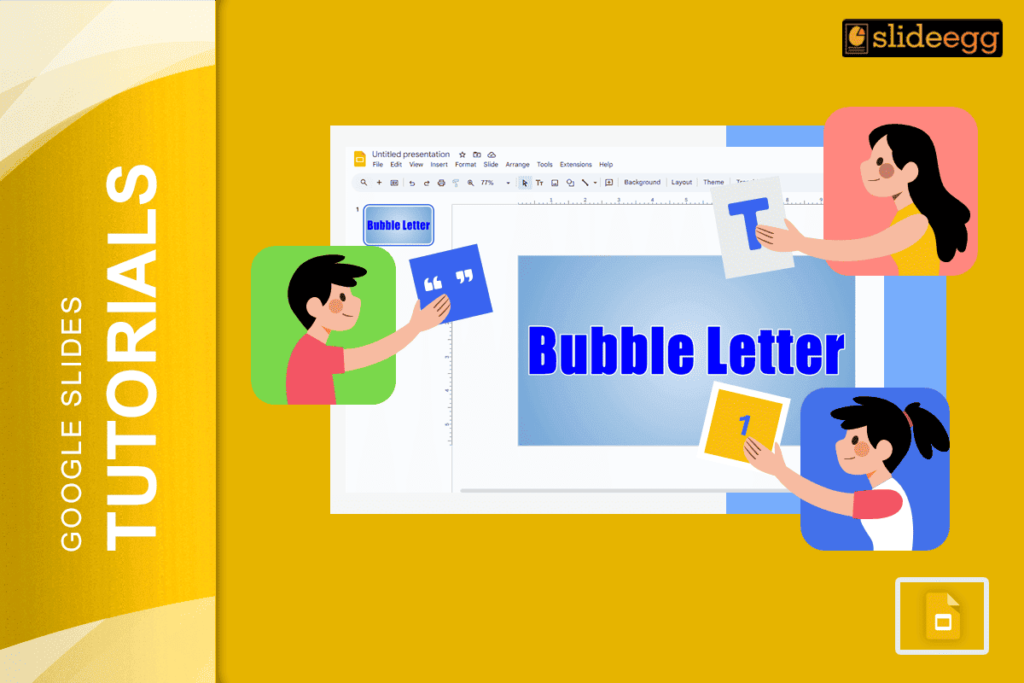
🎨 Turn Simple Text into Fun Bubble Letters in Google Slides
Presentations don’t have to be boring. If you want to make your text stand out, bubble letters are the way to go! They add a fun, creative touch to any slide—whether you’re designing a classroom poster, a title slide, or a playful graphic.
Google Slides has everything you need to create bubble letters with just a few clicks. Let’s walk through the process step by step!
✏️ Step 1: Open Google Slides
Start by opening Google Slides and choosing a blank slide or an existing presentation where you want to add bubble letters.
✏️ Step 2: Insert WordArt
- Click on “Insert” in the top menu.
- Select “WordArt” from the dropdown.
- A text box will appear—type your word (e.g., “BUBBLE”) and press Enter.
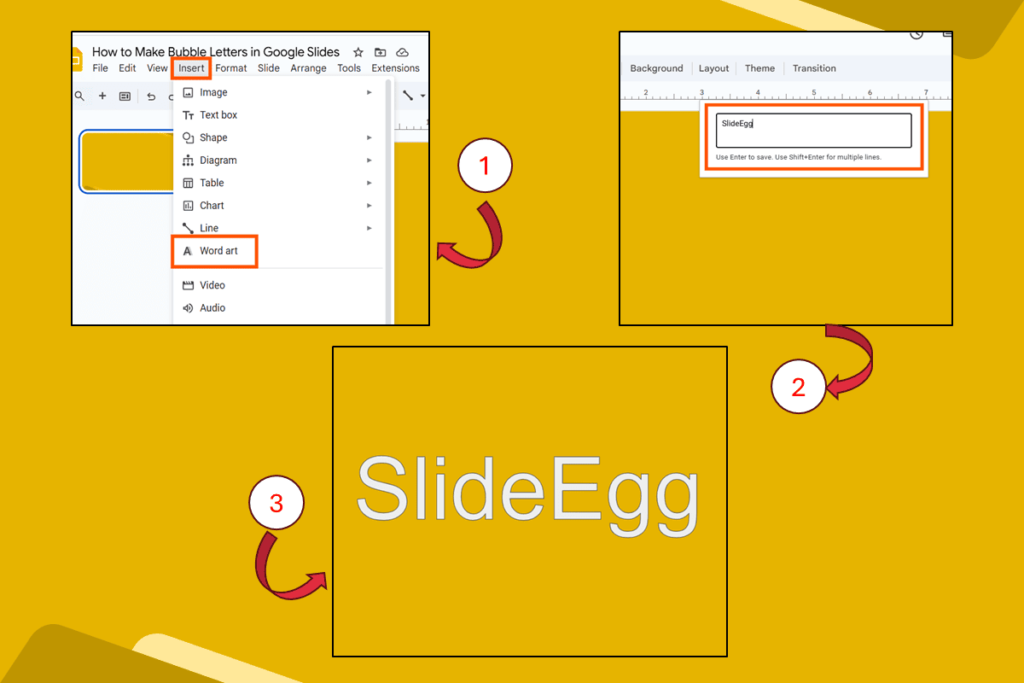
This creates big, outlined letters that are easy to edit.
✏️ Step 3: Choose a Bubble-Style Font
- Click on your WordArt text.
- Go to the font dropdown in the toolbar.
- Select a rounded, thick font like Luckiest Guy, Bangers, or Fredoka One.
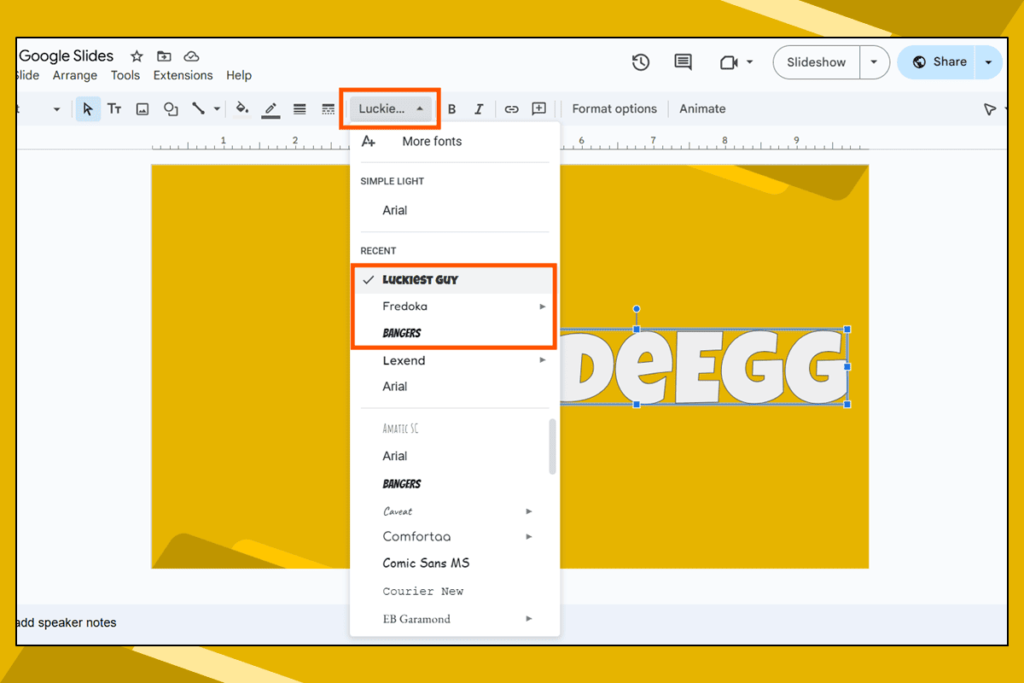
These fonts have a natural bubble-letter feel, making your text look fun and playful.
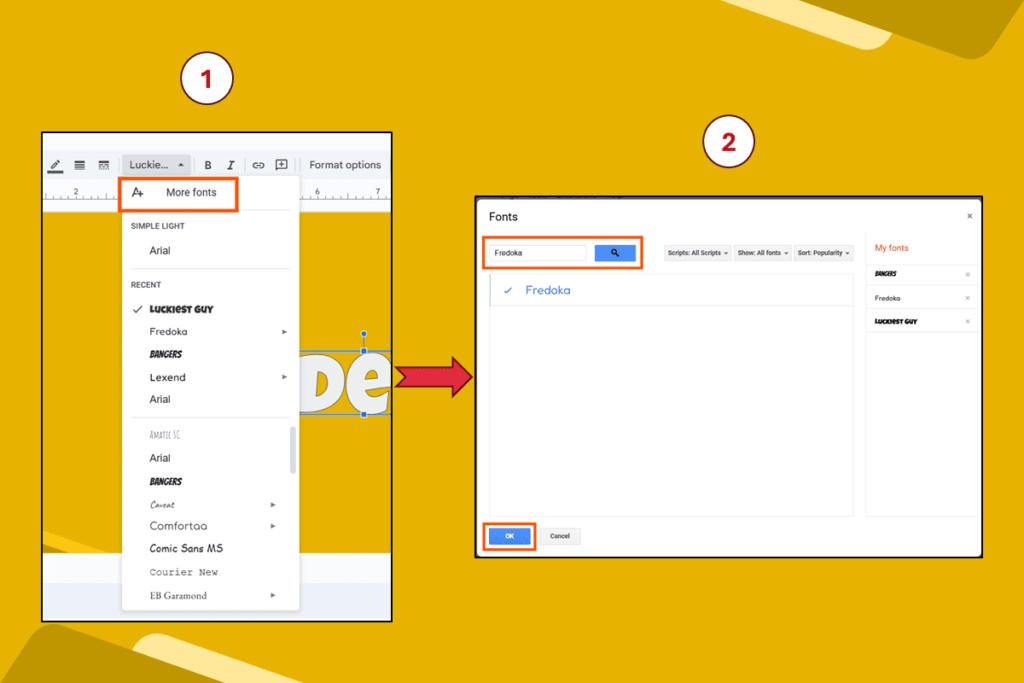
💡 Can’t find these fonts?
- Click on “More Fonts” from the font dropdown.
- A pop-up will appear—type the font name in the search bar.
- Select the font and click OK to add it to your font list.
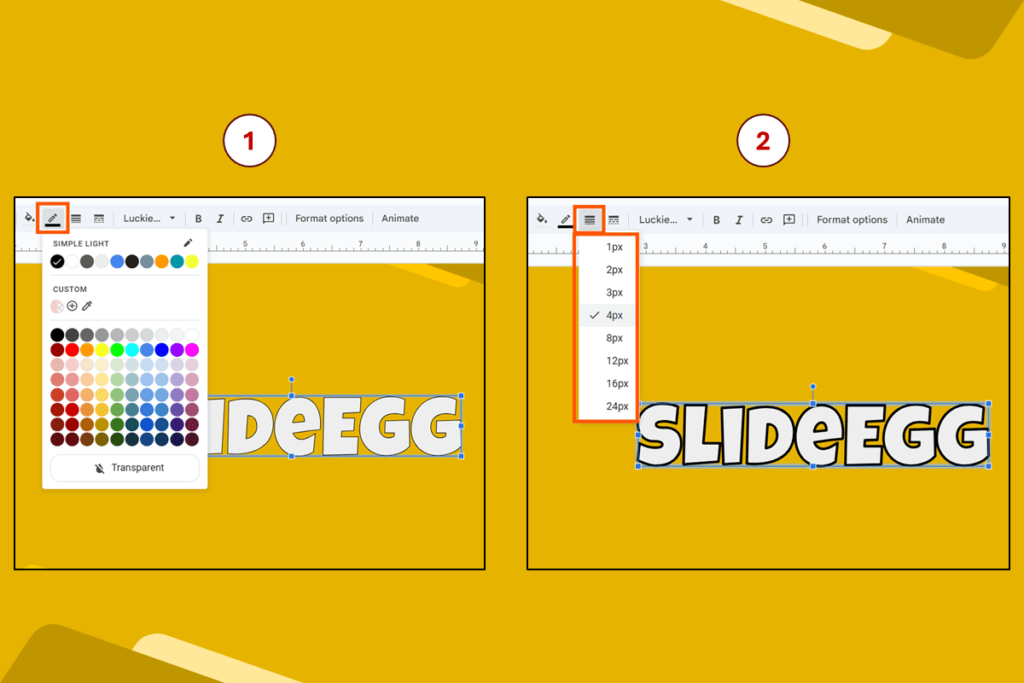
✏️ Step 4: Add an Outline for a Bubble Effect
Bubble letters need a bold border. Here’s how to do it:
- Click on the border color tool (pencil icon in the toolbar).
- Choose black or a dark color for a strong outline.
- Click on border weight (next to the color option).
- Select a thicker line (4px or more) to make the outline stand out.
✏️ Step 5: Fill the Letters with Color
To make your bubble letters even more eye-catching:
- Click on your WordArt text.
- Click the paint bucket icon in the toolbar.
- Pick any bright, fun color.
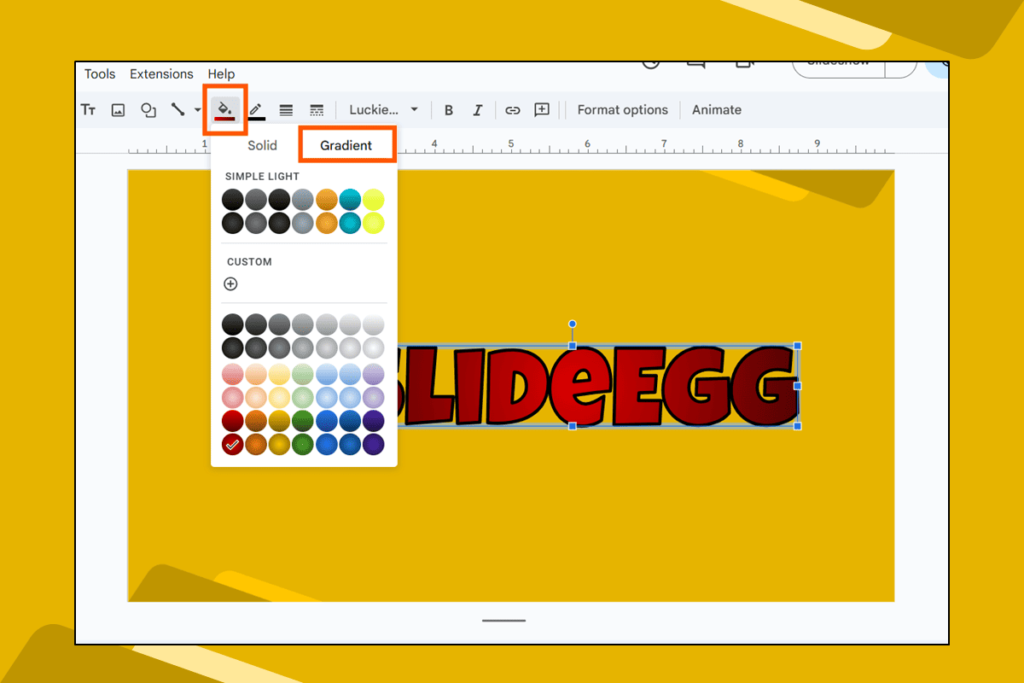
✨ Bonus Tip: Try gradient colors for a cool 3D effect!
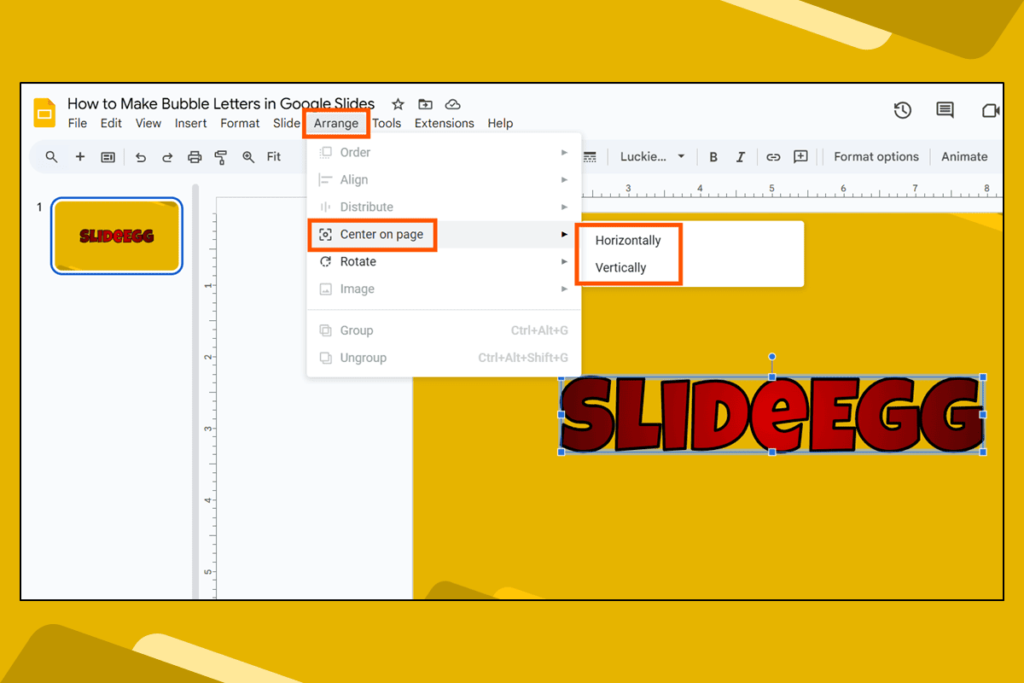
✏️ Step 6: Resize and Arrange Your Text
- Make it bigger by dragging the corners.
- Use arrow keys to adjust positioning.
- Align it perfectly by clicking Arrange > Center on Page.
✏️ Step 7: Group the Letters (Optional)
If you created separate WordArt for each letter, group them together:
- Hold Shift and click each letter.
- Right-click and select “Group”.
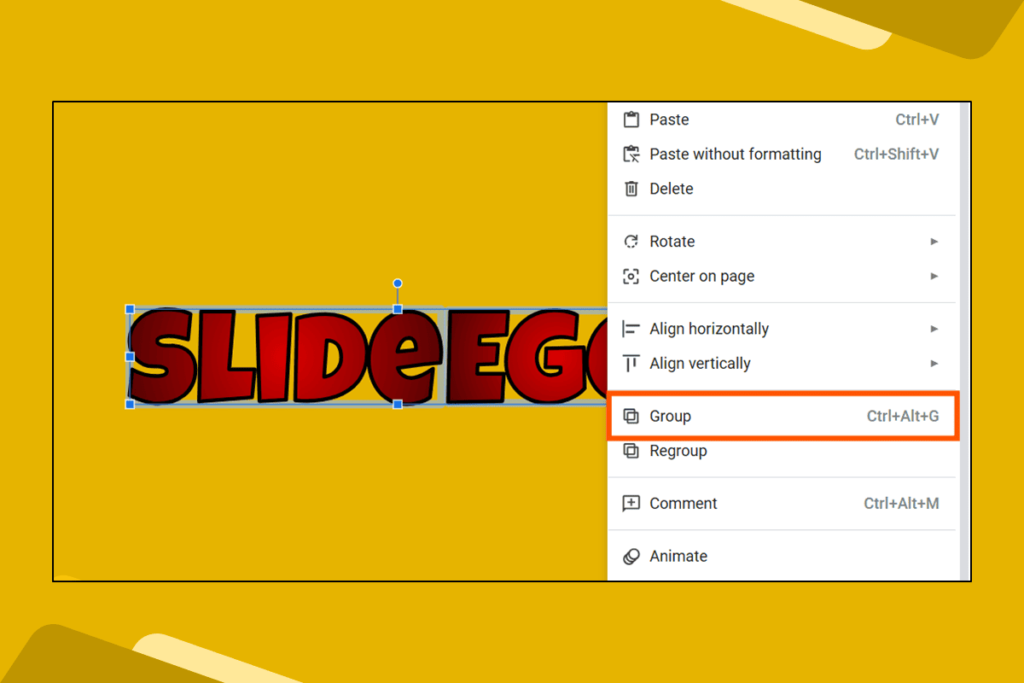
Now, you can move and resize them as a single unit!
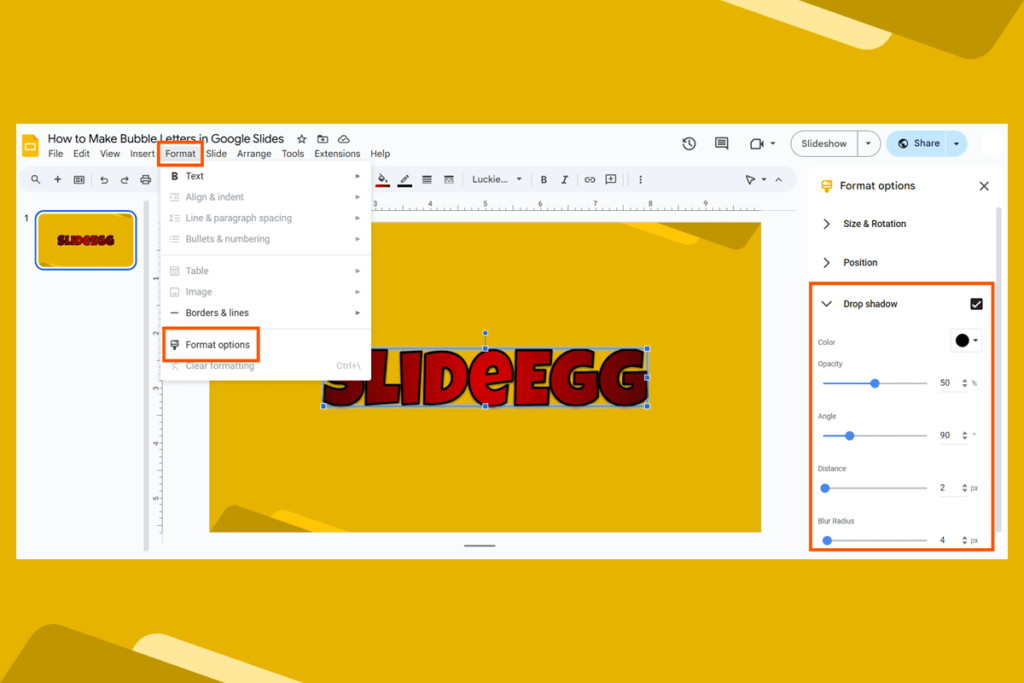
🎨 Want to Make Your Bubble Letters Even Cooler?
✔ Add a Drop Shadow – Go to Format options > Drop shadow for a 3D effect.
✔ Use Neon Colors – Bright colors make text pop.
✔ Tilt or Rotate Letters – Click on a letter and drag the rotate handle for a fun twist.
🤔 FAQs About Bubble Letters in Google Slides
❓ Can I make bubble letters without WordArt?
Yes, but it’s harder! WordArt makes it easier to add outlines and customize your text.
❓ What fonts look best for bubble letters?
Try Luckiest Guy, Bangers, Fredoka One, Rubik Bubbles, or Bubblegum Sans for a bubbly, playful look.
❓ How do I animate bubble letters?
- Click your bubble text.
- Go to Insert > Animation.
- Choose an effect like “Fade in” or “Fly in”.

This makes your bubble letters pop onto the screen with style!
🚀 Time to Get Creative!
Now you know how to make awesome bubble letters in Google Slides. Whether you’re designing a title slide, a fun poster, or a playful presentation, these steps will help you create bold, colorful text that stands out.
So go ahead—open Google Slides and start experimenting with your own bubble letter designs!