Creating a poster in Google Slides Templates is a fantastic way to design visually appealing and informative graphics for various purposes, such as events, presentations, or displays. Here’s a step-by-step guide on how to make a poster using Google Slides:
Step 1: Open Google Slides
- Go to slides.google.com and sign in with your Google account.
- Click on the “+ Blank” or “Start a new presentation” option to create a new slide presentation.
Step 2: Set The Poster Size
- Click on “File” in the top menu.
- From the drop-down menu, select “Page setup.”
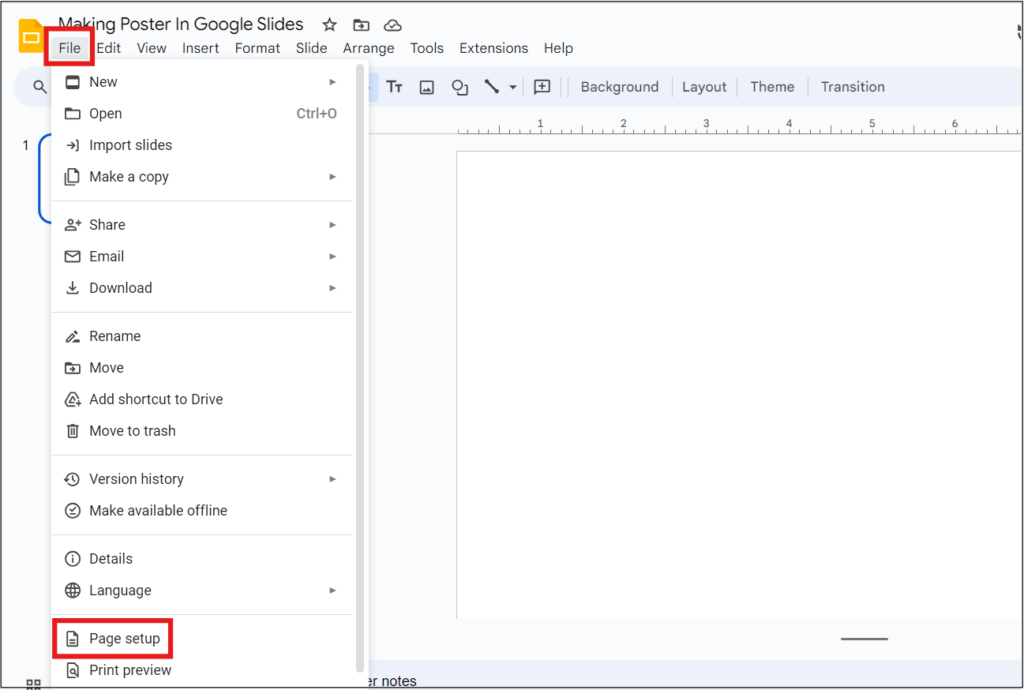
- In the “Page setup” dialog box, choose “Custom” from the options.
- Enter the dimensions for your poster. Common poster sizes are 18×24 inches, 24×36 inches, or any other size you prefer.
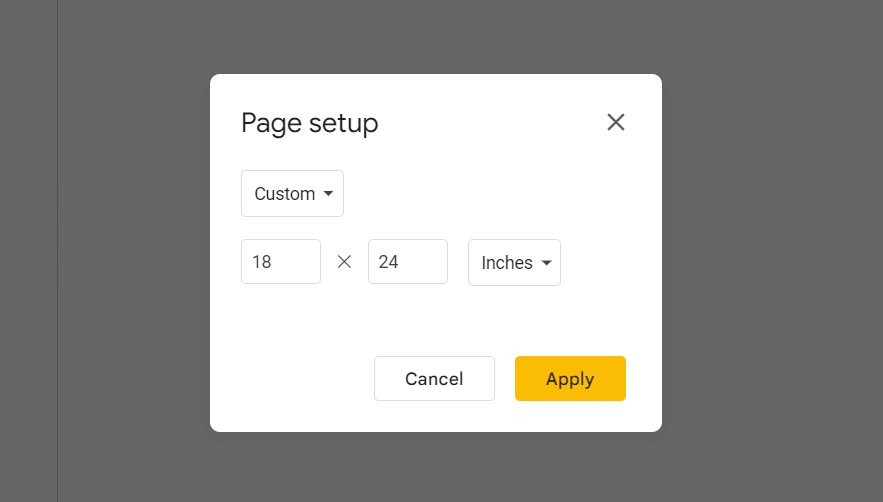
- Click on the “Apply” button to set the custom size for your poster.
Step 3: Design Your Poster
- Now that you have set the custom poster size, you can begin designing your poster.
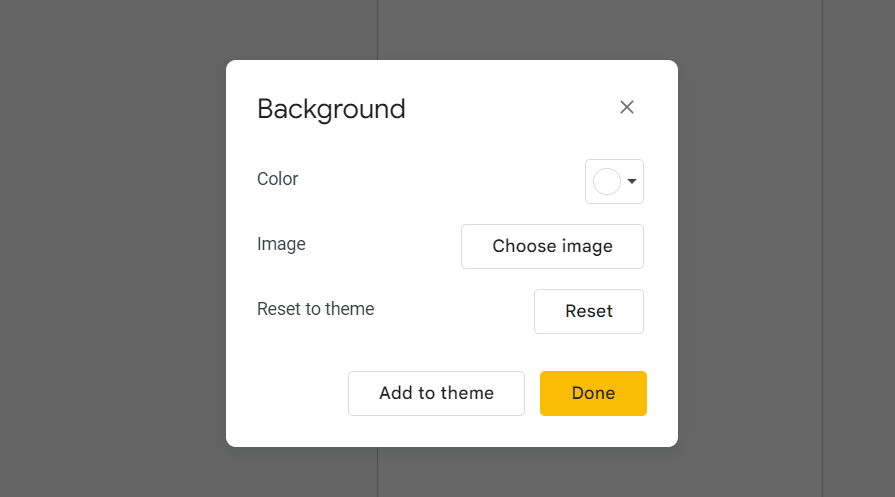
- Add a background color or image to your poster by clicking on “Background” in the top menu and selecting the desired option.
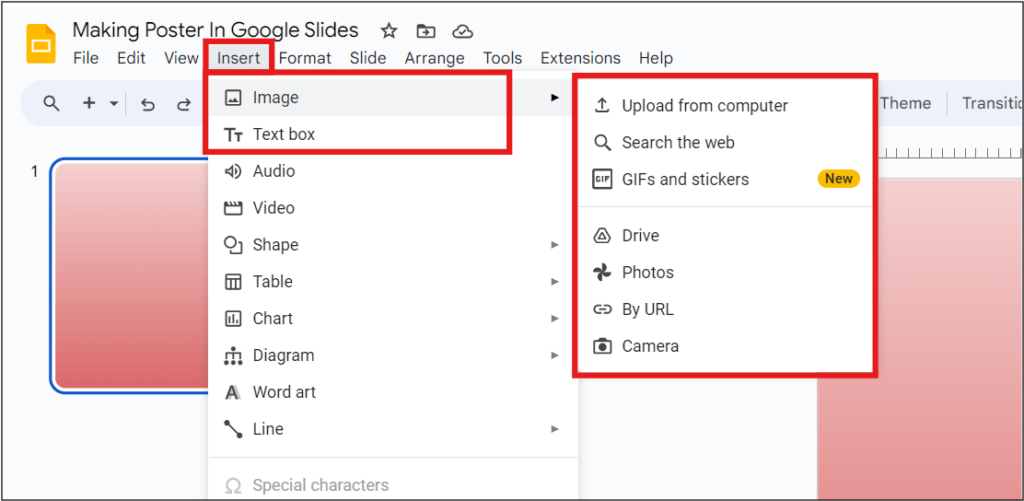
- Use shapes, text boxes, images, and other elements to design the layout of your poster. To insert any of these elements, click on “Insert” in the top menu and choose the respective option.
Step 4: Customize Text And Graphics
- To add text, click on the “Text box” option in the top menu or use the shortcut “Ctrl + Shift + T” (Windows/Linux) or “Cmd + Shift + T” (Mac).
- Click and drag your mouse to draw a text box on the slide and start typing your content.
- Customize the font, size, color, and alignment of the text using the formatting options available in the toolbar.
- To add images, click on “Insert” in the top menu and choose “Image.” Upload an image from your computer or select one from Google Drive.
Step 5: Arrange Elements
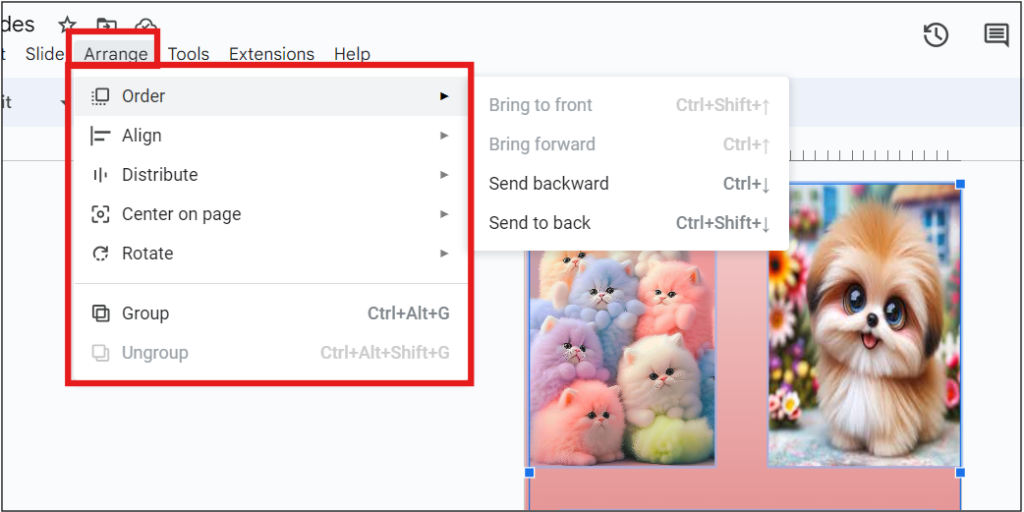
- To arrange elements on your poster, use the “Arrange” options available in the toolbar. You can bring elements forward or backward, align them, and distribute them evenly on the slide.
Step 6: Add Visual Enhancements
- Google Slides offers various visual enhancements, such as shapes, icons, and charts, that you can use to make your poster more engaging.
- To insert shapes or icons, click on “Insert” in the top menu and choose “Shape” or “Icon.” Select the desired shape or icon from the available options.
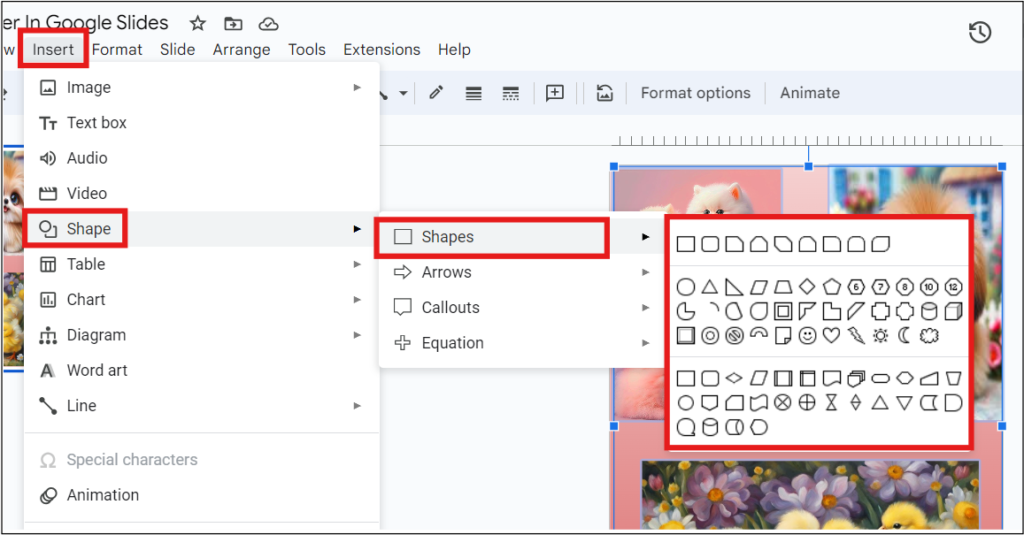
- Customize the color, size, and position of the shapes or icons as needed.
Step 7: Preview And Save
- Once you have completed designing your poster, take a moment to preview it and make any final adjustments.
- To save your poster, click on “File” in the top menu and select “Save” or “Save as.”
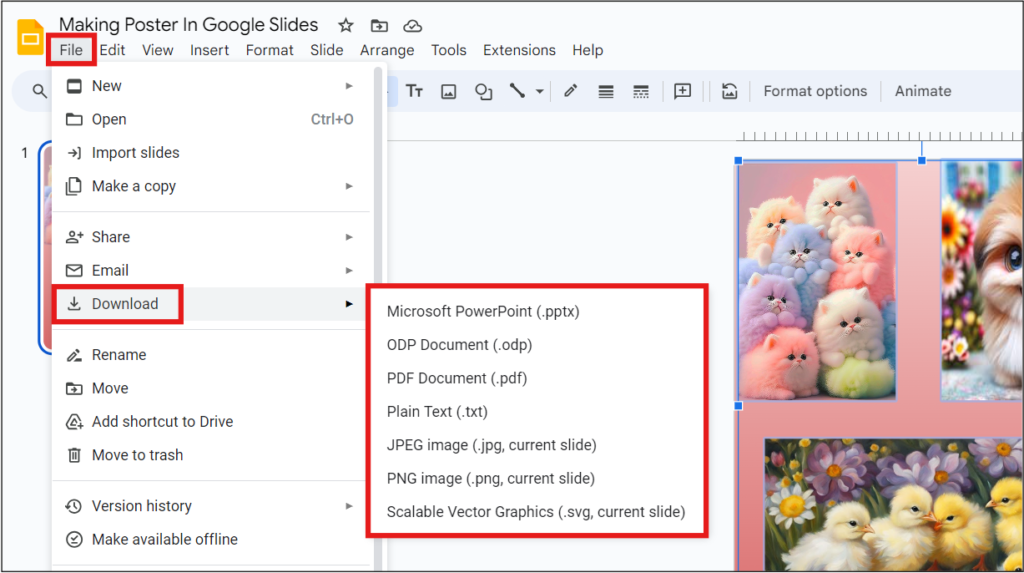
- You can also export your poster as a PDF or image by clicking on “File” and choosing “Download” from the drop-down menu.
Step 8: Print Your Poster
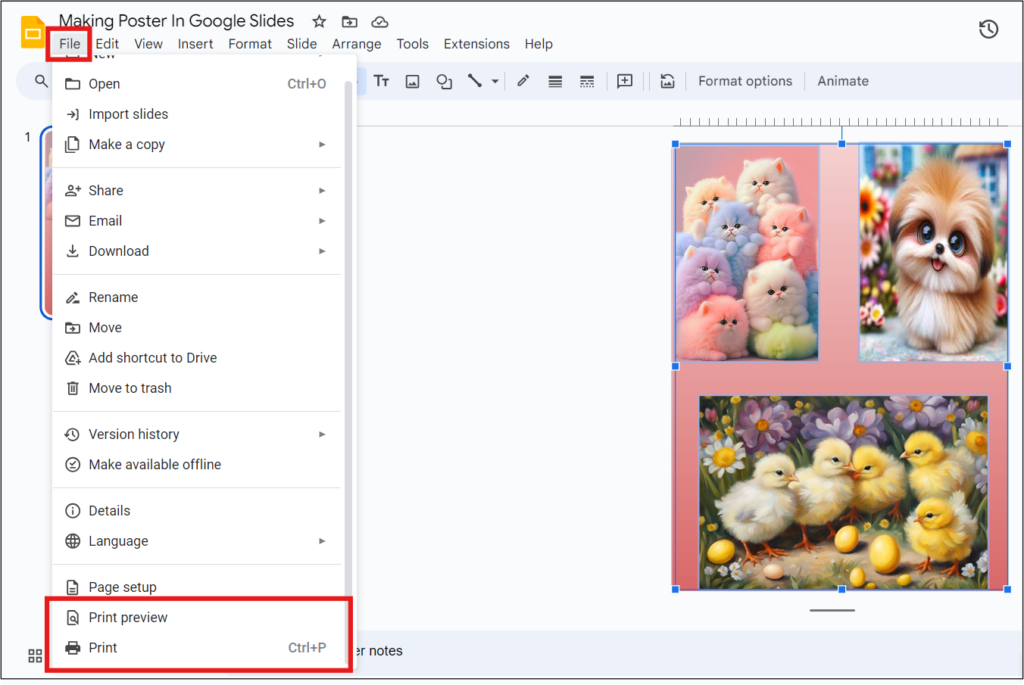
- To print your poster, click on “File” in the top menu and select “Print.”
- Adjust the print settings as needed, such as choosing the paper size and orientation, and then click on the “Print” button.
That’s it! You have successfully created a poster using Google Slides.
With Google Slides’ intuitive interface and design tools, you can produce visually stunning posters for various purposes quickly and easily.
