| 🎯 Quick & Simple Tricks for Making a Google Slides Photo Slideshow Here are some quick tips to make your slideshow-making process super smooth: ✅ Gather Your Photos First: Organize the pictures you want to use. This saves time later. ✅ Use High-Quality Images: Clear and bright photos make your slideshow look professional. ✅ Keep It Simple: Too many effects can be distracting. A clean, smooth flow is best. ✅ Use Transitions Wisely: Subtle transitions make slideshows look polished. ✅ Add Music for Extra Effect: Background music makes your slideshow more engaging. |
Introduction
“A picture is worth a thousand words.” But what if you could make those pictures tell a story? That’s exactly what a photo slideshow does!
Google Slides is a free and easy tool to create stunning photo slideshows. Whether it’s for a birthday, a wedding, or a school project, you can put together beautiful memories in just a few clicks.
Let’s break it down step by step!
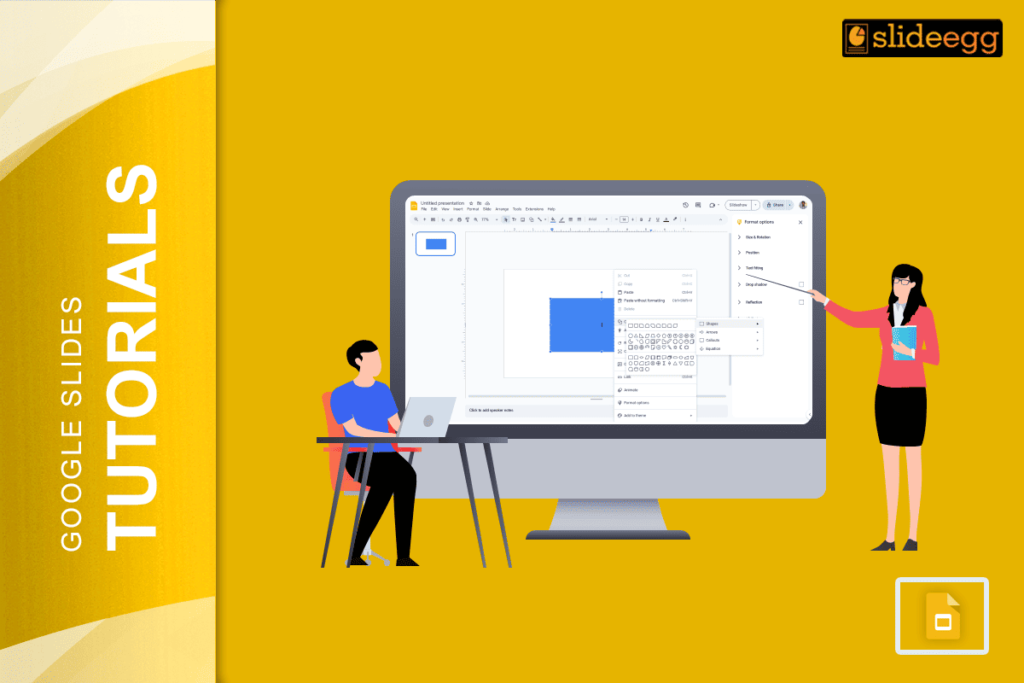
🛠️ Step 1: Open Google Slides
First, go to Google Slides and click on the blank presentation option. You’ll see a new slide with a title and text box. Don’t worry! We’ll remove those in the next step.
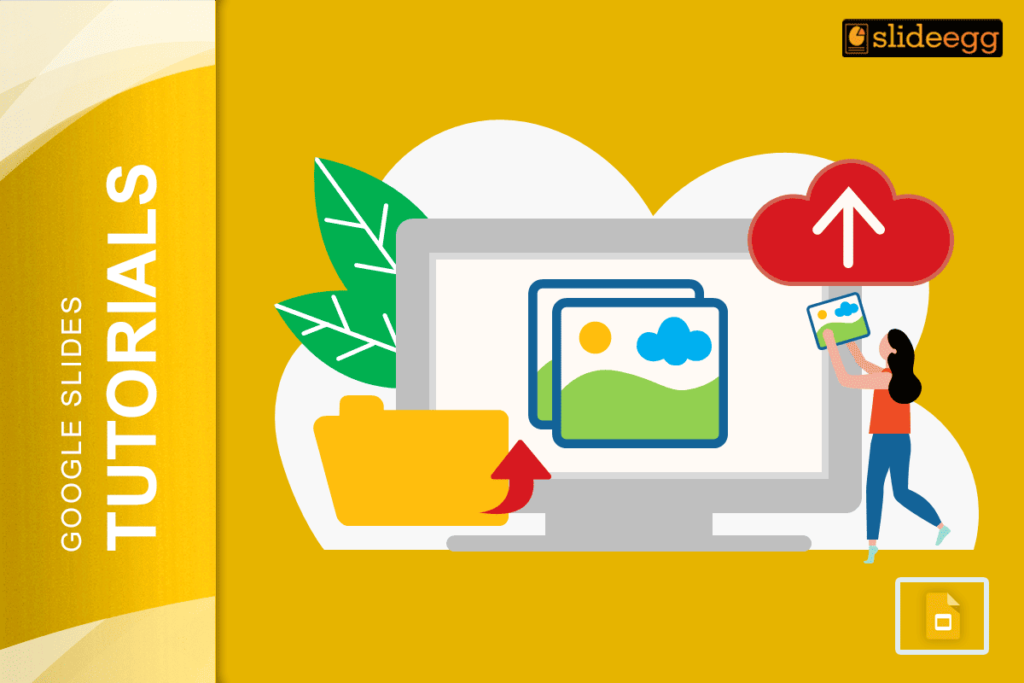
🖼️ Step 2: Add Photos to Slides
- Click on the first slide and delete the text boxes.
- Now, click “Insert” → “Image” → “Upload from Computer” (or choose from Google Drive).
- Select the photo you want to add. It will appear on the slide.
- Resize and adjust the image if needed.

🔹 Pro Tip: Want to add multiple photos? Simply duplicate the slide and replace the image!
🎨 Step 3: Customize Your Slideshow
Now, let’s make it visually appealing!
✅ Choose a Theme: Click “Slide” → “Change Background” and pick a color or image.
✅ Adjust Layouts: Click “Slide” → “Apply Layout” to arrange your images neatly.
✅ Add Text (Optional): If you want captions, click “Insert” → “Text Box” and type your message.

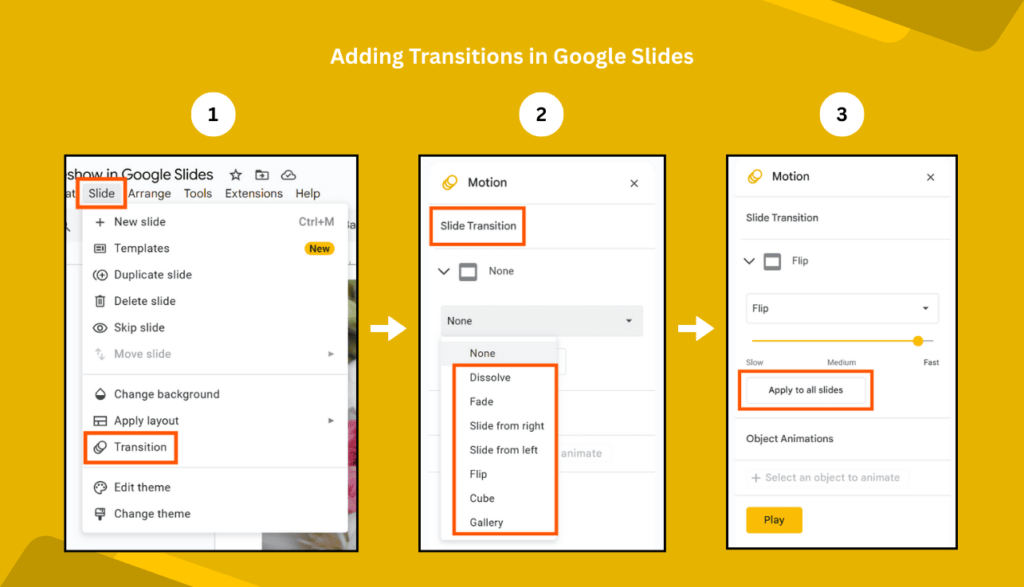
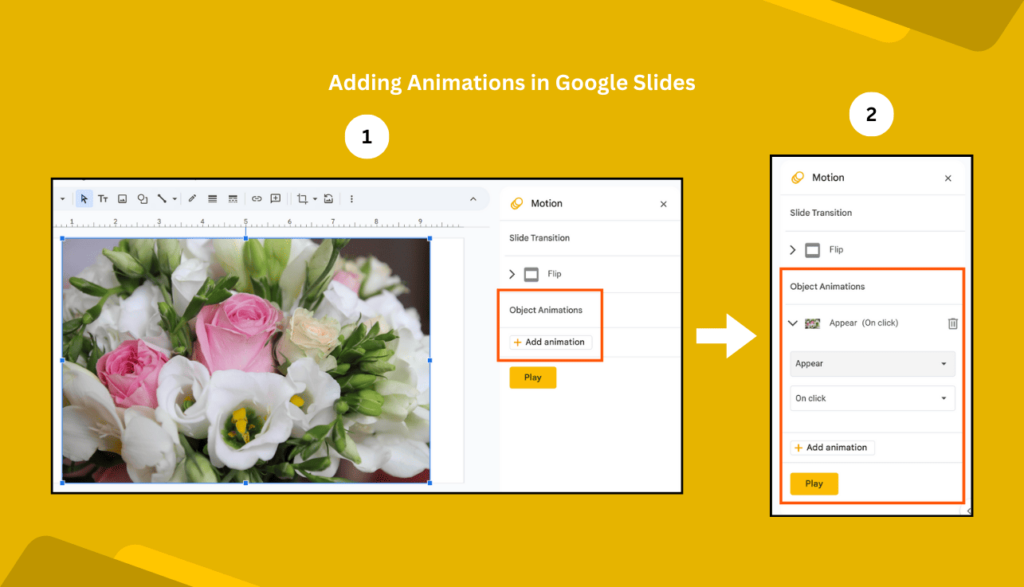
🎞️ Step 4: Add Transitions & Animations
Want a smooth slideshow? Add transitions!
- Click on a slide, then go to “Slide” → “Transition”
- Choose a transition like Fade, Slide, or Flip.
- Click “Apply to all slides” for consistency.
🔹 Bonus: Click on any image, go to “Add Animation”, and make it appear with a cool effect!
🎵 Step 5: Add Background Music (Optional)
A slideshow feels more alive with music! Here’s how to add it:
- Go to “Insert” → “Audio”
- Upload an MP3 file or choose from Google Drive
- Adjust settings to play automatically for a seamless experience
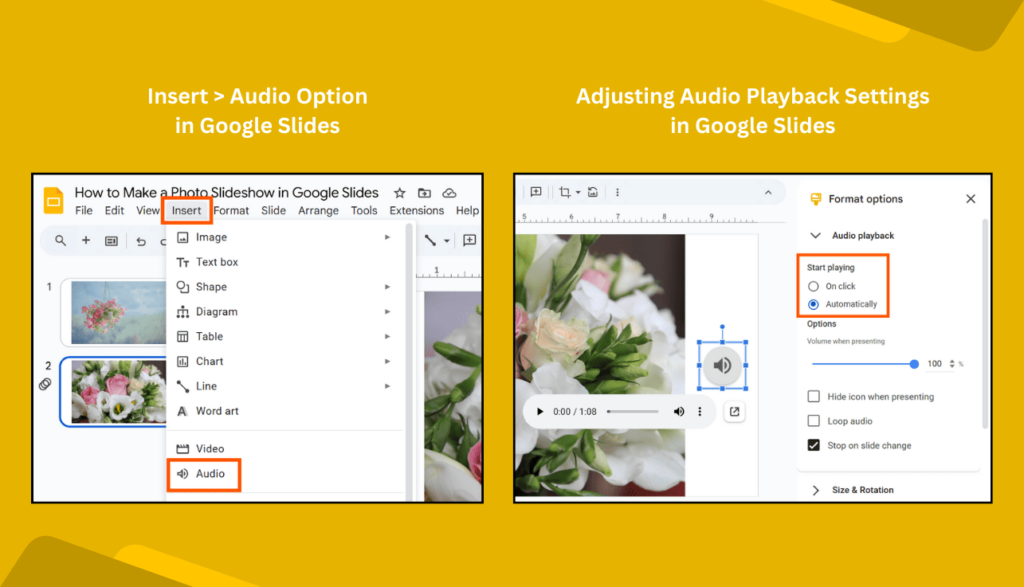
🎶 Pro Tip: If you don’t have an MP3 file, upload a video with music and place it off-slide!
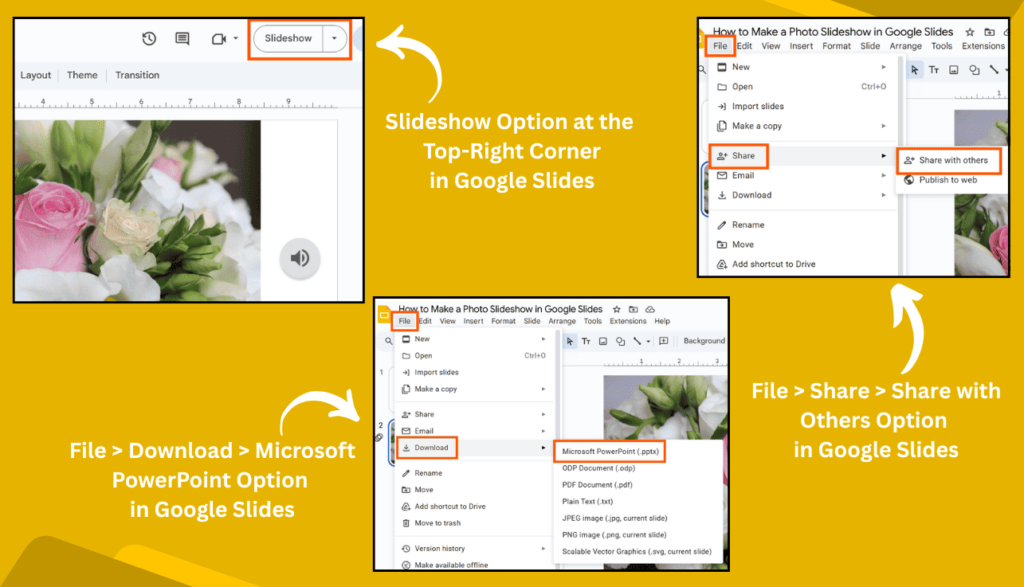
🎬 Step 6: Present & Share Your Slideshow
Now your slideshow is ready, it’s time to share it!
- Click “Slideshow” (top-right corner) to view your slideshow.
- To share, click “File” → “Share” and send it via email or get a link.
- If you want to download it as a video, use “File” → “Download” → “Microsoft PowerPoint” and convert it using an online tool.
❓ FAQs on Google Slides Photo Slideshow
Q1: Can I make a photo slideshow in Google Slides without an internet connection?
Yes! You can use Google Slides offline if you enable offline mode in Google Drive.
Q2: How many photos can I add to a slideshow?
There’s no strict limit, but keeping it under 50 slides makes it easier to view.
Q3: Can I add video clips to my slideshow?
Yes! Click “Insert” → “Video” to add YouTube or uploaded videos.
Q4: How do I make my slideshow play automatically?
Go to “File” → “Publish to the Web”, select auto-advance timing, and share the link.
Wrapping Up
And that’s it! You now know how to make a beautiful, engaging photo slideshow in Google Slides—all for free. Just add your photos, use smooth transitions, throw in some music, and you’re good to go!
Now, go ahead and create your masterpiece!