Creating a collage on Google Slides is a fun and creative way to combine multiple images and other elements into one cohesive visual presentation. It is a fantastic way to showcase photos, ideas, and designs appealingly. Whether you’re making a collage for a school project, a presentation, or just for fun, Google Slides offers an easy and free platform to get the job done. This guide will walk you through the steps to create a stunning collage in Google Slides.
Step-by-Step Guide to Creating a Collage on Google Slides
Step 1: Open Google Slides
First, you’ll need to open Google Slides. If you don’t already have a Google account, you’ll need to create one. Once you’re logged in, go to Google Drive, click on ‘New,’ and then select ‘Google Slides.’ You can start with a blank presentation or choose a pre-designed template.
Step 2: Choose a Layout
For a collage, you might want to start with a blank layout. Click on ‘Layout’ in the toolbar and select ‘Blank.’ This gives you a clean canvas to work with, making it easier to arrange your images and other elements.
Step 3: Add Images
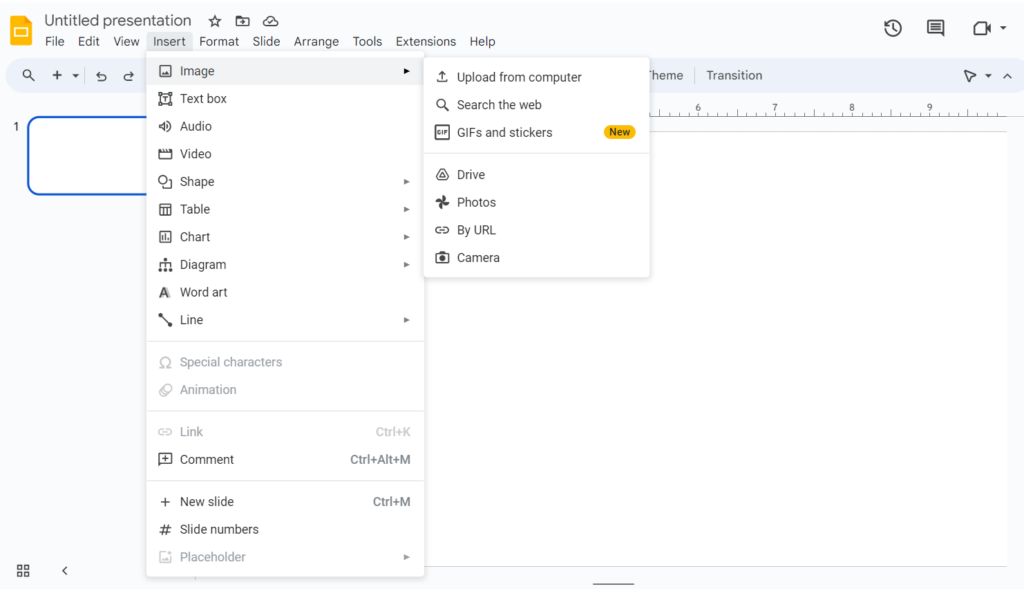
To add images to your collage:
- Select the ‘Insert’ option from the menu at the top of the screen.
- Select ‘Image,’ then choose where to upload your images from. You can upload from your computer, search the web, or use images stored in your Google Drive.
Step 4: Arrange Your Images
Once you’ve added your images, you can start arranging them. Select an image and drag it to reposition it. You can resize images by clicking and dragging the corners. To rotate an image, click on the blue dot at the top and drag it in the direction you want.
Step 5: Add Text
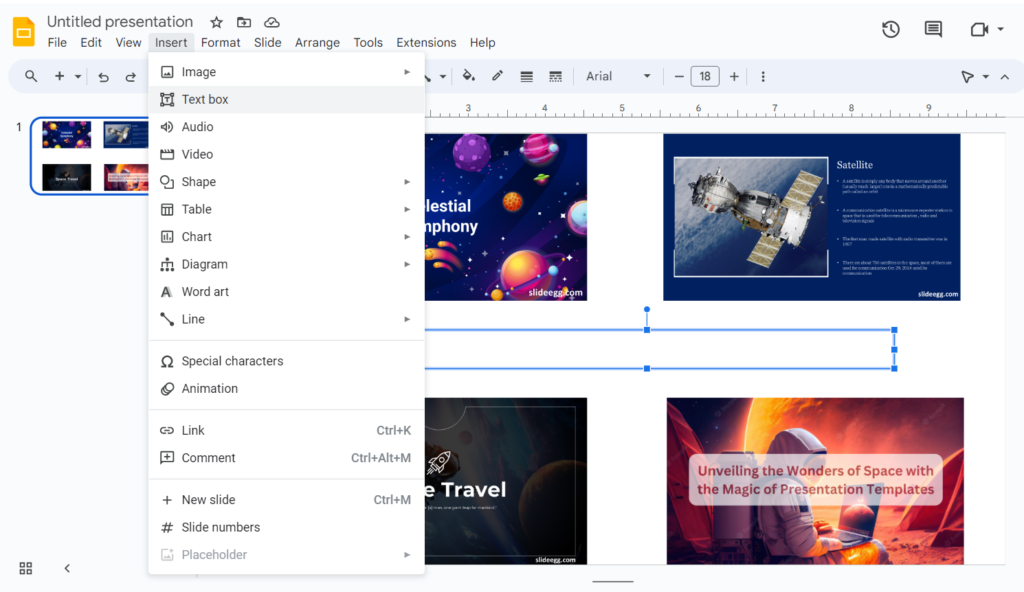
To make your collage more informative or creative, you can add text:
- Click on the ‘Insert’ menu.
- Select the ‘Text box’ and click on the slide where you want the text to appear.
- Type your text, then use the formatting options to change the font, size, color, and alignment.
Step 6: Customize Your Background
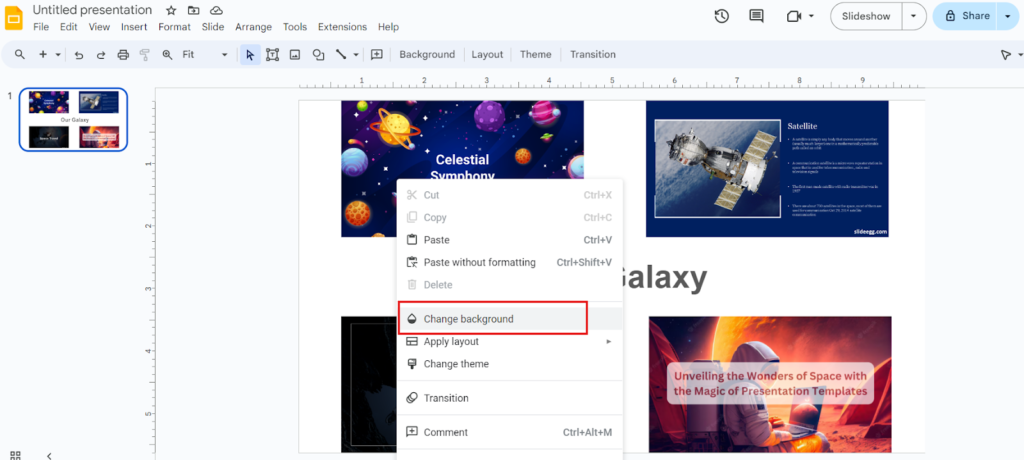
A visually appealing background can enhance your collage. It’s simple to change background images in Google Slides with few steps:
- Right-click on the slide background and select ‘Change background.’
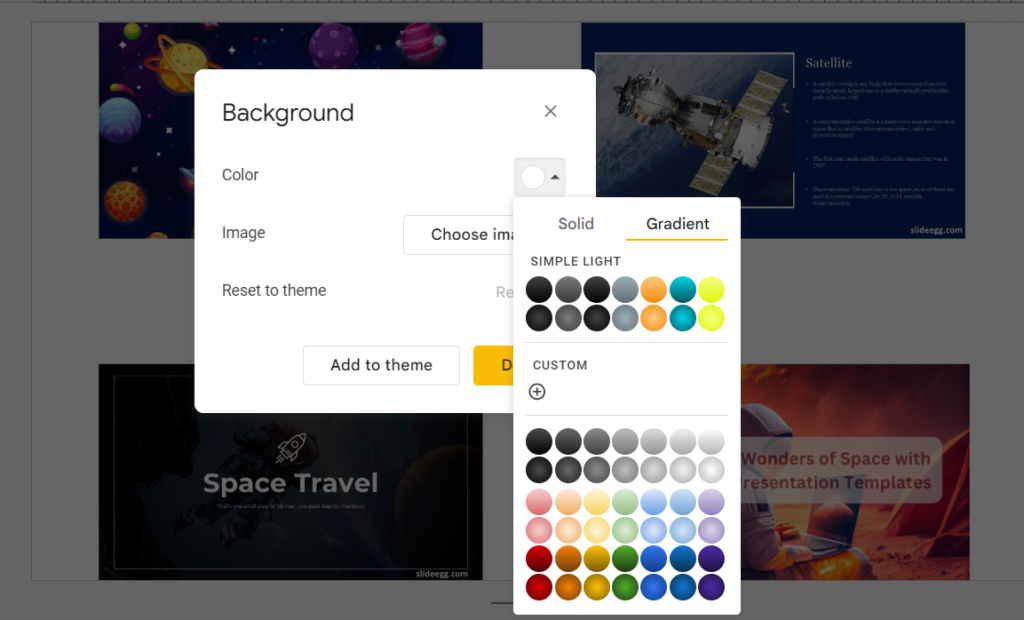
- You can choose a solid color, a gradient, or upload an image as your background.
Step 7: Use Shapes and Lines
Shapes and lines can help you organize your collage and add creative elements:
- Click on the ‘Insert’ menu, then select ‘Shape’ or ‘Line.’
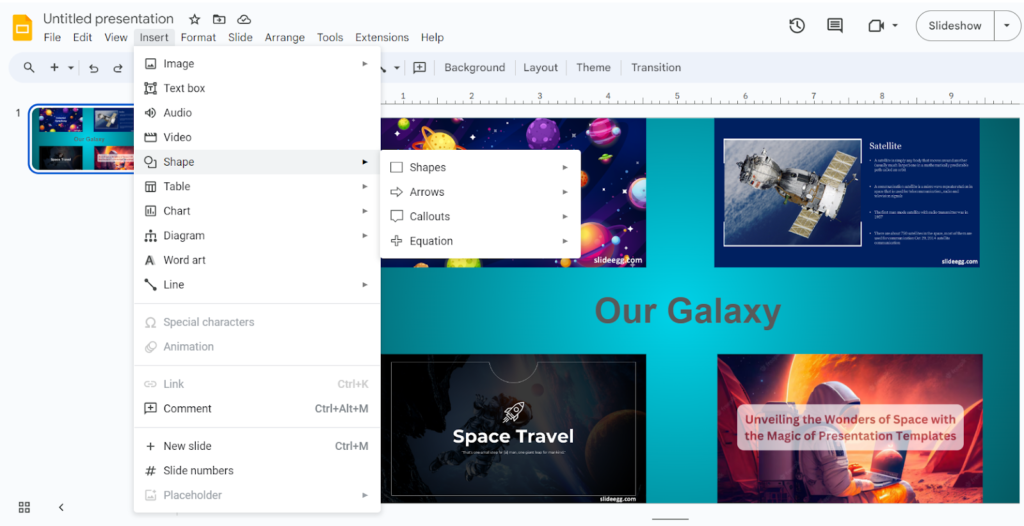
- Choose the shape or line you want and draw it on your slide. You can adjust the size, color, and style using the toolbar.
Step 8: Layering Elements
You can layer images, text, and shapes to create a dynamic collage:
- Right-click on an element and choose ‘Order’ to bring it to the front or send it to the back.
- Use this feature to overlap images and text creatively.
Step 9: Add Transitions and Animations
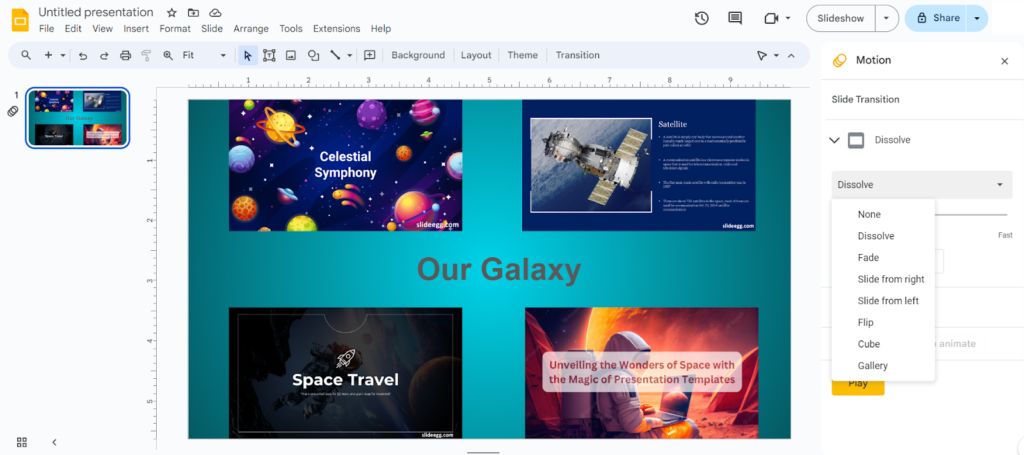
To make your collage interactive, add transitions and animations:
- Click on ‘Slide’ in the top menu, then select ‘Transition.’
- Choose a transition for your slide. To animate individual elements, click on them, then select ‘Animate’ from the toolbar.
Free Google Slides Templates
Using a pre-designed theme can save time and add a professional touch to your collage. There are many free Google Slides themes available online. Various websites offer a wide variety of themes that you can download and use. Simply download your chosen theme and upload it to Google Slides by going to ‘Slide’ > ‘Change theme’ > ‘Import theme.’
Additional Tips
- Experiment with different layouts: Don’t be afraid to try different arrangements and designs. The more you experiment, the more unique your collage will be.
- Use high-quality images: High-resolution images will make your collage look more professional.
- Keep it simple: Sometimes less is more. Be careful not to clutter your collage with too many items.
Let’s Wind Up
Creating a collage on Google Slides is a fun and creative way to display your photos and ideas. With these simple steps, you can design a beautiful collage that’s perfect for any occasion. It’s time to get creative! Let’s start!
If you enjoyed learning how to make a collage, you might also be interested in our blog post on How to Create a Banner in Google Slides. This guide will teach you everything you need to know about designing custom banners for your presentations, projects, and more. If you are working on the PowerPoint platform, check out our blog on How to Create a Picture Collage in PowerPoint.
Happy collaging!


