| Quick Tips to Lock a Slide in Google Slides 🔒 Convert Slide to Image – Download the slide as a PNG/JPEG and set it as a background to prevent edits. 🔒 Use Master Slide – Add fixed elements to the Master Slide so they can’t be moved. 🔒 Group Elements Together – Select multiple items, right-click, and choose Group to lock them in place. 🔒 Restrict Editing Access – Change sharing permissions to “Viewer””” to stop others from editing. 🔒 Use a Transparent Shape – Place a transparent shape over the slide and lock it in position. 🔒 Make a Copy for Editing – Keep an original version safe by working on a duplicate slide |
Locking a Slide in Google Slides: Here’s What You Need to Know
Google Slides makes it easy to create and share presentations, but there’s one problem—it doesn’t have a built-in option to lock a slide. If multiple people are working on the same file, it’s common for someone to accidentally move or delete important content.
While Google doesn’t offer a direct “lock” button, there are a few simple ways to prevent unwanted changes. You can convert a slide into an image, use Master Slide settings, or adjust sharing permissions to keep your content secure.
In this blog, let’s check the best methods to lock a slide in Google Slides so your work stays exactly as you want it.
Method 1: Save Your Slide as an Image (Best for Full Locking)
This method completely locks everything on the slide. Once saved as an image, no one can move or edit individual elements.
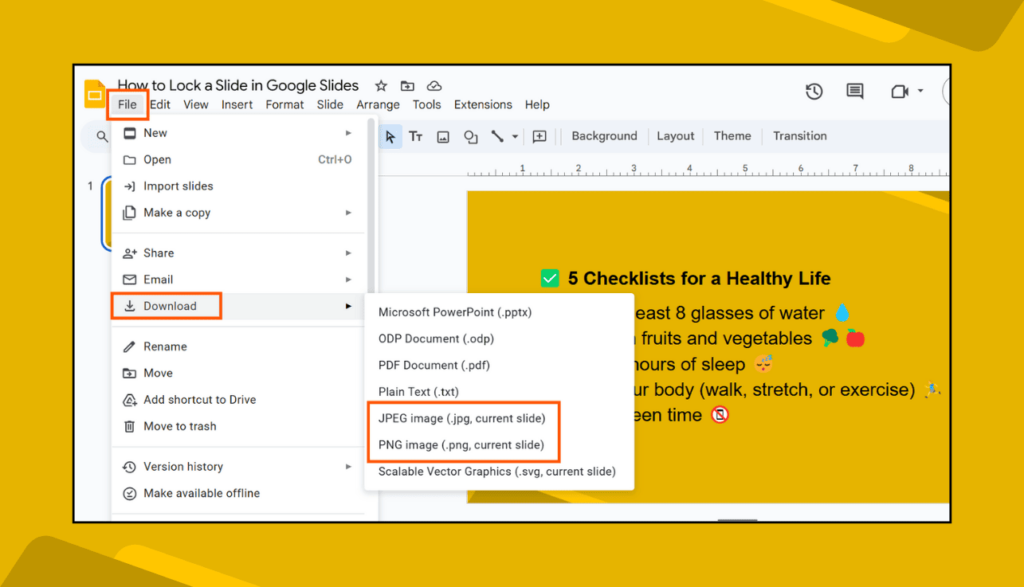
Steps to Lock a Slide as an Image:
1️⃣ Open Google Slides and go to the slide you want to lock.
2️⃣ Click on File > Download > PNG or JPEG (PNG gives better quality).
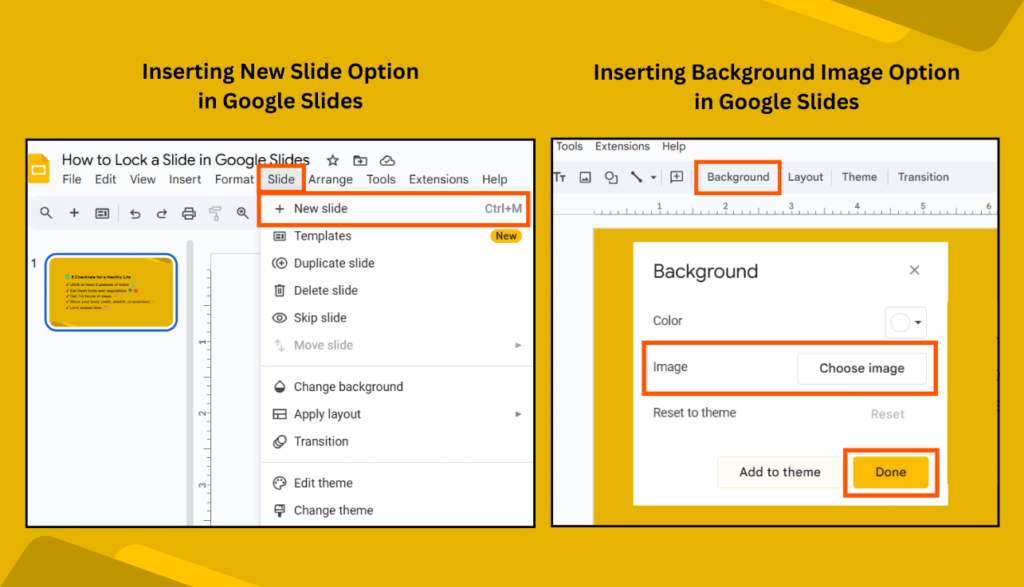
3️⃣ Now, create a new slide and delete the content.
4️⃣ Click on Background > Choose Image, then upload the saved image.
5️⃣ Click Done—now your slide is locked!
🚀 Why This Works: Since it’s a background image, no one can move or edit anything.
Method 2: Use the Master Slide (Best for Templates & Layouts)
Want to lock only certain elements while keeping the rest editable? The Master Slide is your best friend!
Steps to Lock Elements Using Master Slide:
1️⃣ Click on Slide > Edit Theme (this opens the Master Slide).
2️⃣ Select a layout and add the content you want to lock (logos, backgrounds, watermarks, etc.)
3️⃣ Click X to close the Master Slide editor.
4️⃣ Now, whenever you use that layout, the locked elements can’t be moved!
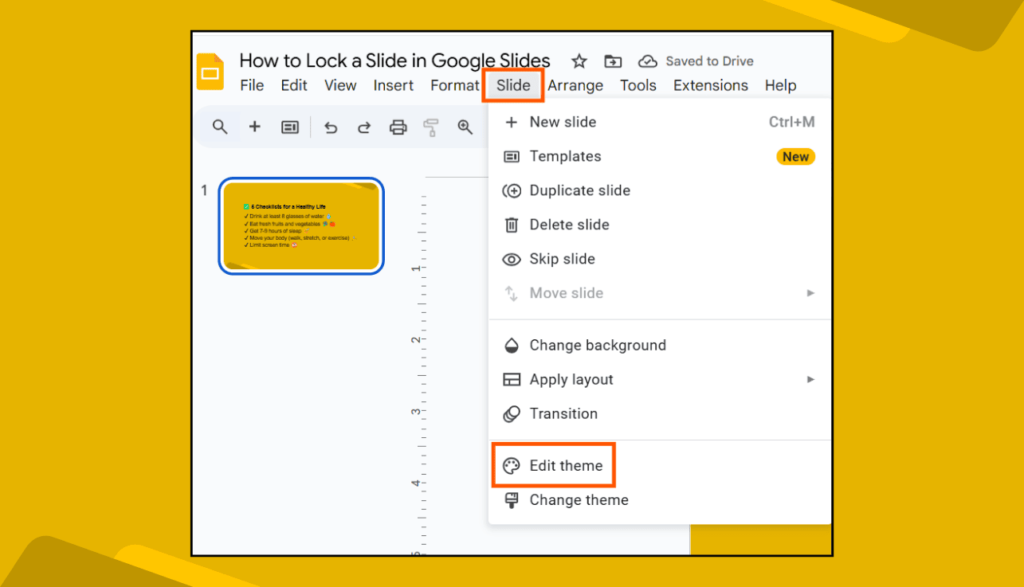
✅ Why This Works: Elements added to the Master Slide stay fixed, while users can edit other parts.
Method 3: Use View-Only Mode (Best for Sharing Without Edits)
If you just want to prevent others from making changes, this is the easiest method!
Steps to Share a View-Only Slide:
1️⃣ Click on Share in the top-right corner or goto File > Share > Share with others.
2️⃣ Under General access, select Anyone with the link.
3️⃣ Change the setting from Editor to Viewer.
4️⃣ Click Done—now no one can edit your slides!
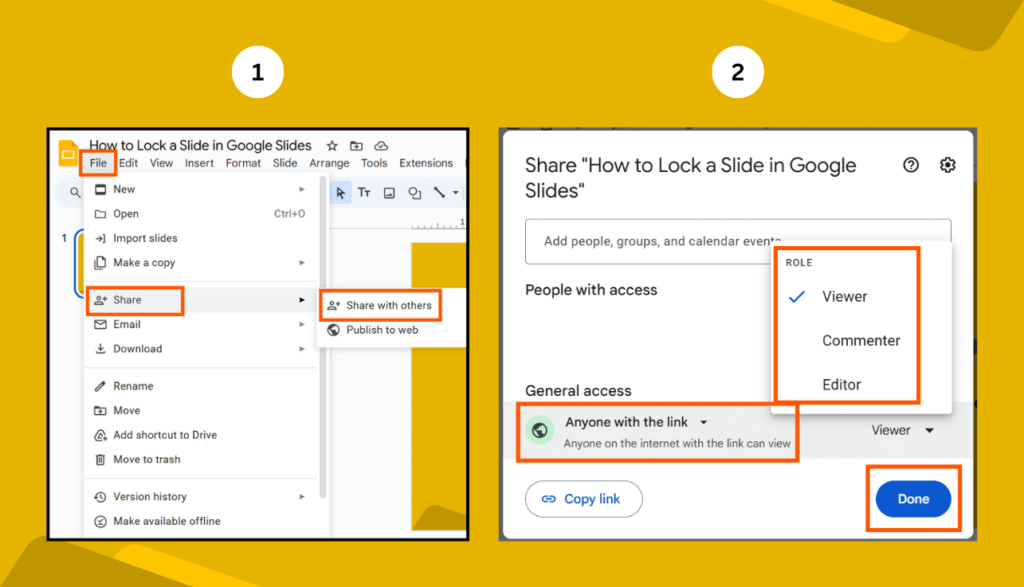
👀 Why This Works: Others can view the slides but can’t edit or move anything.
FAQs on Locking Slides in Google Slides
❓ Can I lock just one element instead of the whole slide?
Yes! Use the Master Slide to lock specific items while keeping other parts editable.
❓ What if I want to unlock the slide later?
If you used the image method, you’ll need to edit the original slide. If you used the Master Slide, just go back to Slide > Edit Theme to make changes.
❓ Can I password-protect a Google Slide?
No, Google Slides doesn’t have a password-protect feature. But you can restrict access using View-Only Mode.
❓ Does locking a slide work on mobile?
Yes! If you lock a slide using the image method, it stays locked even when viewed on mobile.
Final Thoughts
Locking a slide in Google Slides isn’t as simple as clicking a button, but with these methods, you can protect your content from unwanted edits.
Whether you need to lock an entire slide, or certain elements, or restrict access, these steps will help you keep your presentation exactly how you want it. Try them out and make your slides more secure!