
| Easy Ways to Make an Image Clickable in Google Slides Here’s a quick breakdown of how to add a hyperlink to an image in Google Slides: 1. Insert an Image: Click “Insert” > “Image” and choose where to get the image from. 2. Select the Image: Click on the image to highlight it. 3. Add a Link: Press Ctrl + K (Windows) or Cmd + K (Mac) OR click “Insert link” in the toolbar. 4. Enter the URL: Type or paste the link and click “Apply“. 5. Test the Link: Click “Present” and check if the image is clickable. And that’s it! Now let’s explore this process in more detail. |
How to Link an Image in Google Slides (Step-by-Step Guide)
Ever wondered how to make an image clickable in Google Slides?
Whether you’re adding a website link, linking to another slide, or even an external file, making an image interactive is super easy!
Imagine this: You’re presenting a slide, and instead of telling people to visit a website, they can just click on an image, and boom! They’re there.
Not only does this make your presentation look sleek, but it also helps your audience engage with your content better.
So, let’s break it down in the simplest way possible!
Step 1: Insert an Image in Google Slides
Before adding a link, you need an image! Here’s how to insert one:
- Open your Google Slides presentation.
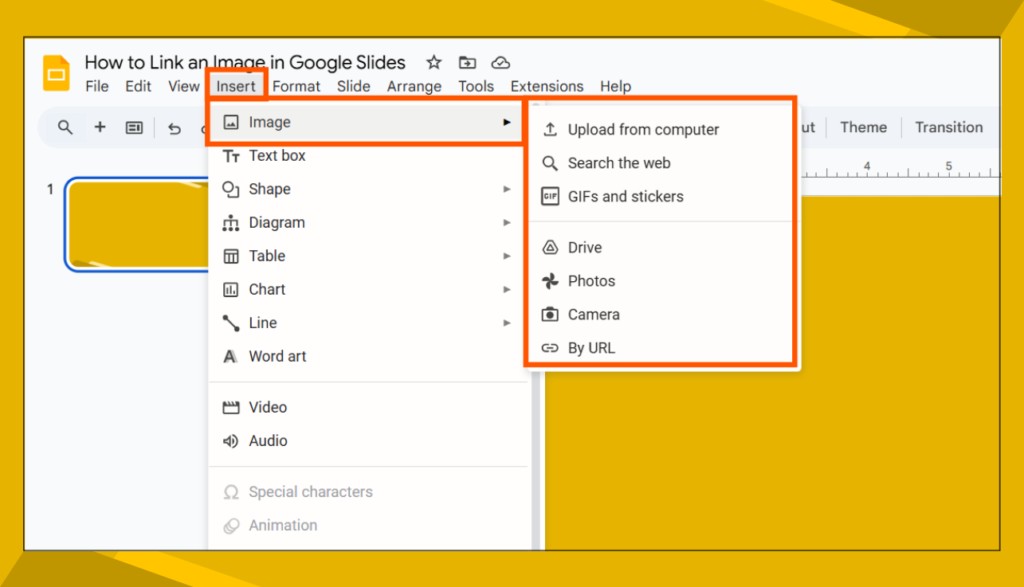
- Click on “Insert” > “Image” (at the top).
- Choose one of the options:
- Upload from Computer – If the image is saved on your device.
- Search the Web – Use Google’s built-in search.
- Drive/Photos – Select an image from your Google Drive or Google Photos.
- By URL – Paste an image link from the internet.
Once the image is on your slide, you’re ready for the next step!
Step 2: Select the Image
Now, click on the image you just inserted. You’ll notice a blue outline around it, meaning it’s selected.

Step 3: Add a Hyperlink to the Image
Here’s how to add a clickable link:
🔹 Method 1 (Shortcut Way):
Press Ctrl + K (Windows) or Cmd + K (Mac).
🔹 Method 2 (Manual Way):
- Click on the image to select it.
- Click the link icon (🔗) in the toolbar OR go to “Insert” > “Link”.
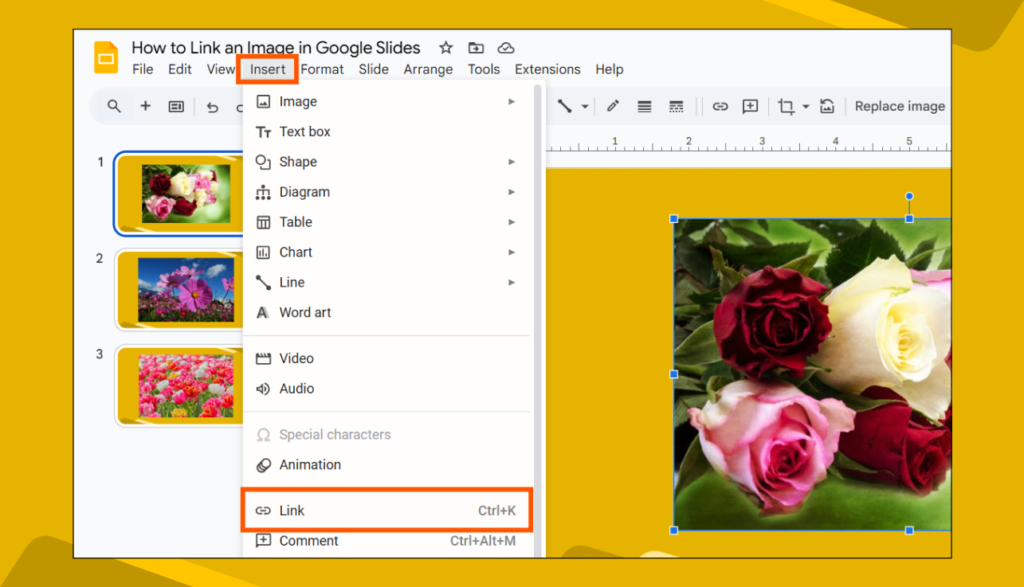
- A box will appear—paste or type the link inside.
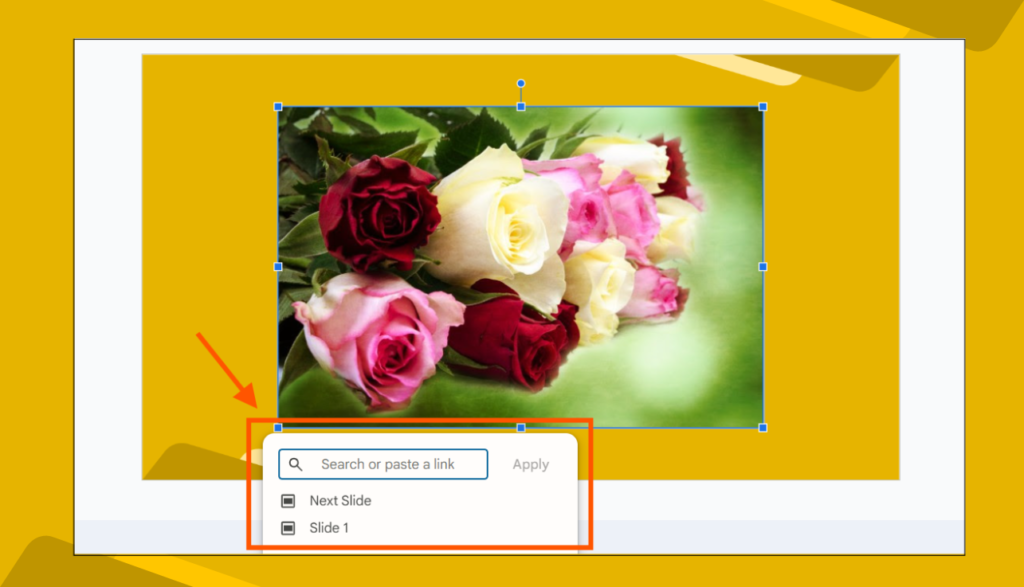
👉 Bonus: You can link the image to:
- A website (e.g., https://www.example.com)
- Another slide in the presentation
- A Google Drive file
Step 4: Apply and Save the Link
After entering the link, click “Apply”.

Done! Your image is now clickable.
Step 5: Test the Hyperlink
To make sure your link works:
- Click “Present” (top-right corner).
- Hover over the image and click it.
- If the link opens correctly, you did it!
Why Should You Link Images in Google Slides?
🔹 Keeps your audience engaged – Instead of cluttering slides with text, just use an image with a clickable link.
🔹 Looks professional – Hyperlinked images make your presentation more interactive.
🔹 Easy navigation – You can link to another slide for quick access to information.
FAQs About Linking Images in Google Slides
1. Can I link an image to another slide in the same presentation?
Yes! Instead of pasting a website URL, click “Slides in this presentation” and select the slide you want to link to.
2. How do I remove or change a link from an image?
Click on the image, then click “Edit link” (or the small “X” to remove it).
3. Can I hyperlink multiple images in one slide?
Absolutely! Just follow the same steps for each image.
4. Will the link work if I download the Google Slides as a PDF?
Yes! The linked image remains clickable in a PDF format.
5. Can I add a link to a GIF in Google Slides?
Yes! GIFs work just like images. Follow the same steps to add a link.
That’s it! Now you can link an image in Google Slides like a pro. Try it out and make your presentations more interactive!