Adding visuals to your presentations can significantly enhance your audience’s understanding and engagement. Google Slides offers several tools to make your slides more appealing, such as inserting, cropping, and masking images. In this blog, we’ll walk you through these features step-by-step to make your presentations even more professional.
How to Insert Images in Google Slides
Step 1: Open Google Slides
First, open your Google Slides presentation. If you don’t have one yet, you can create a new presentation by navigating to Google Slides (https://slides.google.com) and clicking on the “+” icon to start a blank presentation.
Step 2: Insert an Image
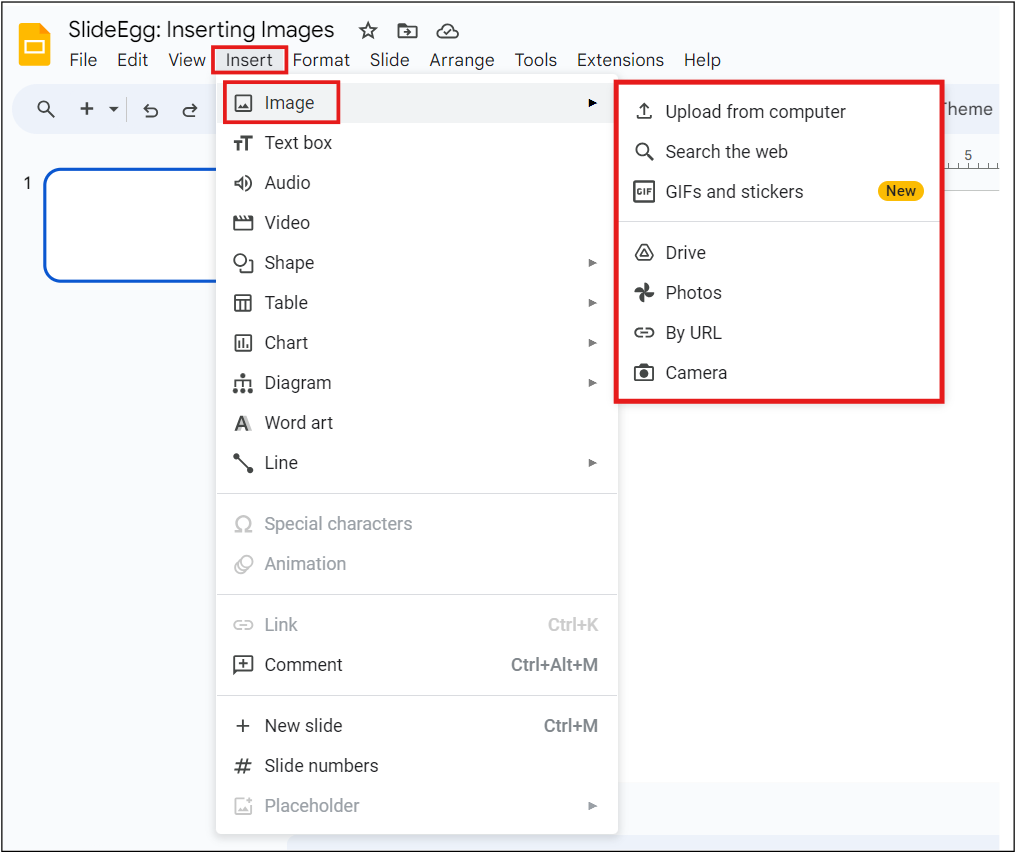
- Click the “Insert” option from the menu bar at the top of the screen.
- Select “Image” from the dropdown menu.
- Choose where you want to source your image from: Upload from the computer, Search the web, GIFs and Stickers (New), Drive, Photos, By URL, Camera.
Step 3: Amend the Image Size and Position
Once your image is inserted, you can click and drag the corners to resize it. To reposition the image, simply click on it and drag it to where you want it on the slide.
How to Crop Images in Google Slides
Cropping an image allows you to trim away unwanted edges. Here’s how you can crop images directly in Google Slides:
Step 1: Select the Image
Click on the image you want to crop.
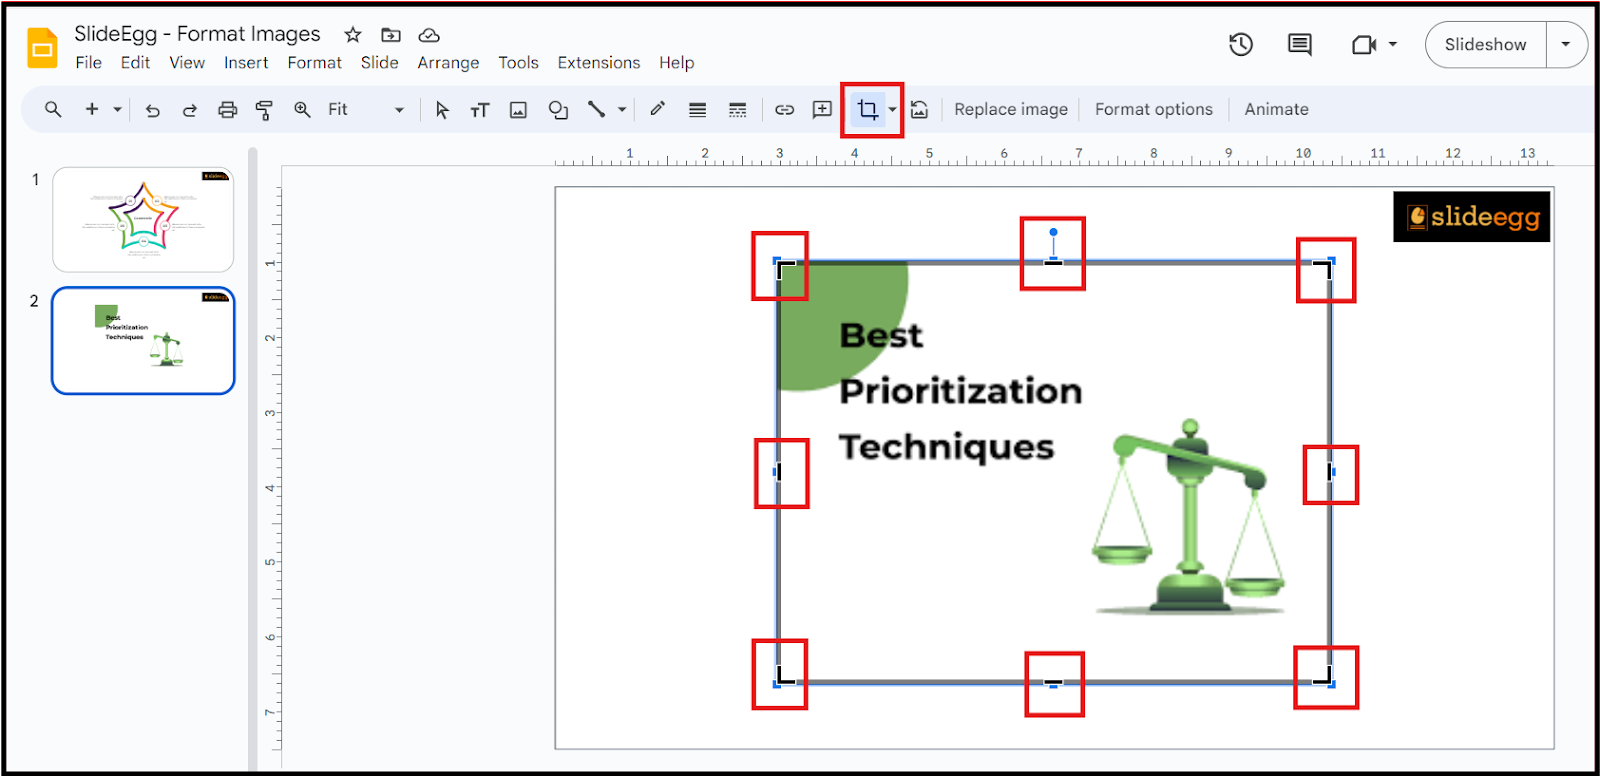
Step 2: Use the Crop Tool
- Click on the “Crop” icon in the toolbar, which looks like a square with a line through it.
- Drag the black handles to adjust the crop area.
- Press “Enter” or click anywhere outside the image to apply the crop.
Tips for Cropping
- You can hold the “Shift” key to maintain the aspect ratio while cropping.
- Use the crop handles precisely to get the desired part of the image.
How to Mask Images in Google Slides
Masking images allows you to shape your images into various shapes like circles, stars, and arrows. This can enhance the visual appeal of your presentation.
Step 1: Select the Image
Click on the image you want to mask.
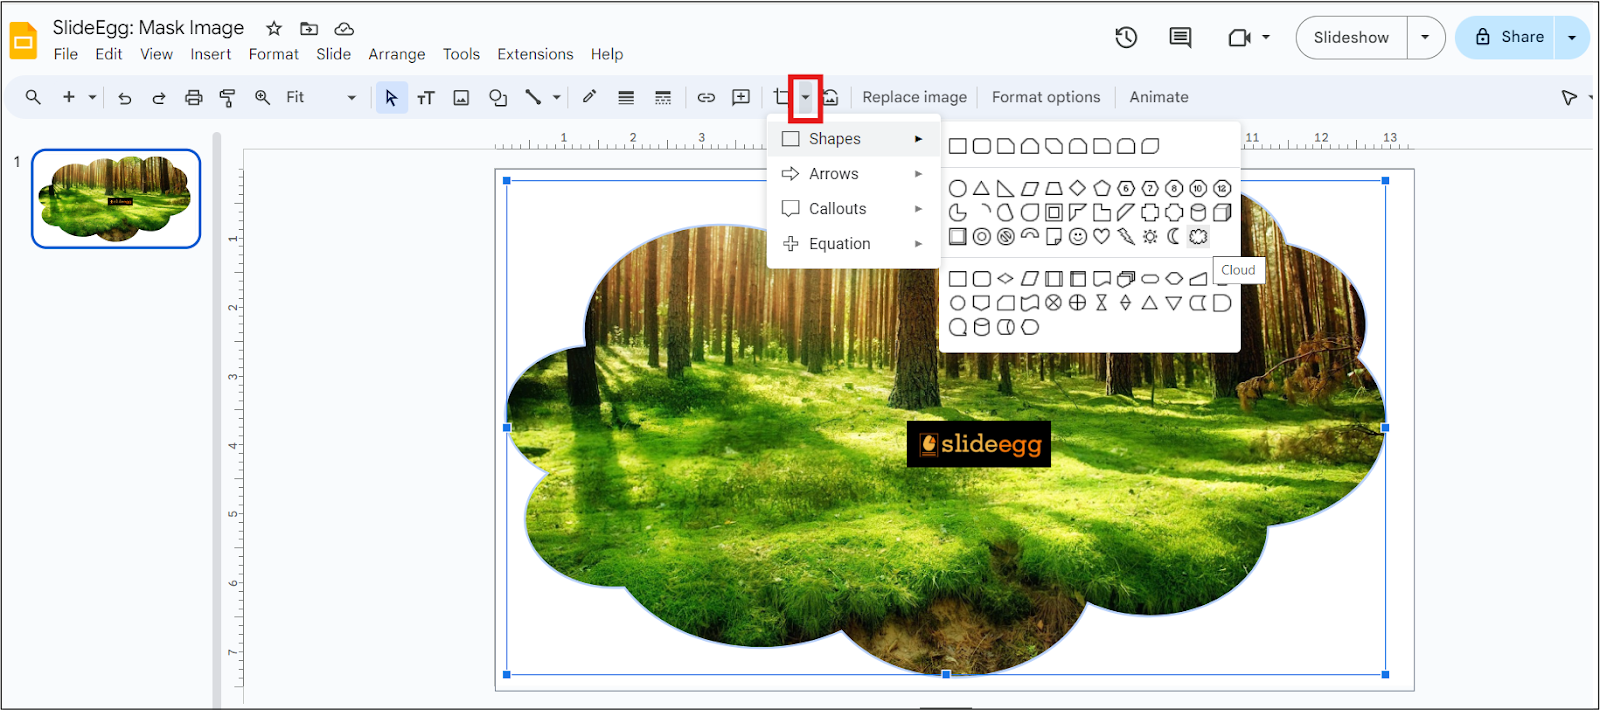
Step 2: Apply a Mask
- Click on the dropdown arrow next to the crop icon in the toolbar.
- Hover over “Mask image” and select the shape you want from the available options.
Step 3: Adjust the Mask
You can adjust the size and position of the masked image just like a regular image. Click and drag the corners to resize or drag the image to reposition it within the mask.
Enhancing Your Presentation with Premade Google Slides Themes
Using premade free Google Slides themes can save you time and give your presentation a polished look. Many websites are offering free presentation templates that you can easily download and apply to your slides.
How to Apply a Theme
- Select the “Theme” button on the toolbar.
- Browse through the available themes or click on “Import theme” at the bottom to upload a downloaded theme.
- Select your desired theme, and it will be applied to all your slides.
Benefits of Using Premade Themes
- Time-Saving: Quickly apply a cohesive look without spending time on design.
- Professional Appeal: Many free themes are designed by professionals, giving your presentation a sleek appearance.
- Consistency: Ensure all your slides have a uniform design, making your presentation look more organized.
Additional Tips
- Applying Image Effects: To further enhance your images, try applying various image effects in Google Slides. This can help you create eye-catching visuals.
- Making Images Transparent: Sometimes, you might want to blend images with the background or other elements. You can read our blog on how to make images transparent in Google Slides to learn how to achieve this effect.
Conclusion
Mastering the basics of inserting, cropping, and masking images in Google Slides can significantly elevate the quality of your presentations. Coupled with the use of premade themes, you can create professional, engaging, and visually appealing slides with ease. Experiment with these tools and tips, and you’ll be able to create presentations that not only convey your message effectively but also captivate your audience’s attention. Also, check out our blog on how to insert, crop, or mask images in PowerPoint, if you are interested in working with MS PowerPoint. Happy presenting!