| Quick Tips to Add a Checkbox in Google Slides Before we dive into the detailed steps, here’s a quick rundown: ✅Use a Text Box + Special Character → Insert a text box, go to Insert → Special characters → Search “checkbox” and select one. ✅Use a Square Shape → Draw a small square, adjust the size, and duplicate it for multiple checkboxes. ✅Use Emojis → Type ✔ or ☑ directly into a text box. ✅Use an Image → Copy a checkbox image and paste it into your slide. Alright, now let’s break it down step by step! |
Introduction
“Checklists bring order to chaos.” – Atul Gawande.
A well-structured checklist can turn a cluttered presentation into a clear and organized one. Google Slides, however, doesn’t offer a built-in checkbox feature like Google Docs. But that doesn’t mean you can’t add them!
There are a few simple workarounds to insert checkboxes in your slides, whether for to-do lists, quizzes, or interactive presentations. Let’s break down the easiest methods step by step.
🖥️ Method 1: Insert Checkbox Using Special Characters
This is the easiest way to add checkboxes without any extra tools.
Steps:
- Click on the slide where you want the checkbox.
- Go to Insert → Text box and create a small box.
- Click Insert → Special characters.
- In the search bar, type “checkbox”.
- Pick a checkbox symbol (☐, ☑, ✔) and click it to insert.
- Resize and copy-paste it for multiple checkboxes.
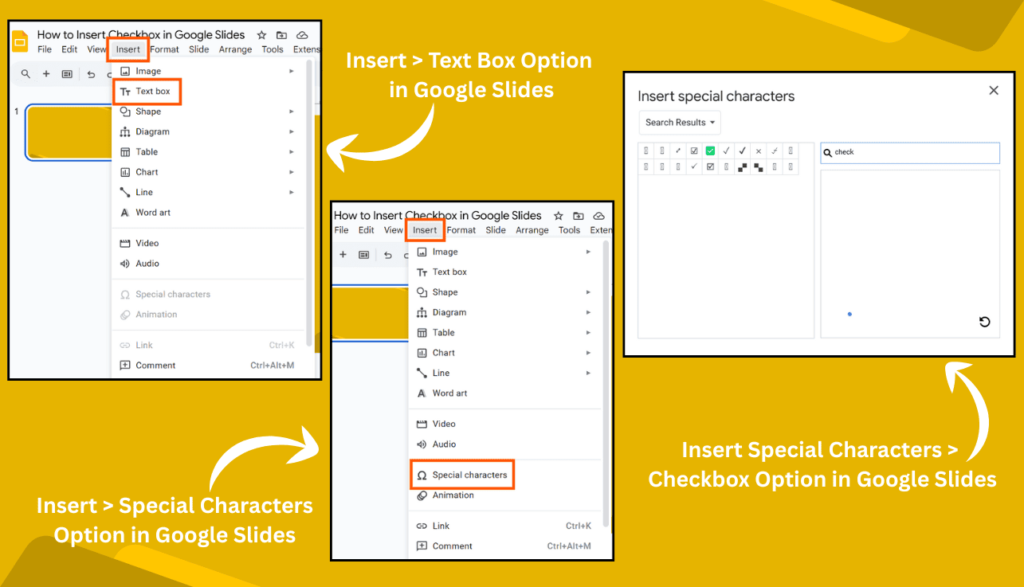
✅ Best for creating to-do lists and forms!
🔲 Method 2: Insert Checkbox Using Shapes
If you want more customizable checkboxes, this method works great!
Steps:
- Click on Insert → Shape → Shapes.
- Select the square shape (🟦).
- Draw a small square and resize it.
- Change the color, and border, or add a shadow if needed.
- Copy-paste it to create multiple checkboxes.
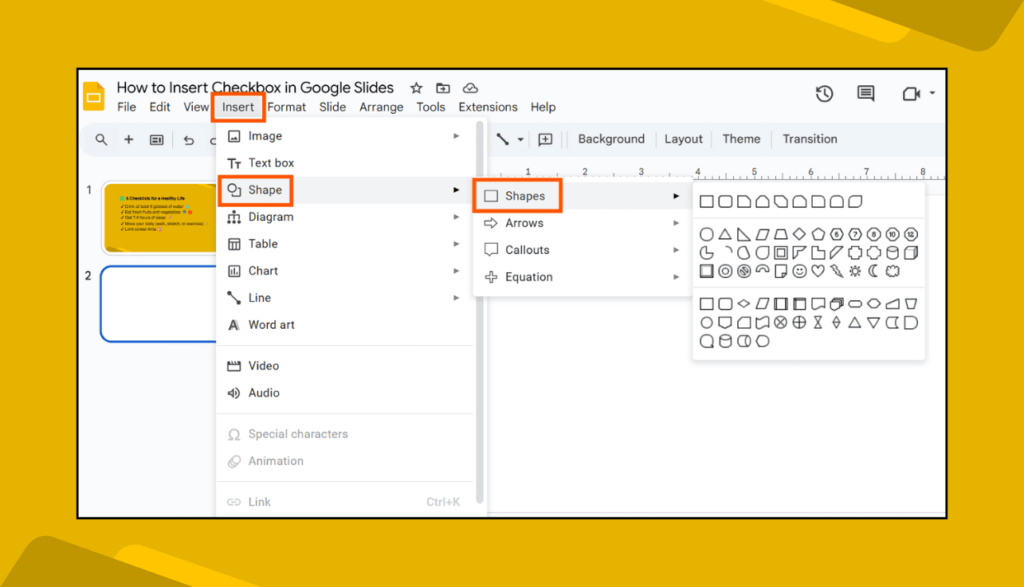
✅ Best for designing quizzes, surveys, and interactive slides!
🎨 Method 3: Insert Checkbox Using Emojis
Did you know you can add checkboxes using emojis? It’s super quick!
Steps:
- Click inside a text box.
- Press Windows + . (Windows) or Cmd + Ctrl + Space (Mac) to open the emoji keyboard.
- Type “checkbox” or “check” in the search bar.
- Click on a checkbox emoji (✔, ☑, ☐) to insert it.
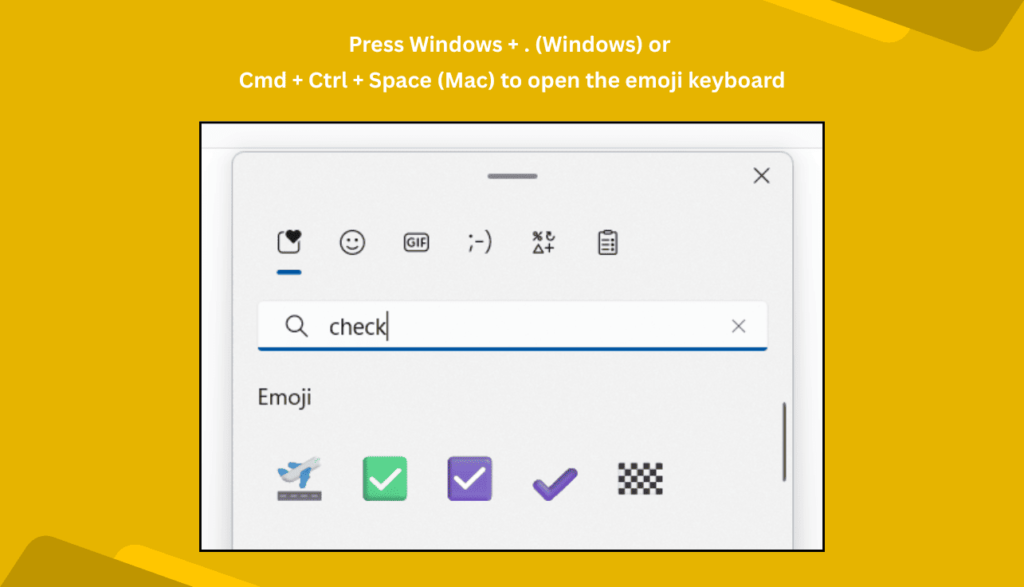
✅ Best for adding quick checkboxes in bullet lists!
🖼️ Method 4: Insert Checkbox Using Images
For a professional look, you can add a checkbox image.
Steps:
- Go to Insert → Image → Search the web.
- Type “checkbox icon” and select an image.
- Click “Insert” and resize it as needed.
- Copy and paste it for multiple checkboxes.
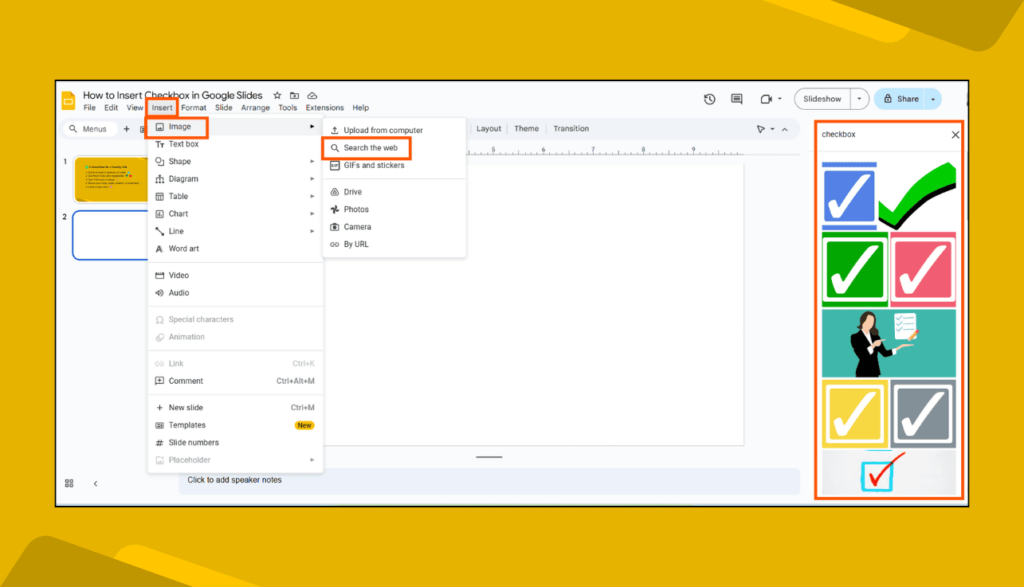
✅ Best for stylish, polished presentations!
🚀 Bonus: Make Your Checkboxes Clickable!
Want to make checkboxes interactive? Try this trick:
- Add two checkboxes (empty and checked versions) as images.
- Link the checked version to a new slide that shows it as “selected.”
- This creates a cool illusion of interactive checkboxes!
Perfect for interactive quizzes or to-do lists in Google Slides! 🎯
❓ FAQs
1. Can you check off checkboxes in Google Slides?
No, checkboxes in Google Slides are not interactive by default. However, you can manually replace an empty checkbox with a checked one.
2. What is the easiest way to add a checkbox?
Using special characters (Insert → Special characters) is the fastest and simplest method.
3. Can I use Google Forms instead for checkboxes?
Yes! If you need clickable checkboxes, use Google Forms instead of Google Slides.
Final Thoughts
Adding a checkbox in Google Slides is super easy once you know the tricks. Whether you use symbols, shapes, emojis, or images, you can create a clean and professional look in minutes.
Now, go ahead and make your presentations interactive and organized!