
Creating visually appealing presentations is essential for capturing and keeping your audience’s attention. When creating a presentation, images play a crucial role in making your content more engaging. Google Slides provides several tools and options to help you edit and customize images to fit your presentation’s theme and message. In this blog, we’ll explore the various ways you can edit images in Google Slides, ensuring your slides look professional and polished.
Adding and Inserting Images
Before diving into editing, you need to know how to add images to your slides:
Step 1: Insert Image
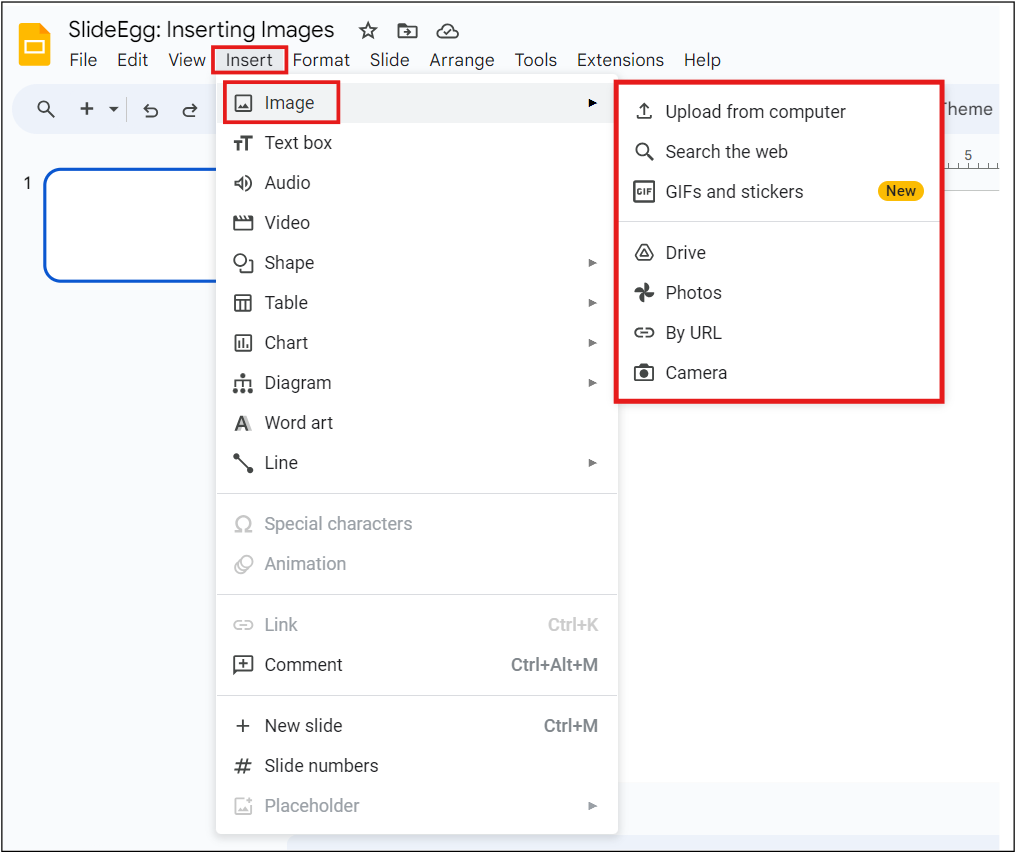
- Click on the “Insert” menu, then select “Image.” You can choose to upload from your computer, search the web, GIFs and stickers (new), drive, photos, by URL, or even take a snapshot.
Step 2: Drag and Drop
- You can also drag an image file directly from your computer into the slide.
Basic Image Editing Tools
Google Slides offers a range of basic tools to modify your images:
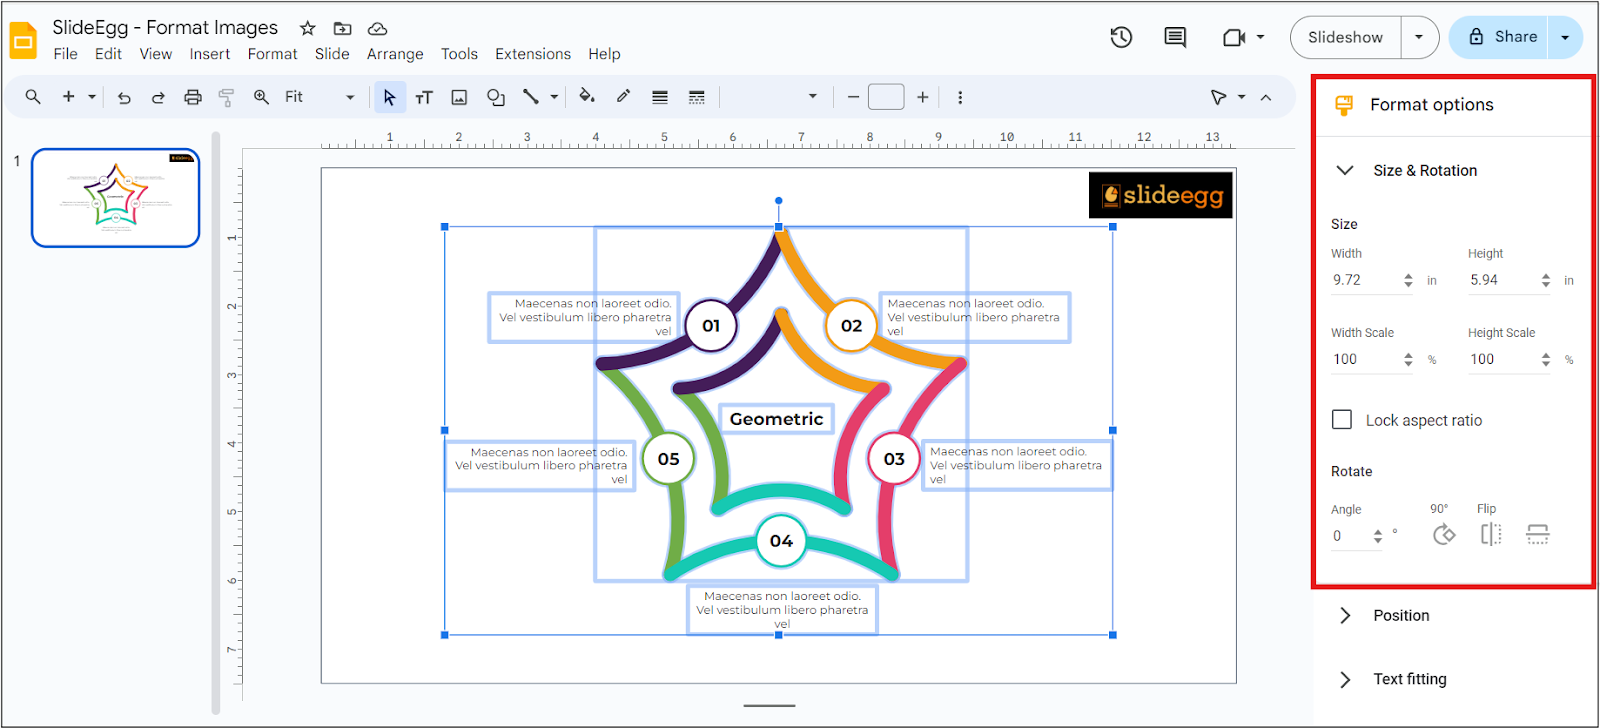
Resizing Images
- Manual Resize: Click on the image, then drag the corners to resize. Keep holding the Shift key to retain the aspect ratio.
- Using the Format Options: Select the image, right-click to get “Format options,” and use the “Size & Rotation” settings to enter specific dimensions.
Cropping Images
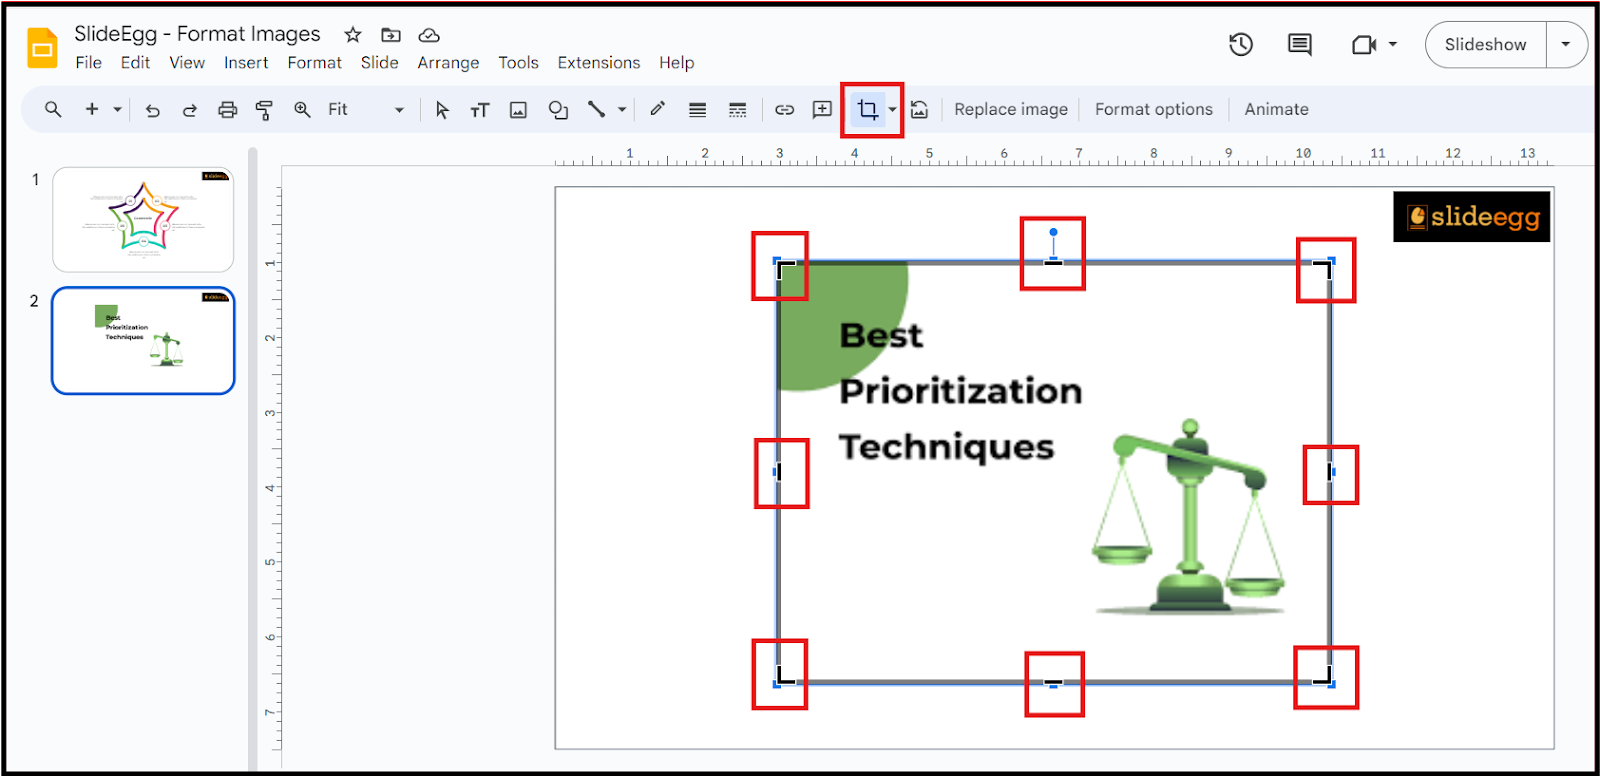
- Crop Tool: Click on the image, then select the crop icon from the toolbar. Drag the black bars to crop the image as needed.
- Masking: Click on the image, then the drop-down arrow next to the crop icon. Choose a shape to mask your image into different forms like circles, stars, etc.
Adjusting Image Position
- Positioning: Drag the image to reposition it on your slide. Use the alignment guides to center your image.
- Rotating: Use the rotate handle to manually rotate the image or use the “Rotation” option in the Format options panel.
Advanced Image Editing Tools
Google Slides also provides more advanced editing options:
Recoloring and Adjustments
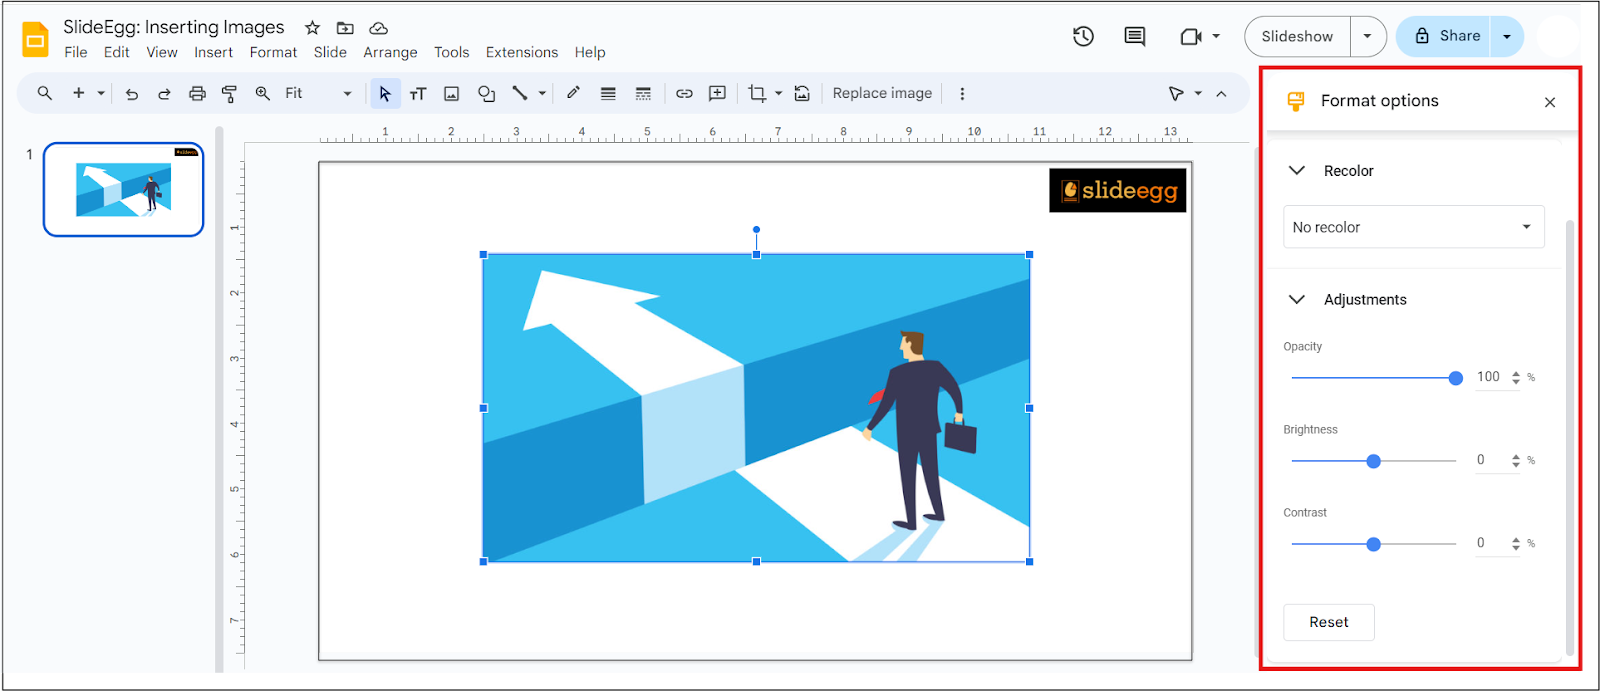
- Recoloring: Select the image, click “Format options,” and choose “Recolor” to apply different color filters.
- Adjustments: In the “Format options” panel, use the sliders under “Adjustments” to tweak transparency, brightness, and contrast.
Adding Borders and Shadows
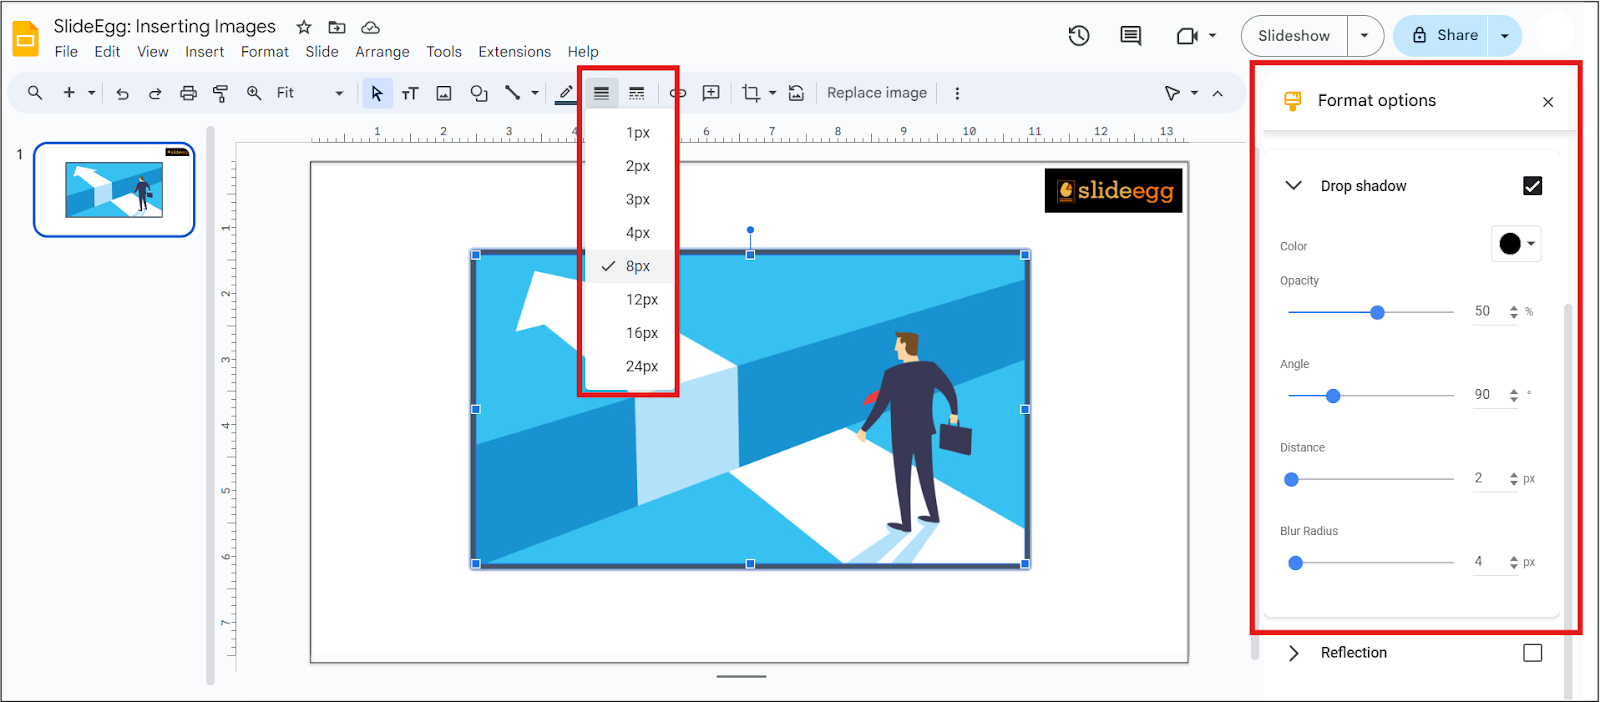
- Borders: Click on the image, select the border color icon from the toolbar, and choose your desired color. Adjust the weight and dash style for customization.
- Shadows: In the “Format options” panel, under “Drop shadow,” enable it and adjust the parameters like angle, distance, blur radius, and transparency.
While editing images, you might also need to change the background images or color to match your theme. For more detailed instructions on this, check out our blog on How to Edit Background Images and Color in Google Slides.
ProTips: Use Premade Google Slides Templates
To save time and enhance your presentation’s look, consider using premade free Google Slides themes available online. These templates often come with professionally designed layouts and placeholders that can be easily customized.
Tips for Effective Image Use in Presentations
Consistency and Relevance
- Ensure that your images are relevant to your content and add value to your message.
- Maintain a consistent style throughout your presentation for a professional look.
Quality and Resolution
- Use high-resolution images to avoid pixelation.
- Avoid overloading slides with too many images, which can distract from your main message.
Strategic Placement
- Place images strategically to support your text and highlight key points.
- Use whitespace effectively to keep your slides uncluttered.
Conclusion
Editing images in Google Slides is easy and simple with a variety of tools at your disposal. By mastering these basic and advanced editing techniques, you can create visually appealing presentations that captivate your audience. Don’t forget to take advantage of premade themes and templates to streamline your workflow and ensure a polished final product. For more tips and tricks on creating stunning presentations, visit our Tips & Tricks page, where we share various hacks to enhance your presentation skills. Happy presenting!