
Drawing on Google Slides can significantly enhance your presentations, making them more engaging and visually appealing. Whether you’re a teacher, student, or professional, mastering the art of drawing on Google Slides is a valuable skill. This blog will guide you through the process with simple steps and tips, ensuring you can create stunning visuals effortlessly.
Draw on Google Slides Using the Scribble Tool
Step 1: Sign in to Google Slides
Open your web browser and go to Google Slides (https://docs.google.com/presentation/). Sign in to your Google account if you haven’t done so already.
Step 2: Open or Create a Presentation
Choose an existing presentation or create a new one. Remember that the Scribble Tool isn’t available on the mobile app, so you’ll need to use a computer.
Step 3: Access the Scribble Tool
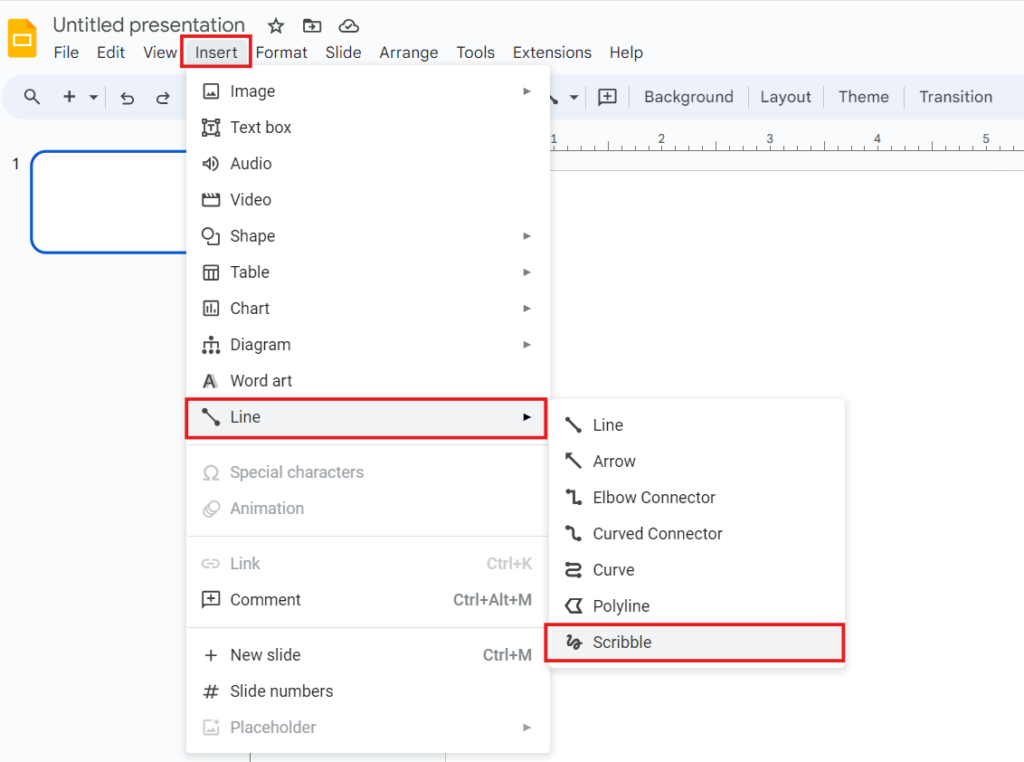
Click the down arrow next to the line tool in the toolbar above your slide. Alternatively, click the “Insert” menu button and hover over “Line.” Select “Scribble” from the options.
Step 4: Start Drawing
Your cursor will change into a crosshair. Click and drag the mouse to draw on your slide. Lift your finger from the mouse button to finalize your drawing. You can edit your drawing by changing the line thickness or making it a dashed line.
Step 5: Customize Your Scribble
Choose a color for your drawing by clicking the pen tool with a black line beneath it. You can also adjust line weight and style.
Step 6: Draw More Lines
Click the Scribble icon in the toolbar to draw additional lines.
Tips for Effective Drawing
- Use Consistent Colors: Stick to a color scheme that matches your presentation to maintain a cohesive look.
- Simplify Shapes: Keep your drawings simple and clear to avoid cluttering your slides.
- Practice Regularly: The more you practice drawing on Google Slides, the better you’ll become at creating professional-looking visuals.
Creating Custom Shapes and Illustrations
Custom shapes can add a unique and distinctive flair to your presentations. Here’s how you can create and use custom shapes in Google Slides:
1. Insert Custom Shapes:
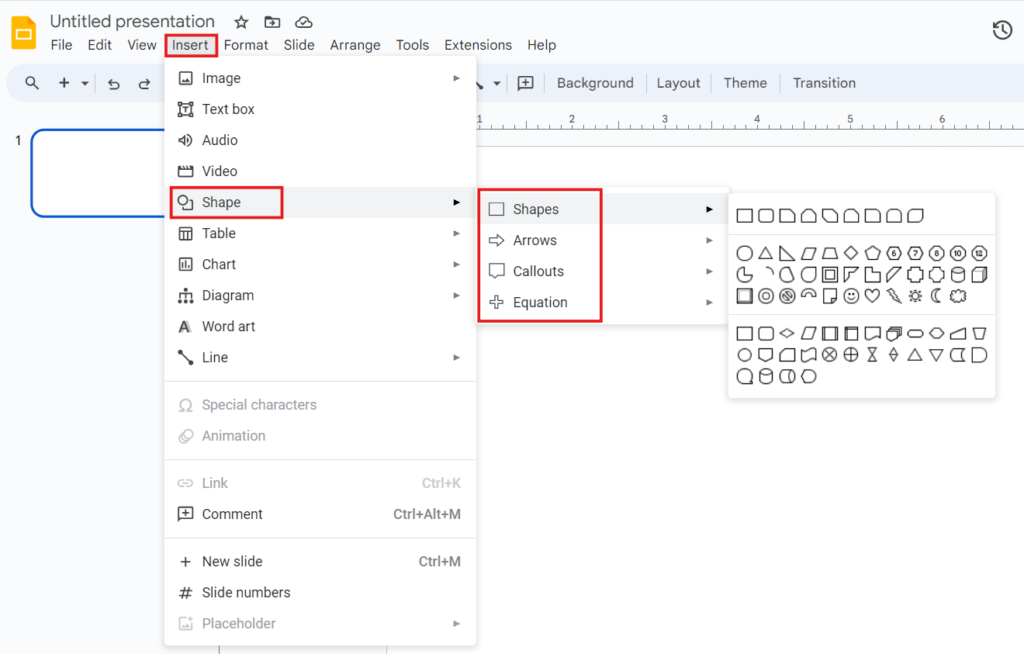
– Click on “Insert” and then choose “Shape” from the dropdown menu.
– Select the shape you want to use and draw it on your slide.
2. Modify Shapes:
– Once the shape is inserted, you can resize, rotate, and change its color using the formatting options.
– For more advanced customization, right-click on the shape and select “Format options”.
3. Combine Shapes:
– To create complex illustrations, combine multiple shapes.
– Use the “Arrange” menu to align and group shapes for better organization.
For a detailed guide on adding and customizing shapes, check out our blog on how to add custom shapes in Google Slides.
Using Free Google Slides Templates
Google Slides offers a variety of free templates that you can use to enhance your presentations. Here’s how to obtain and use them:
1. Access Templates:
– Go to the Google Slides homepage and click on “Template Gallery”.
– Search through the available templates and pick one that serves your needs.
2. Customize Templates:
– Once you’ve chosen a template, you can customize it by adding your content and modifying the design elements.
– Use the drawing tools to add your unique touch to the template.
3. Explore Online Resources:
– Numerous websites offer free Google Slides templates. These can be great for finding specialized designs for different types of presentations.
Conclusion
Drawing on Google Slides is a skill that can elevate your presentations, making them more dynamic and engaging. By following the steps outlined in this guide, you can master the basic and advanced drawing tools in Google Slides. Don’t forget to explore the free templates available online to save time and enhance your designs. Happy drawing!