Creating a dynamic and interactive presentation is essential in today’s digital world. Hyperlinks are a fantastic way to make your Google Slides presentations more engaging and informative. Whether you’re linking to a website, a different slide within your presentation, or an email address, hyperlinks can enhance your slides by providing additional resources and making your presentation more interactive. In this blog, we’ll walk you through the simple steps to create hyperlinks in Google Slides.
Why Use Hyperlinks in Google Slides?
Hyperlinks can significantly improve your presentations by:
- Allowing quick access to external websites for more information.
- Enabling easy navigation within your slides.
- Providing a direct link to email addresses for quick communication.
- Adding interactivity, which can make your presentation more engaging.
Step-by-Step Guide to Creating Hyperlinks in Google Slides
There are three primary ways to add hyperlinks in Google Slides: linking to a website, linking to another slide within the same presentation, and linking to an email address. Here’s how you can do each:
1. Adding a Hyperlink to a Website
To link to a website from your Google Slides presentation, follow these steps:
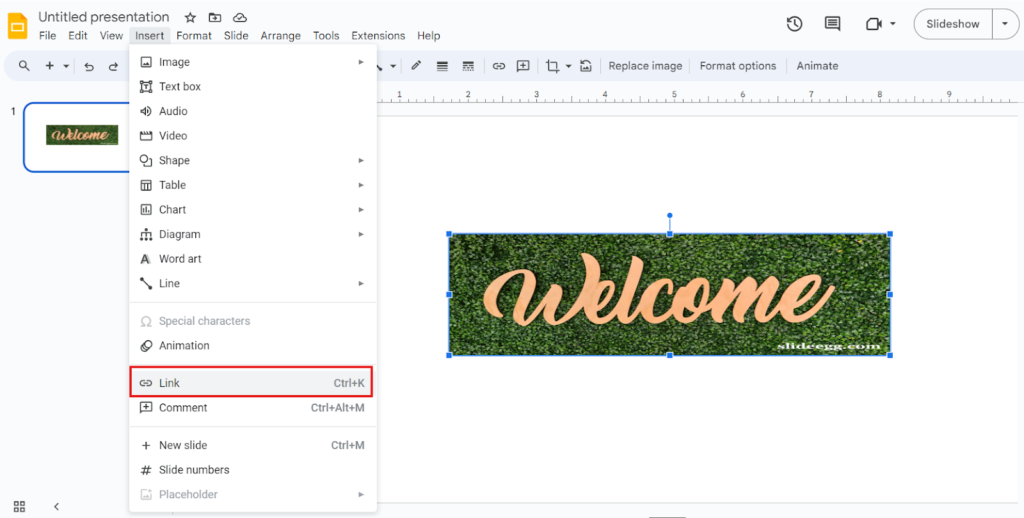
Step 1: Select the Text or Object: Highlight the text or select the object (like an image or shape) you want to link.
Step 2: Insert Link: Click on the “Insert” menu at the top of the screen and select “Link.” Alternatively, you can use the shortcut `Ctrl+K` (or `Cmd+K` on a Mac).
Step 3: Enter URL: A dialog box will appear. Type the URL of the website you want to connect to into the “Link” field.
Step 4: Apply the Link: Click “Apply.” The text or object will now be hyperlinked to the specified URL.
2. Linking to Another Slide in the Same Presentation
Creating links to other slides within the same presentation can help your audience navigate through your content more smoothly. Here’s how to do it:
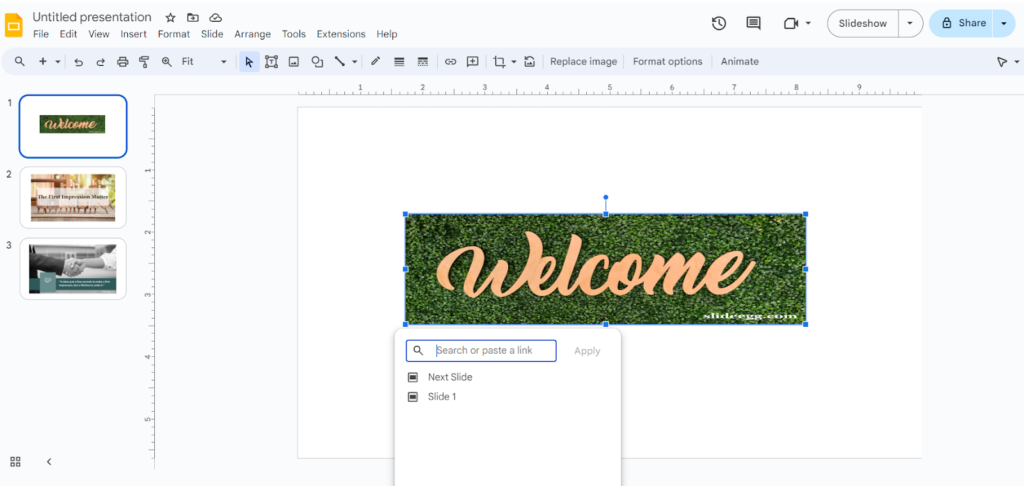
Step 1: Select the Text or Object: Highlight the text or select the object you want to link.
Step 2: Insert Link: Click on the “Insert” menu and select “Link.”
Step 3: Choose Slide: In the dialog box, click on the drop-down arrow next to “Slides in this presentation.” Select the slide you want to link to.
Step 4: Apply the Link: Click “Apply.” Your text or object will now link to the selected slide.
3. Linking to an Email Address
Linking to an email address can facilitate quick communication. Here’s how you can do it:
Step 1: Select the Text or Object: Highlight the text or select the object you want to link.
Step 2: Insert Link: Click on the “Insert” menu and select “Link.”
Step 3: Enter Email Address: In the dialog box, type `mailto:` followed by the email address (e.g., `mailto:example@example.com`).
Step 4: Apply the Link: Click “Apply.” The text or object will now be hyperlinked to open the email client with the specified email address.
Tips for Using Hyperlinks in Google Slides
- Be Clear and Descriptive: Ensure that the linked text or object clearly describes what the link is about. For instance, rather than using “Click here,” opt for “Visit our website for more details.”
- Check Your Links: Always test your hyperlinks to make sure they lead to the correct destination.
- Use Hyperlinks Sparingly: Too many links can be distracting. Use them judiciously to maintain the flow of your presentation.
Troubleshooting Common Issues
Sometimes, hyperlinks might not work as expected. Below are some typical issues and solutions:
- Broken Links: Ensure the URL is correct and that the website is active.
- Links Not Working in Presentation Mode: Make sure you are in presentation mode when testing links. Some links might not work correctly in edit mode.
- Email Links Not Opening: Check your browser and email client settings. Ensure that your email client is set as the default application for handling mailto links.
Conclusion
Hyperlinks are a powerful tool to make your Google Slides more interactive and informative. By following the steps outlined above, you can easily add hyperlinks to websites, other slides within your presentation, and email addresses. This will not only enhance the user experience but also provide additional resources and information to your audience. To make your presentations even more impressive, consider using pre-made Google Slides templates available online. These templates can save you time and provide a professional look for your slides.
For more tips and tricks on creating interactive presentations, check out our blog on how to make a hyperlink in PowerPoint. Mastering these skills will ensure that your presentations are not only visually appealing but also highly functional. Start enhancing your slides today with these simple steps and resources!
