Creating a mind map in Google Slides is a fantastic way to visualize your thoughts and ideas, whether for business presentations, educational purposes, or personal projects. Mind maps help to organize information hierarchically, making it easier to understand and remember. It plays a major role in business presentations to convey ideas. In this complete guide, we’ll walk you through the process of creating a mind map in Google Slides step by step. By the end of this guide, you’ll be able to create stunning mind maps that effectively communicate your ideas.
What is Mind Mapping?
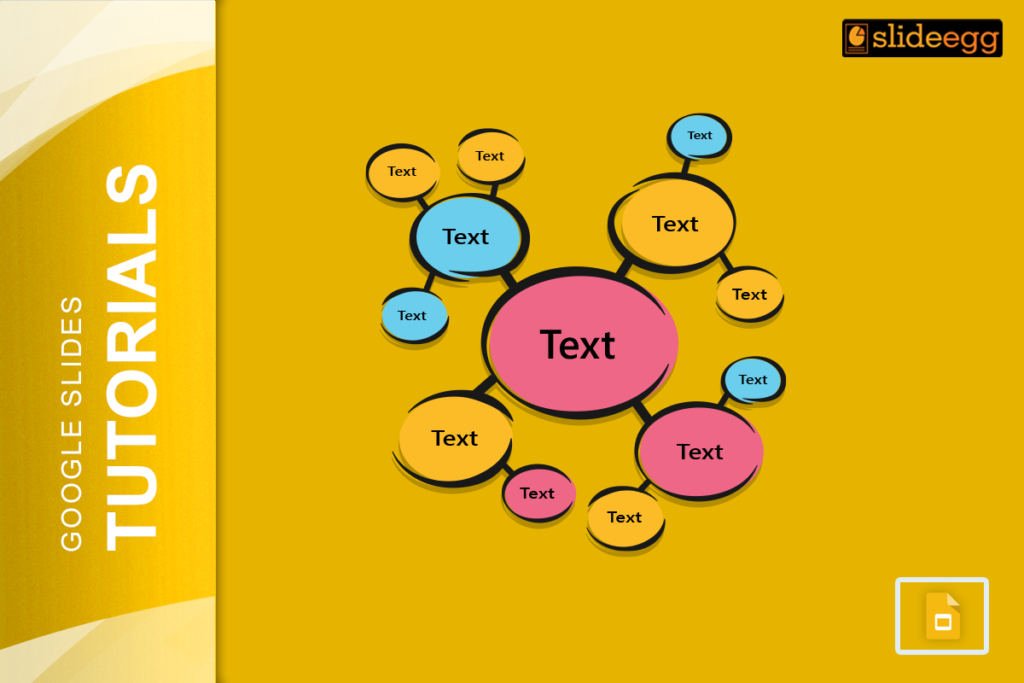
Mind mapping is a powerful technique that leverages visual thinking to organize and analyze information. It’s particularly useful in business presentations, brainstorming sessions, and educational contexts. Google Slides, a free and accessible tool, allows users to create dynamic and engaging mind maps without needing specialized software. Even there are many mind map templates available on the internet to save you time and provide inspiration.
Step-by-Step Guide to Creating a Mind Map in Google Slides
Step 1: Open Google Slides
First, open Google Slides by navigating to Google Slides (https://slides.google.com) and clicking on the “+” button to create a new blank presentation. If you prefer, you can also choose from free Google Slides themes available online to give your mind map a unique look.
Step 2: Set Up Your Slide
Start with a blank slide. You can delete any text boxes or placeholders that are automatically included in a new presentation. To do this, click on the text box and press the “Delete” key.
Step 3: Insert a Central Idea
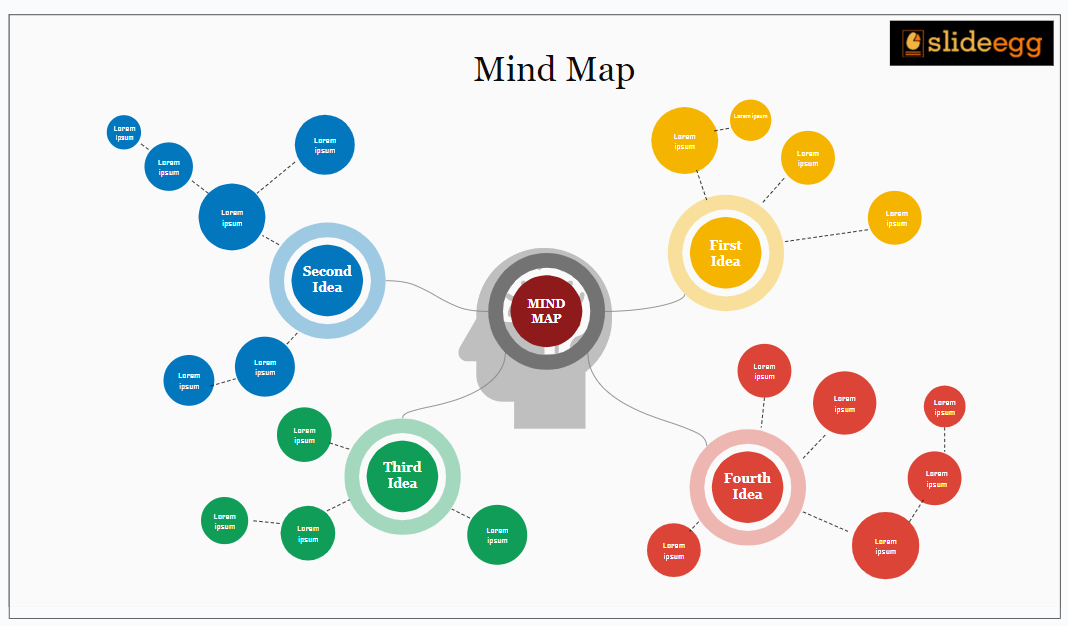
The central idea of your mind map should be placed at the center of the slide. To insert a text box, click on “Insert” in the top menu, then select “Text box.” Click and drag to create a text box in the middle of the slide and type your central idea. This could be a keyword or a phrase that represents the main topic of your mind map.
Step 4: Add Branches
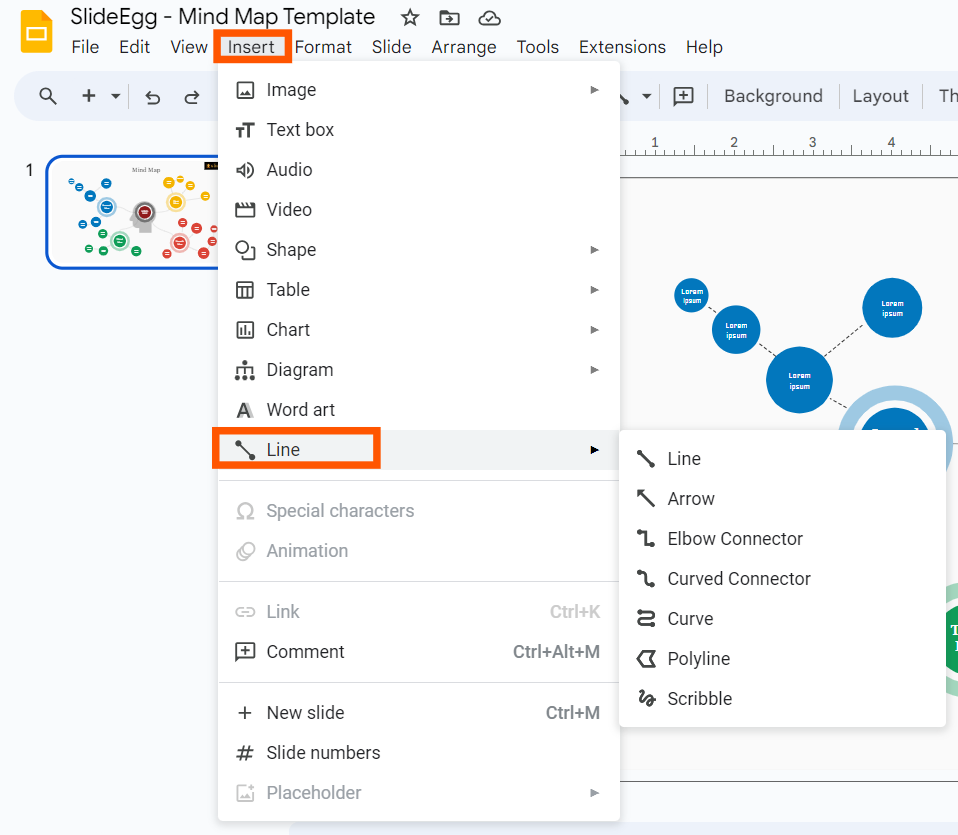
Branches are the subtopics or categories that stem from your central idea. To create branches, use the “Line” tool. Click on “Insert” in the top menu, select “Line,” and choose the type of line you want (e.g., arrow or straight line). Click and drag from the central idea to the location where you want to place your subtopic.
Step 5: Add Subtopics
Once you have your branches, it’s time to add subtopics. Insert text boxes at the end of each branch and type in your subtopic. You can use different colors, fonts, and sizes to differentiate between the main branches and subtopics. This helps in making your mind map more visually appealing and easier to understand.
Step 6: Connect Subtopics with Lines
To make your mind map coherent, connect the subtopics with lines. This visually represents the relationship between different ideas. Use the “Line” tool as you did earlier to draw lines between subtopics and their corresponding branches.
Step 7: Customize Your Mind Map
Customization is key to making your mind map engaging. Use different colors to represent different branches or categories. Google Slides allows you to change the color of lines and text boxes easily. Click on the item you want to customize, then use the toolbar options to change colors, line styles, and more.
Step 8: Use Shapes for Additional Visual Elements
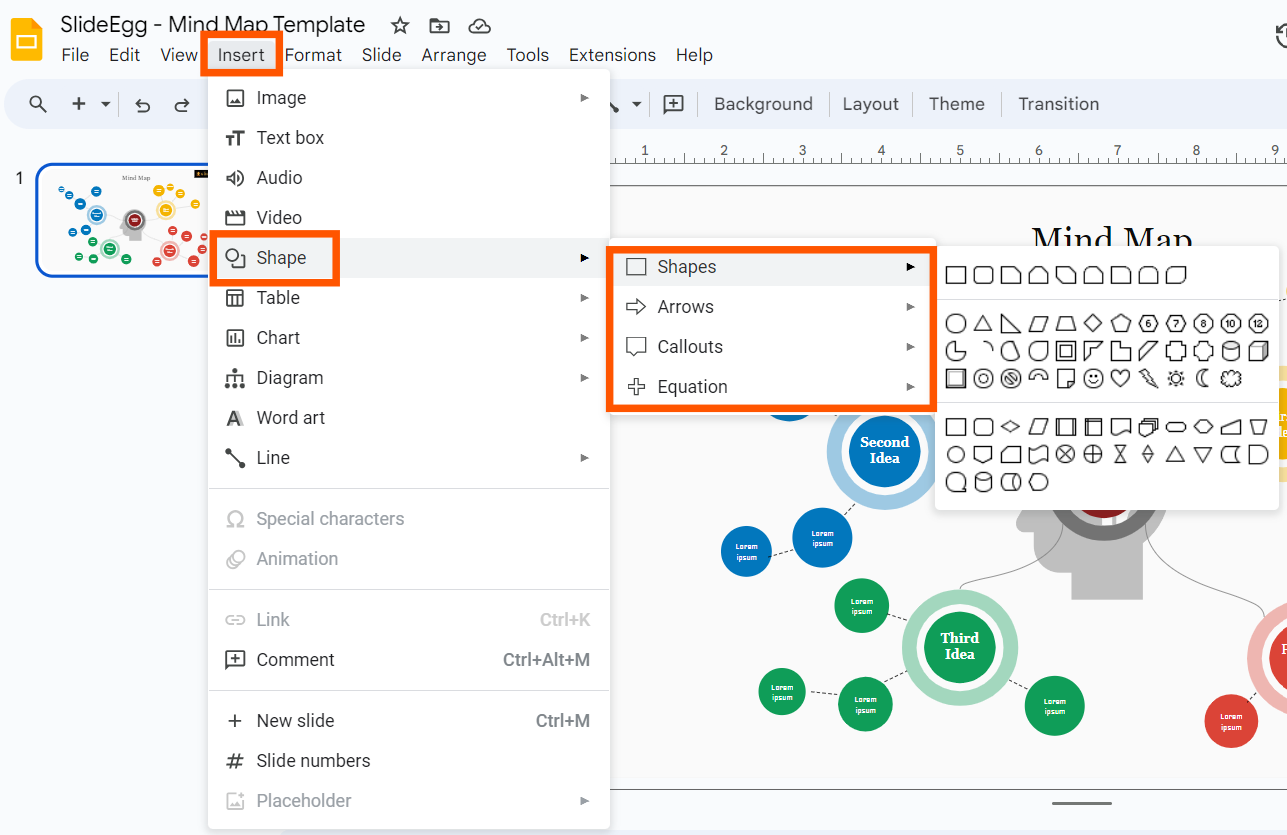
Shapes can be used to highlight important points or to group related subtopics. To insert a shape, click on “Insert” in the top menu, select “Shape,” and choose the shape you want. You can then click and drag to place the shape on your slide.
Step 9: Add Images and Icons
Enhancing your mind map with images and icons can make it more captivating. To add images, click on “Insert” in the top menu, select “Image,” and choose where to upload your image from. You can also use the built-in Google Image search to find relevant images.
Step 10: Save and Share Your Mind Map
Once you are satisfied with your mind map, save your presentation. Google Slides automatically saves your work in your Google Drive, but you can also download it as a PDF or PowerPoint file. To share your mind map, click on the “Share” button in the top right corner and enter the email addresses of your collaborators.
Conclusion
Creating a mind map in Google Slides is an easy and effective way to visualize and organize your thoughts. By following this guide, you can create detailed and visually appealing mind maps that can enhance your presentations and brainstorming sessions. Additionally, visit our tips and tricks page for more presentation hacks.