Creating a banner in Google Slides is a simple process that can be done quickly and easily. Whether you’re designing a banner for a presentation, a social media post, or an event, Google Slides offers the tools you need. This guide offers detailed, step-by-step directions to assist you throughout the process. By the end, you’ll be able to create professional-looking banners with ease.
Step 1: Open Google Slides
- Access Google Slides: Open your web browser and go to Google Slides: https://slides.google.com.
- Create a New Presentation: Click on the “+ Blank” option to start a new presentation.
Step 2: Set Up the Slide Dimensions
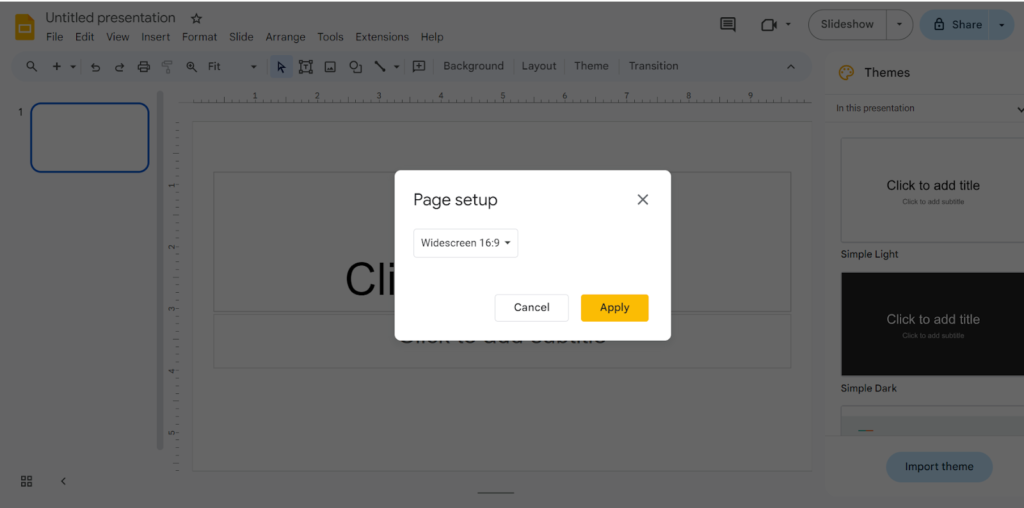
To create a banner, you need to adjust the slide size.
- Open Page Setup: Click on “File” in the top menu, then select “Page Setup.”
- Custom Dimensions: In the Page Setup window, click on the dropdown menu and select “Custom.”
Step 3: Design the Background
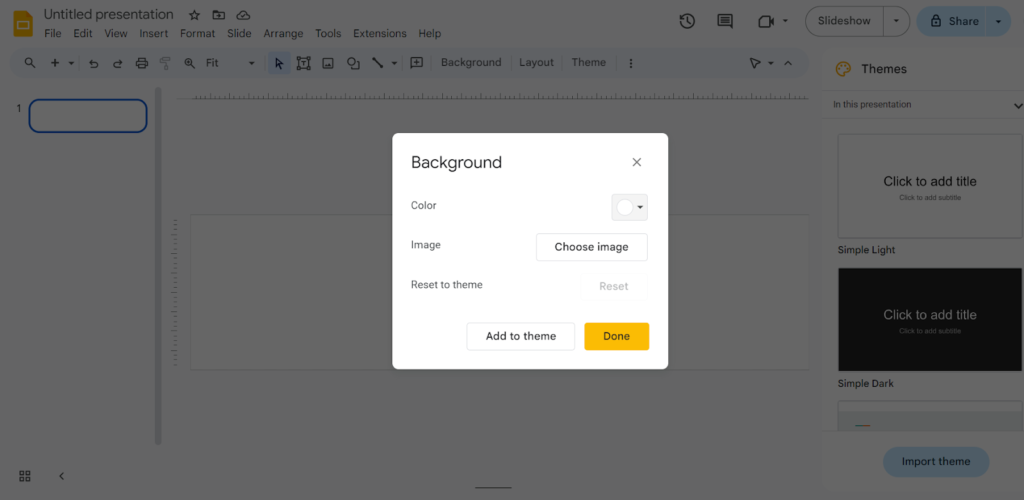
- Add a Background Color: Click on “Background” in the top menu. Choose a color that fits your design needs. You can also use an image as the background by clicking “Choose image” and uploading a photo from your computer.
- Insert Shapes: Use the “Shape” tool to add rectangles, circles, or other shapes to your banner. This can help structure your design.
Step 4: Add Text
- Insert a Text Box: Click on the “Text box” icon in the toolbar and draw a text box on your slide.
- Type Your Message: Enter the text you want to display on your banner. Make sure it’s concise and impactful.
- Format Text: Highlight your text and use the toolbar to change the font, size, color, and alignment. Bold or italicize important words to make them stand out.
Step 5: Add Images and Icons
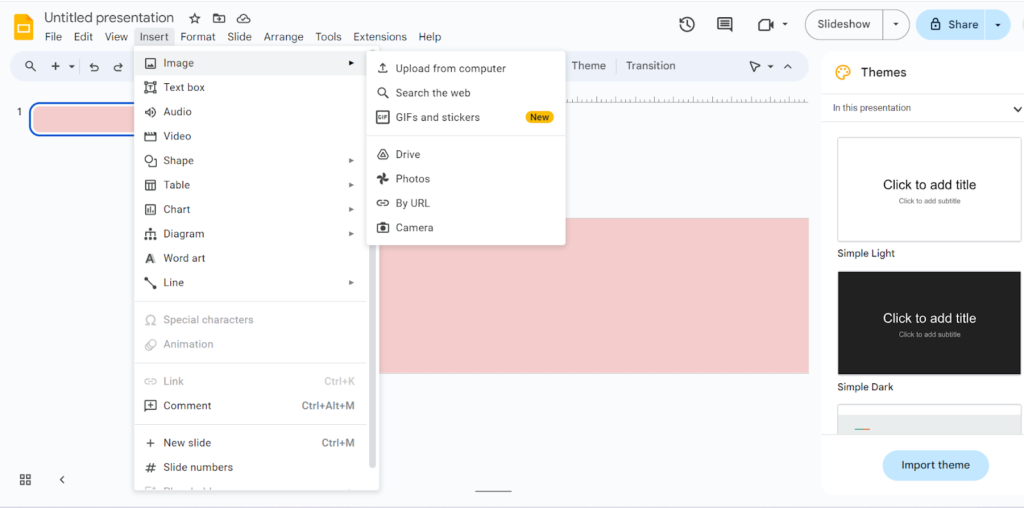
- Insert Images: Click on “Insert” in the top menu, then select “Image.” You can upload images from your computer, search the web, or use Google Drive.
- Use Icons: Icons can enhance your banner. You can find free icons online or use add-ons like “Icons by Noun Project” available in Google Slides.
Step 6: Arrange and Align Elements
- Move Elements: Click and drag text boxes, images, and shapes to arrange them on your banner.
- Align Elements: Use the alignment tools in the toolbar to ensure everything is perfectly aligned. You can align objects to the left, right, center, or justify them.
Step 7: Add Final Touches
- Use Layers: Right-click on an element and use the “Order” option to bring it forward or send it backward. This helps create a layered look.
- Add Borders and Shadows: Enhance your text and shapes by adding borders and shadows. This can make your banner more visually appealing.
Step 8: Save and Export Your Banner
- Save Your Work: Google Slides automatically saves your progress. To ensure your work is saved, click on “File” and select “Save.”
- Download as an Image: To use your banner outside of Google Slides, click on “File,” then “Download,” and choose “PNG image” or “JPEG image.” This will download your banner as an image file.
Step 9: Use Your Banner
- Insert into Presentations: If you’re using the banner in a presentation, insert it into your slides by clicking “Insert,” then “Image,” and uploading your banner.
- Share on Social Media: For social media, upload the downloaded image file directly to your social media platform of choice.
Using Pre-Made Google Slides Themes
While creating a banner from scratch can be fun, using pre-made Google Slides themes can save time and offer professional designs.
Finding Pre-Made Themes
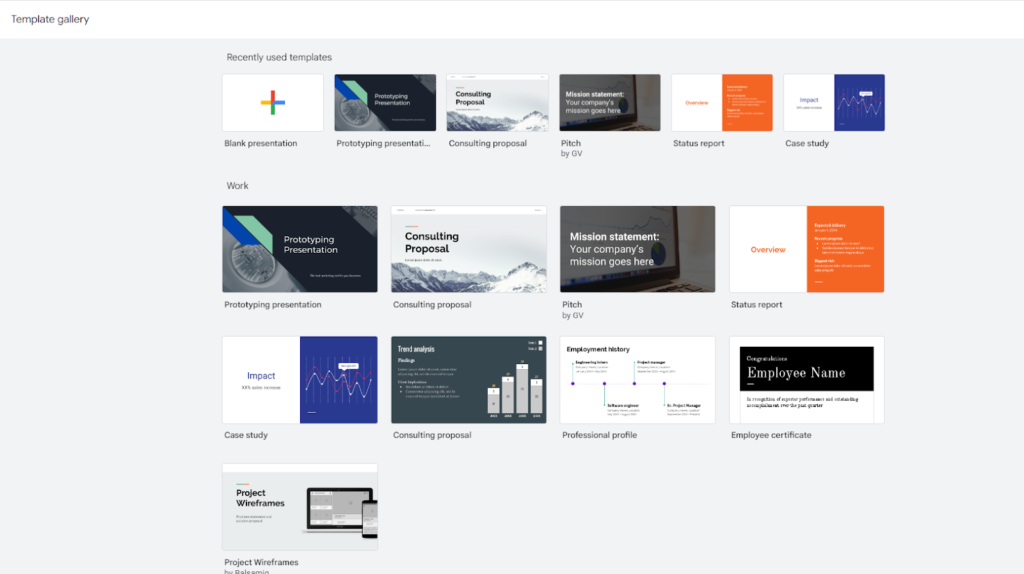
- Explore Google Slides Templates: Google Slides offers a variety of templates that can be used or modified to create banners. Go to the Google Slides homepage and click on “Template Gallery” to browse available options.
- Search Online: Many websites offer free and premium Google Slides templates with a vast collection of themes suitable for different purposes.
Using Pre-Made Themes for Banners
- Download the Template: After selecting a template you like, download it from a reputable website, ensuring it is compatible with Google Slides.
- Import the Template: Open Google Slides, click on “File,” then “Import slides,” and upload the downloaded template.
- Customize the Template: Adjust the template to fit your banner dimensions and content. Change the text, images, and colors to match your brand or event theme.
Benefits of Using Pre-Made Themes
- Time-Saving: Pre-made themes can significantly reduce the time needed to create a banner, especially if you’re not a design expert.
- Professional Look: These templates are often created by professional designers, ensuring a high-quality appearance.
- Consistency: Using a professional template can help maintain a consistent look across multiple banners or slides, which is particularly useful for branding purposes.
Tips for Creating Effective Banners
- Keep It Simple: Avoid cluttering your banner with excessive text or numerous images. Simplicity often makes for a more powerful message.
- Use Contrasting Colors: Ensure that the text is readable by using colors that contrast well with the background.
- Focus on One Key Message: Make sure your banner has a clear focus. Highlight the most important information to grab attention quickly.
- Test Different Designs: Don’t be afraid to experiment with different layouts and designs. Create multiple versions and see which one works best.
The Bottom Line
Creating a banner in Google Slides is an excellent way to design professional-looking graphics without the need for specialized software. By following these steps, you can create a customized banner that suits your needs, whether it’s for a presentation, social media, or an event. Remember, practice makes perfect. The more you use Google Slides, the more comfortable you’ll become with its features, allowing you to create even more impressive designs over time. You can also check out our how to make a poster in Google Slides tutorial to learn the steps for making beautiful posters. Happy designing!
