| Quick Tips to Change Image Shape in Google Slides Want to make your slides more creative? Here’s a quick way to crop an image into any shape in Google Slides: ✔ Click on the Image – Select the image you want to reshape. ✔ Find the Crop Tool – Click the small arrow next to the crop icon in the toolbar. ✔ Choose a Shape – Pick a shape like a circle, star, or heart. ✔ Adjust the Image – Resize or move the image inside the shape if needed. And that’s it! Now, let’s dive into the detailed step-by-step guide with some extra tips. |
Give Your Images a Unique Shape in Google Slides
A plain square or rectangle image can look boring on a slide. But did you know you can crop images into cool shapes in Google Slides? Circles, stars, arrows, and even speech bubbles—you can turn any image into a fun, eye-catching shape!
This trick is great for presentations, school projects, or business slides. It makes your slides look more creative and visually appealing without using any extra software.
The best part? It’s super easy! Let me show you how.
1. How to Crop an Image into a Shape in Google Slides
Google Slides lets you crop images into different shapes in just a few clicks. Here’s how:
Step-by-Step Guide:
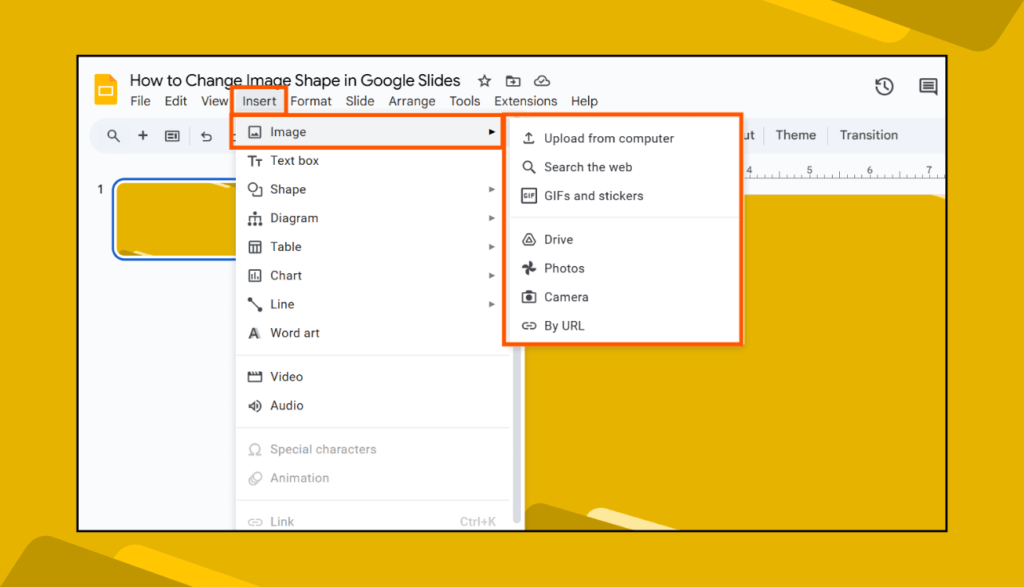
1️⃣ Insert an Image – Click on “Insert”> “Image” and upload or select an image.
2️⃣ Select the Image – Click on the image to activate the editing options.
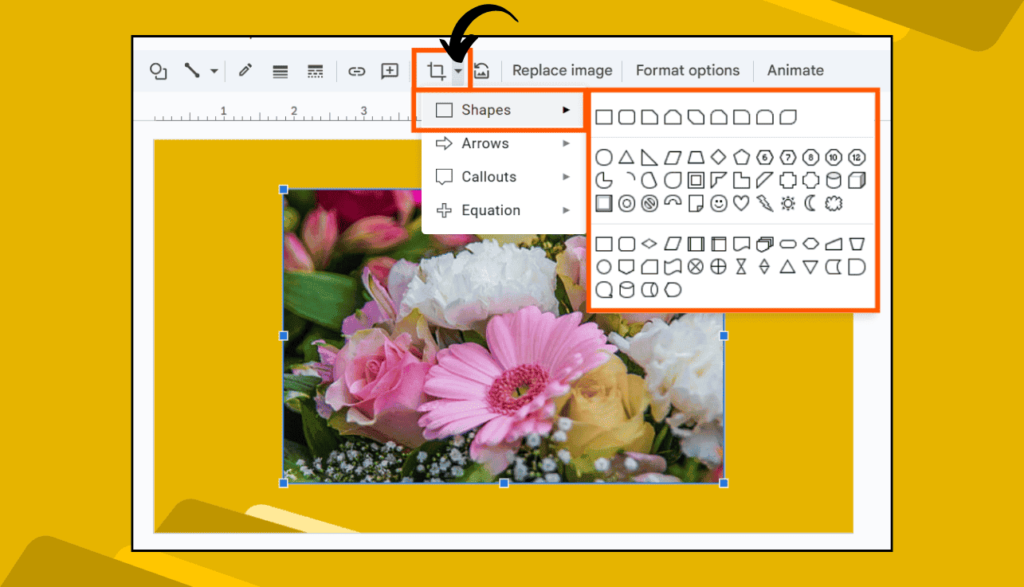
3️⃣ Find the Crop Tool – Look for the crop icon in the toolbar (a small rectangle with a slash).
4️⃣ Click the Drop-Down Arrow – Instead of clicking directly, click the small arrow next to it.
5️⃣ Choose a Shape – You’ll see many shape options like circles, stars, and arrows. Click on one.
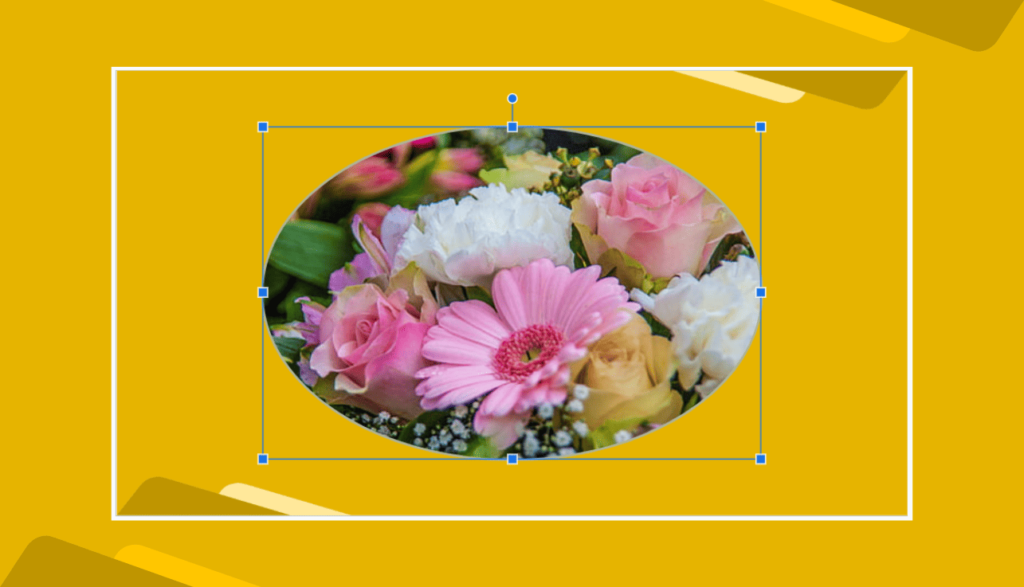
6️⃣ Adjust if Needed – Drag the edges to resize or move the image inside the shape.
📌 Tip: If you want a perfect circle, use a square image before cropping!
2. How to Add a Border Around the Cropped Image
Once you crop an image into a shape, you might want to add a border to make it stand out.
Steps to Add a Border:
🔹 Click on the Image – Select the cropped image.
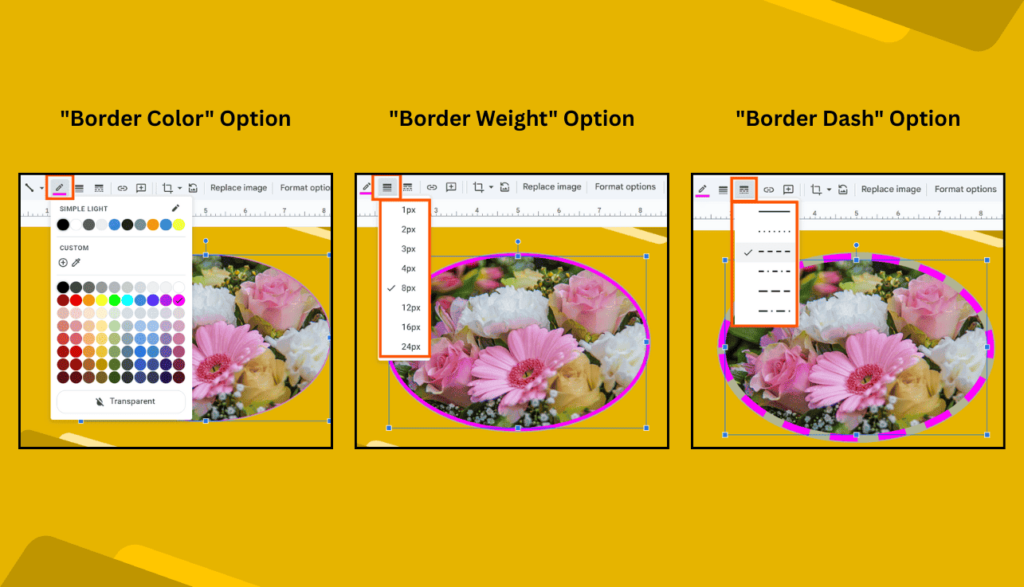
🔹 Click on the “Border Color” Icon – It looks like a pencil in the toolbar.
🔹 Choose a Color – Pick any border color you like.
🔹 Adjust Border Thickness – Click the “Border weight” icon to make the border thicker or thinner.
💡 Bonus Tip: Want a dashed or dotted border? Click the “Border Dash” option to change the style!
3. How to Reset an Image to Its Original Shape
If you’re not happy with the cropped shape, you can reset the image back to normal.
Here’s how:
Method 1:
✅ Click on the Image – Select the cropped image.
✅ Click the Crop Tool Again – Open the shape options.
✅ Choose the Rectangle Shape – This will bring the image back to its original shape.
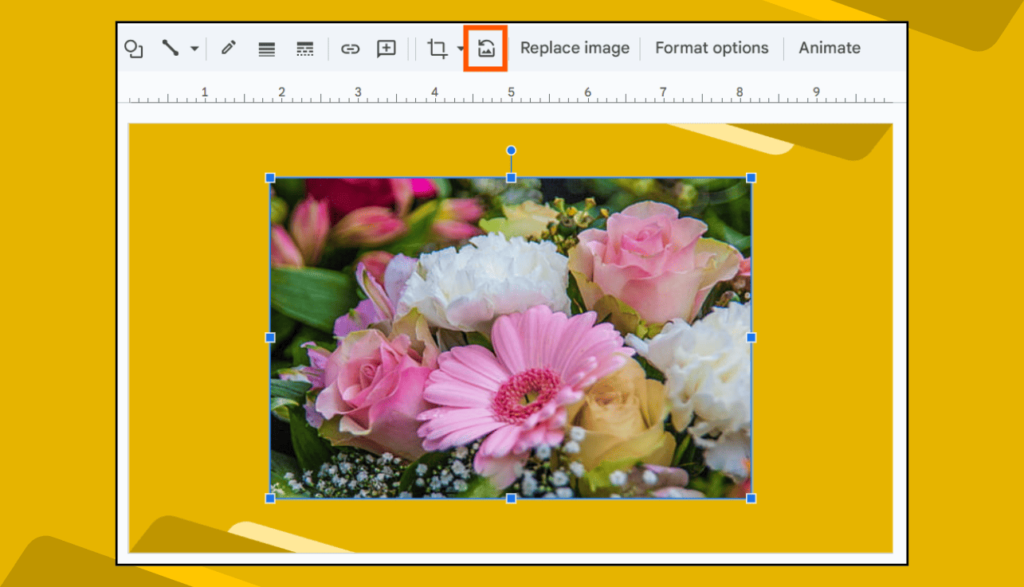
Method 2:
✅ Click on the Image – Select the cropped image.
✅ Click the Reset Image Tool – You can find it next to the crop tool.
✅ And that’s it! This will reset the image back to its actual shape.
You can now crop it into a new shape or leave it as it is.
FAQs About Changing Image Shapes in Google Slides
1. Can I crop an image into a custom shape?
No, Google Slides only allows pre-set shapes. But you can combine shapes to create a custom design!
2. Why is my image getting stretched after cropping?
If your image looks stretched, try resizing it before cropping or adjusting it inside the shape.
3. Can I use this feature on Google Slides mobile?
No, cropping images into shapes is only available on the desktop version of Google Slides.
4. How do I make a perfect circle crop?
Use a square image before selecting the circle shape for an even crop.
5. What’s the best way to make my slides look professional?
Use a consistent shape style, add a border, and align images properly to keep the slides neat and attractive.
Final Thoughts
Changing an image shape in Google Slides is an easy way to make your presentations more visually appealing. Whether you’re cropping a profile picture into a circle or adding fun shapes for a creative project, this feature helps you design slides that stand out.
Now that you know how to do it, go ahead and give your images a fresh new look!