Creating a visually appealing and well-organized presentation in Google Slides can significantly enhance your audience’s engagement. Knowing how to arrange and align objects effectively can make your slides more professional and easier to understand. In this easy-to-follow tutorial, we’ll walk you through the essential techniques for arranging and aligning objects in Google Slides.
Basic Tools and Options in Google Slides
To begin, let’s explore the fundamental tools and options Google Slides offers for arranging and aligning objects. These tools are intuitive and easy to use, making them accessible even if you don’t have advanced design skills. With practice, you’ll be able to create polished and cohesive slides that convey your message effectively.
Step 1: Understanding the Arrange Menu
The Arrange menu in Google Slides is your go-to for aligning and distributing objects. To access this menu, select the object you want to arrange, then click on “Arrange” in the top menu bar. Here, you’ll find several options:
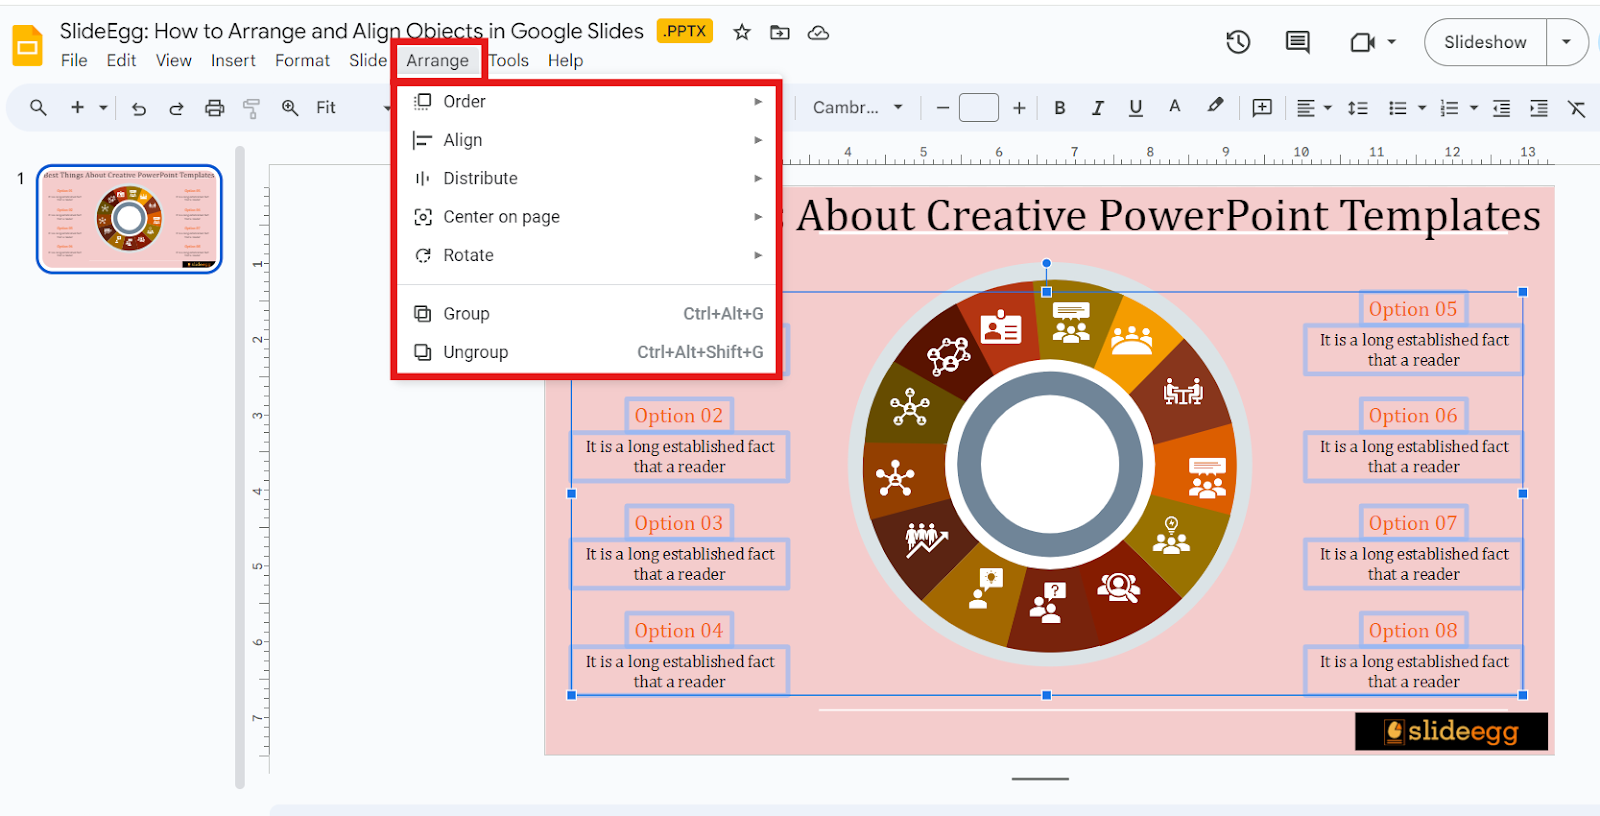
- Order: This option allows you to bring objects to the front or send them to the back. It’s useful when you have overlapping elements and need to prioritize visibility.
- Align: You can align objects to the left, center, right, top, middle, or bottom. They help maintain a consistent and professional appearance.
- Distribute: If you have multiple objects and want to space them evenly, the distribute options can help. You can distribute objects either horizontally or vertically.
- Center on Page: Quickly center your object either horizontally or vertically on the slide.
Step 2: Using Alignment Guides
Google Slides provides alignment guides to help you position objects precisely. These guides appear as red lines when you move objects around. They indicate when your object is aligned with other elements on the slide or with the slide itself. This visual aid makes it easier to achieve balanced layouts without guessing.
Step 3: Grouping Objects
Grouping objects is a handy feature when you want to move or resize multiple items as a single unit. To group objects, select them while holding down the Shift key, right-click, and choose “Group.” This action simplifies the process of arranging complex layouts. If you need more details on this, check out our blog “Group or Ungroup Objects in Google Slides for Easy Editing.”
Step 4: Aligning Text Boxes and Images
Text boxes and images are common elements in presentations. Aligning these objects can make your slides look more structured. Select the text box or image, then use the alignment options in the Arrange menu. For a more polished look, consider aligning text boxes with images or other objects on the slide.
Step 5: Using the Snap to Grid Feature
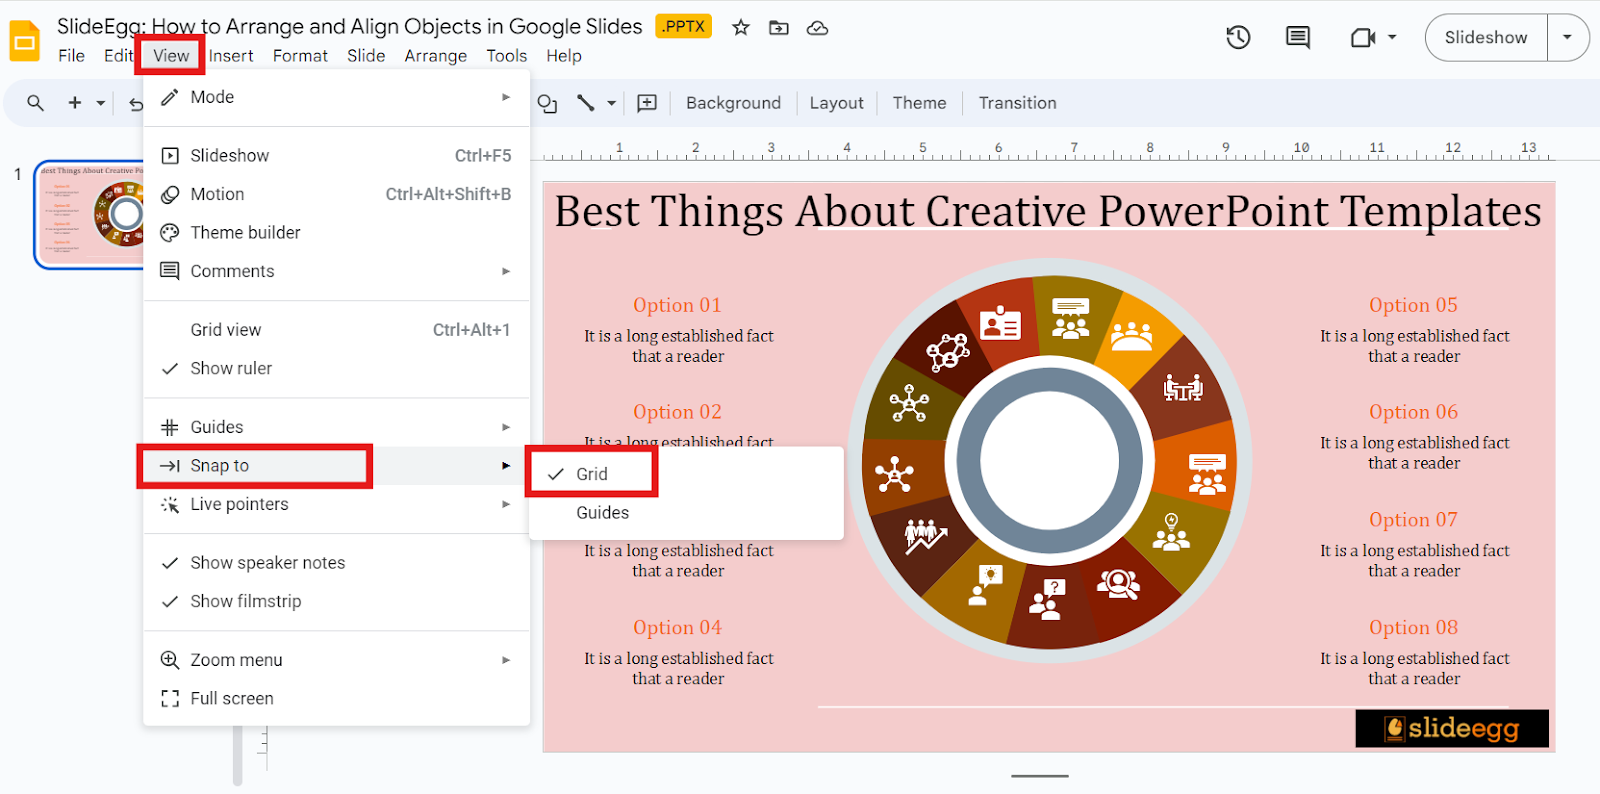
The Snap to Grid feature helps you align objects to a predefined grid on the slide. This feature is especially useful for creating uniform layouts. To enable Snap to Grid, go to “View” in the top menu bar and select “Snap to Grid.” Objects will then automatically align to the nearest grid line as you move them.
Step 6: Distributing Objects Evenly
Even the distribution of objects ensures a balanced and aesthetically pleasing slide. To distribute objects evenly, select all the objects you want to distribute, go to the Arrange menu, and choose either “Distribute Horizontally” or “Distribute Vertically.” This feature is perfect for creating tidy and organized slides.
Using Free Templates
To enhance the visual appeal of your presentations, consider using free Google Slides themes available online. These themes offer professionally designed layouts that can save you time and effort. Simply search for free Google Slides templates, download the one you like, and import it into your presentation. This addition can give your slides an attractive look with ease.
Dive Deeper into Presentation Hacks
For more advanced tips and tricks for making perfect presentations, don’t miss our section on presentation hacks. You’ll find a wealth of information to help you master Google Slides and deliver impressive presentations.
Let’s Wind Up
Mastering the arrangement and alignment of objects in Google Slides can significantly elevate the quality of your presentations. By utilizing the Arrange menu, alignment guides, grouping feature, Snap to Grid, and even distribution tools, you can create professional and engaging slides with ease. And for more insights, be sure to read our related blogs for comprehensive guidance. With these tips and tools at your disposal, you’re well on your way to becoming a Google Slides pro. Happy presenting!