Google Slides is a versatile tool for creating presentations. One of its many features is the ability to apply various image effects to make your slides more visually appealing. In this guide, we’ll walk you through the steps to apply image effects in Google Slides, ensuring your presentations stand out. We’ll also cover how you can use pre-made Google Slides Themes available online to save time and effort.
Why Use Image Effects?
- Enhance Visual Appeal: Adding effects can make your images look more professional and engaging.
- Highlight Key Points: Effects like shadows and reflections can draw attention to important elements.
- Maintain Audience Interest: Visually appealing slides can keep your audience interested and focused.
Step-by-Step Guide to Applying Image Effects in Google Slides
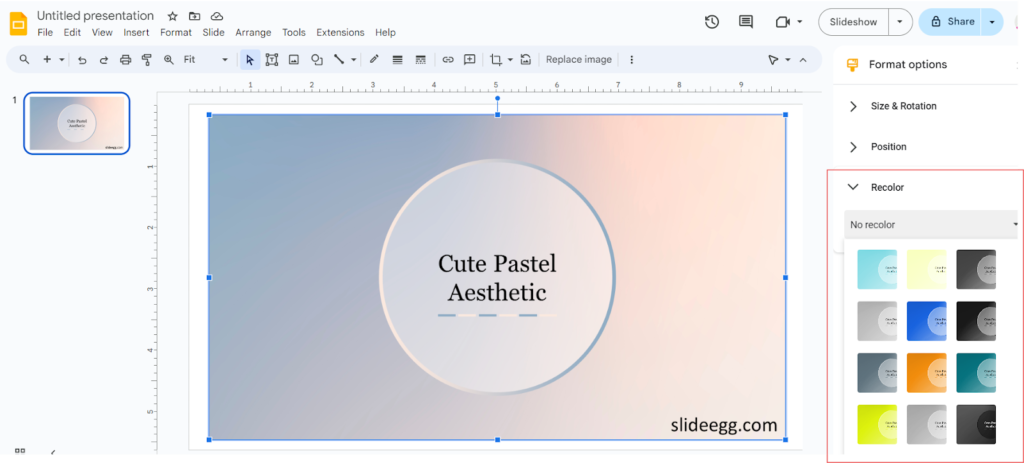
Recoloring an Image
Recoloring an image allows you to adjust its color scheme to match your presentation’s theme. Follow these steps:
- Select the Image: Click on the image you want to modify.
- Access Format Options: Go to the top menu and click on ‘Format’ > ‘Format options’.
- Choose Recolor: In the sidebar that appears, click on the ‘Recolor’ tab.
- Adjust Colors: Explore the available options, such as grayscale, sepia, or custom color adjustments. You can also revert to the original colors if needed.
Changing Transparency
Controlling image transparency can create subtle overlays or highlight specific elements. Here’s how:
- Select the Image: Click on the image.
- Access Format Options: Go to ‘Format’ > ‘Format options’.
- Adjust Transparency: In the ‘Adjustments’ tab, use the transparency slider to make the image more or less opaque.
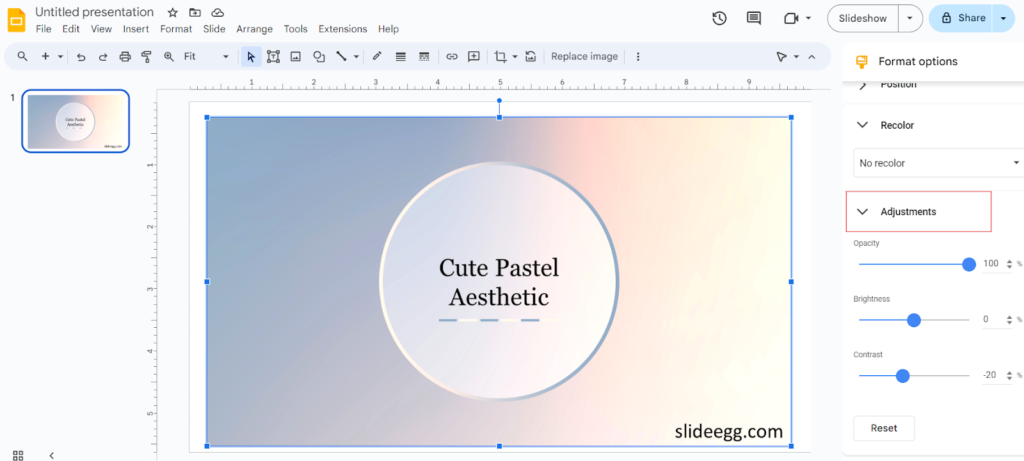
Fine-Tuning Brightness and Contrast
Enhancing brightness and contrast ensures your images are visually appealing. Follow these steps:
- Select the Image: Click on the image you’d like to modify.
- Access Format Options: Go to ‘Format’ > ‘Format options’.
- Adjust Brightness and Contrast: Use the sliders to fine-tune the image’s brightness and contrast.
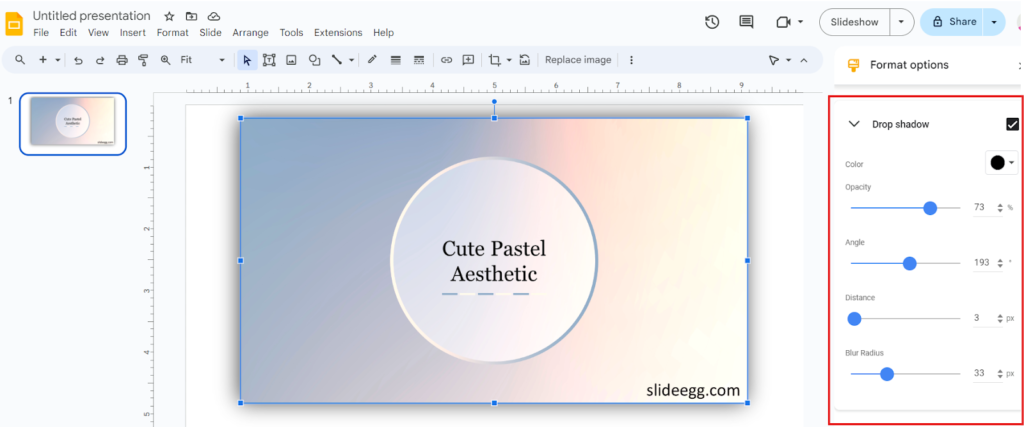
Adding a Shadow Effect
Shadows add depth and dimension to your images. Here’s how to make a shadow effect:
- Select the Image: Click on the image.
- Access Format Options: Go to ‘Format’ > ‘Format options’.
- Enable Drop Shadow: Check the box next to ‘Drop Shadow’.
- Customize the Shadow: Adjust settings like color, transparency, angle, distance, and blur radius.
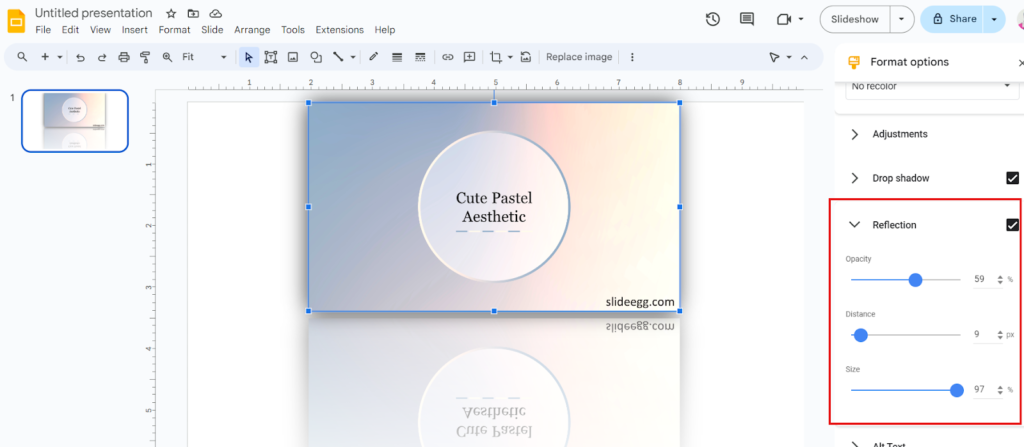
Creating Image Reflections
Reflections can make your images appear as if they’re on a reflective surface. Follow these steps:
- Select the Image: Click on the image.
- Access Format Options: Go to ‘Format’ > ‘Format options’.
- Enable Reflection: Check the box next to ‘Reflection’.
- Customize the Reflection: Adjust transparency, distance, and size for the reflection.
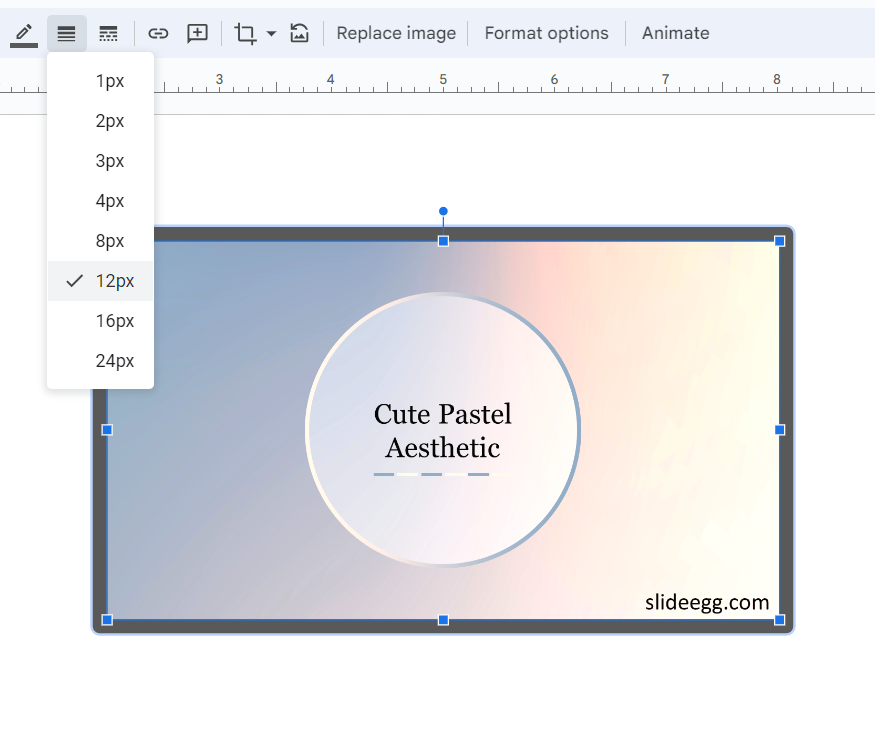
Adding a Border to Your Image
Borders can frame your images, making them stand out more on your slide. Here’s how to add a border:
- Select the Image: Click on the image.
- Access Format Options: Go to ‘Format’ > ‘Format options’.
- Choose Border Color: In the toolbar, click on the pencil icon to select a border color.
- Adjust Border Weight and Style: Use the dropdown menus next to the pencil icon to adjust the thickness (weight) and style (solid, dashed, etc.) of the border.
Rotating and Flipping Images
Rotating and flipping images can help you position them perfectly on your slide. Here’s how:
- Select the Image: Click on the image.
- Access Format Options: Go to ‘Format’ > ‘Format options’.
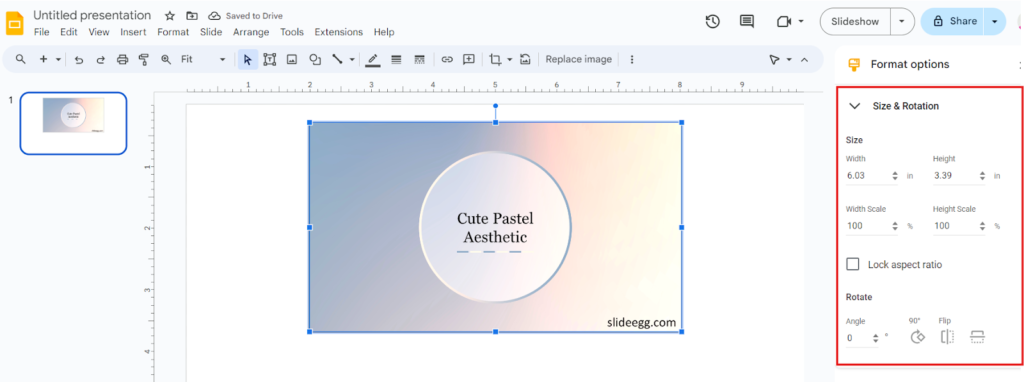
- Rotate the Image: In the ‘Size & Rotation’ tab, enter a value in the rotation box or use the rotate handle on the image.
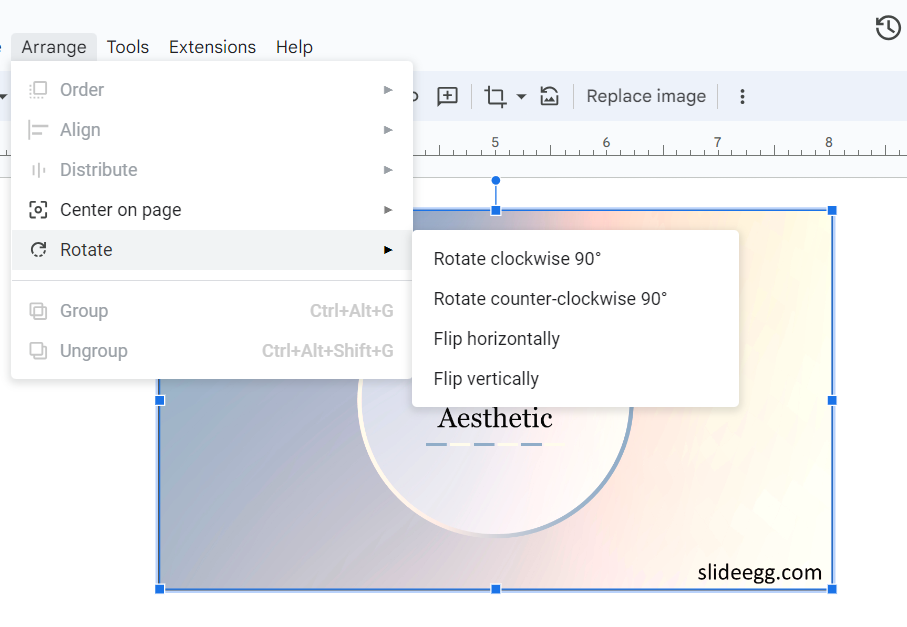
- Flip the Image: Click on the ‘Arrange’ menu, select ‘Rotate’, and then choose ‘Flip horizontally’ or ‘Flip vertically’.
Cropping an Image
Cropping helps you remove unwanted parts of an image and focus on specific elements. Here’s how:
- Select the Image: Click on the image.
- Access Crop Tool: Click the crop icon in the toolbar (it looks like a square with a line through it).
- Adjust Crop: Drag the black handles on the edges and corners to adjust the cropping area.
- Apply Crop: Press Enter or click outside the image to apply the crop.
Using Pre-made Google Slides Templates
Creating a presentation from scratch can be time-consuming. Pre-made Google Slides templates can save you time and effort. These templates come with professionally designed layouts, graphics, and effects already applied. You can find these templates on various websites available online. These sites offer a variety of free and premium templates.
- Choose a Template: Select one that matches your presentation’s theme and style.
- Download the Template: Usually in .pptx or Google Slides format.
- Open the File: Open the template file in Google Slides.
- Customize: Add your own text, images, and any additional effects you need. Adjust the template to fit your content while taking advantage of the pre-designed elements.
Conclusion
Applying image effects in Google Slides is a simple yet powerful way to enhance your presentations. By following the steps outlined in this guide, you can easily add and adjust effects such as recoloring, transparency, brightness, contrast, shadows, reflections, borders, rotation, and cropping. Additionally, using pre-made Google Slides can save you time and ensure your presentations look professional and polished.