
Creating visually appealing presentations can significantly impact how your audience perceives your content. Google Slides, a versatile presentation tool, offers various features to help you achieve this, including the ability to apply filters to your pictures. Adding filters can enhance the visual appeal of your images, making your slides more dynamic and engaging. In this guide, we’ll explore how you can easily apply filters to pictures in Google Slides, transforming your presentations into captivating visual experiences.
Why Filters Matter in Presentations
Using filters isn’t just about making your pictures look better; it’s about creating a cohesive visual story. Filters can help unify the look of your slides, emphasize important points, and keep your audience’s attention. Whether you’re working on a business proposal, a school project, or a personal photo album, the right filter can make a significant difference.
Step-by-Step Guide to Applying Filters
Step 1: Insert Your Image
Start by adding the image you want to edit to your Google Slides presentation.
- Open your Google Slides presentation.
- Go to the slide where you wish to insert the image.
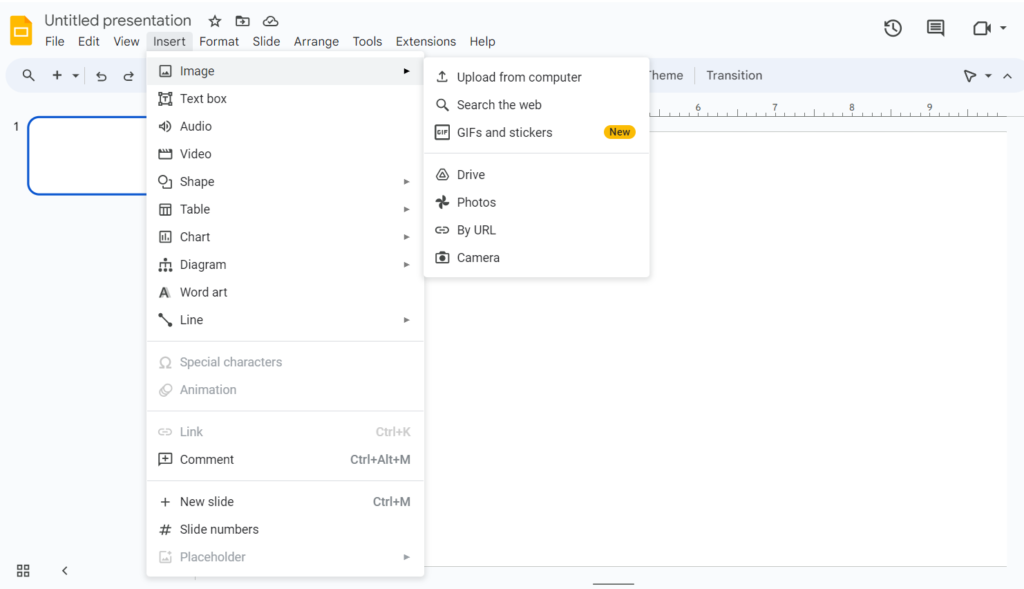
- In the top menu, select ‘Insert,’ and then choose ‘Image.’
- Choose your image source (Upload from the computer, Search the web, Drive, Photos, or by URL).
Step 2: Select and Format the Image
Once your image is in place, click on it to select it. This will enable image editing options.
- Click on ‘Format options’ in the toolbar, or find it under the three vertical dots if it’s not visible.
- The ‘Format options’ sidebar will appear on the right.
Step 3: Apply Adjustments
While Google Slides doesn’t offer traditional filters like those found in photo editing software, you can still enhance your images using adjustments.
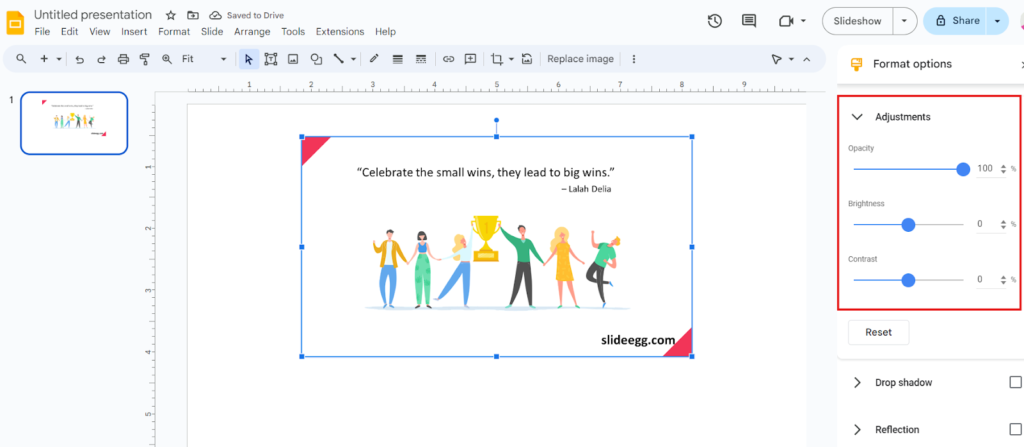
- Within the ‘Format options’ sidebar, select ‘Adjustments.’
- Adjust the ‘transparency’, ‘brightness’, and ‘contrast’ sliders to enhance your image.
Enhancing Images with Third-Party Tools
For more advanced filtering options, consider using third-party tools to edit your images before inserting them into Google Slides.
- Google Photos: Apply filters in Google Photos, save the edited image, and then upload it to Google Slides.
- Canva: Use Canva to apply a wide range of filters, download the edited image, and insert it into your presentation.
Pre-Designed Google Slides Templates
If you’re looking to save time and enhance your presentation’s visual appeal, consider using pre-designed Google Slides templates available online. These templates come with a variety of themes and layouts, making it easy to create professional-looking presentations quickly. Various websites offer a wide selection of free templates that you can customize to fit your needs.
Best Practices for Image Filtering
- Consistency: Use similar filters throughout your presentation to maintain a unified look.
- Clarity: Ensure that the filters enhance your images without overshadowing text or key content.
- Relevance: Select filters that match the tone and theme of your presentation.
Conclusion
Adding filters to pictures in Google Slides is an easy process that can greatly enhance the visual quality of your presentations. By following the steps outlined in this guide, you can make your slides more attractive and professional. While Google Slides provides basic adjustment tools, leveraging external editing tools like Google Photos or Canva can offer more sophisticated filtering options. Experiment with different filters and adjustments to create the perfect look for your presentation, ensuring it captivates and impresses your audience. For more tips on enhancing your presentations, check out our guide on how to apply image effects in Google Slides. Happy presenting!