| Quick Tips to Animate Bullet Points in Google Slides Here are the key steps to animate bullet points in Google Slides: 1. Open your Google Slides presentation. 2. Select the text box containing bullet points. 3. Click on “Insert” > “Animation” (or use “View” > “Motion”). 4. Choose an animation effect (e.g., Fade In, Fly In, Appear). 5. Set the trigger (on click, after previous, with previous). 6. Adjust the timing and speed of the animation. 7. Click Play to preview and make changes if needed. Now, let’s break it down in detail! |
Introduction
💡 “A boring presentation is a forgotten presentation.”
Let’s be honest—nothing kills attention faster than a dull slide filled with static text. If your bullet points just sit there like lifeless dots, your audience will zone out in seconds.
The truth is movement grabs attention. Studies show that animations help people focus better and retain information longer. That’s why animating bullet points in Google Slides isn’t just about making things look cool—it’s about keeping your audience engaged and guiding them through your content.
By adding movement to bullet points, you can:
✔ Control information flow (show one point at a time).
✔ Make slides visually appealing (no more boring text!).
✔ Keep your audience engaged (hello, focus!).
So, let’s learn how to do this step by step!
Step 1: Open Google Slides & Select Your Bullet Points
- First, open your Google Slides presentation.
- Select the text box with the bullet points you wish to animate.
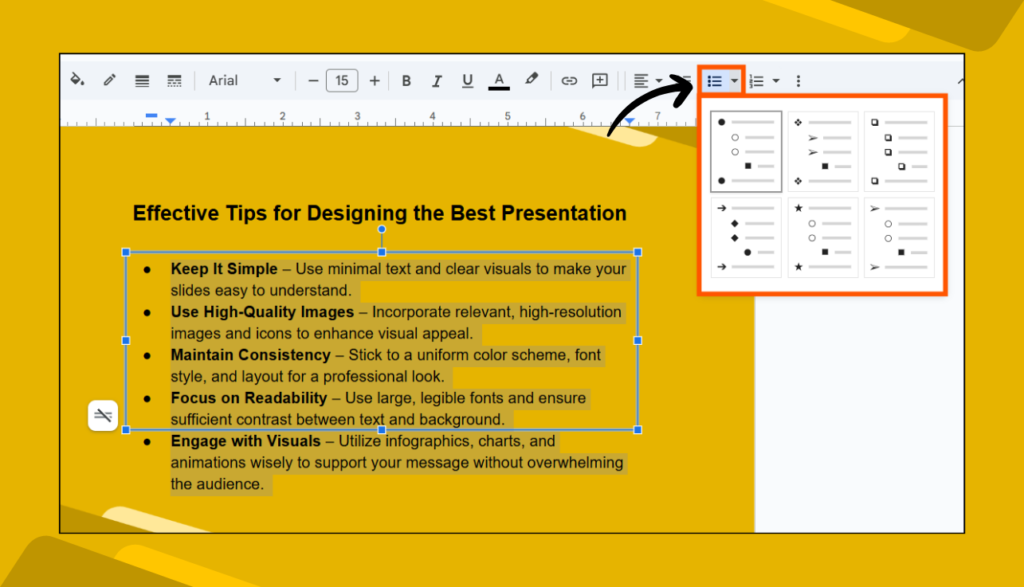
- If you haven’t added bullets yet, just type your text, highlight it, and click the bullet point icon 🔘 in the toolbar.
Step 2: Open the Animation Panel
To add animations, follow these steps:
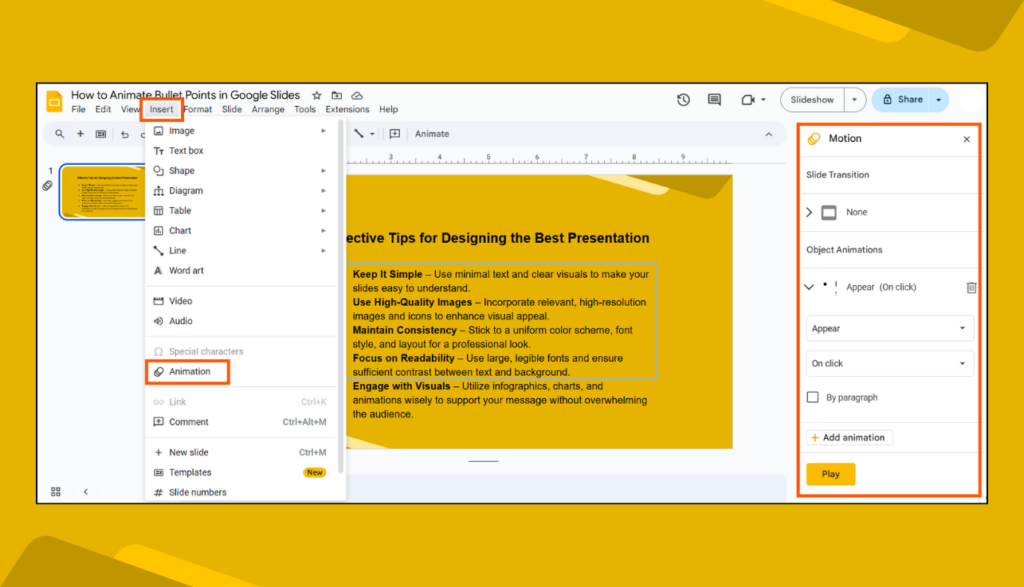
- Click on “Insert” in the top menu.
- Select “Animation” (or go to “View” > “Motion” in newer versions).
- The “Motion” panel will display on the right side of your screen.
Step 3: Choose an Animation Effect
Now, let’s make your bullet points move!
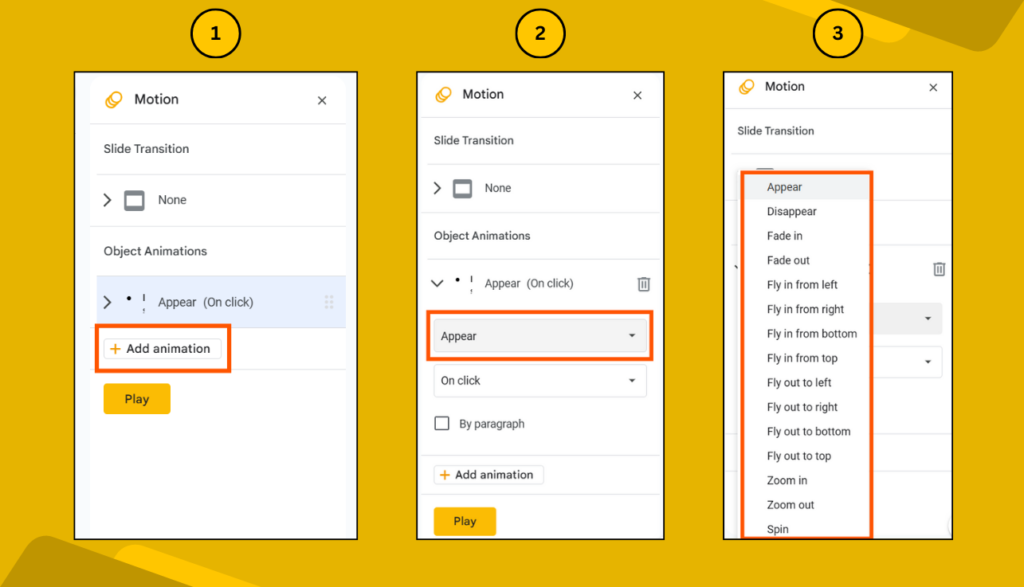
Click on “Add Animation” and pick an effect from the dropdown menu. Some great options include:
✅ Fade In – Smooth and professional.
✅ Fly In from Left/Right – Good for step-by-step presentations.
✅ Appear – Simple, but effective.
✅ Zoom In – Grabs attention instantly.
Step 4: Set Animation Timing
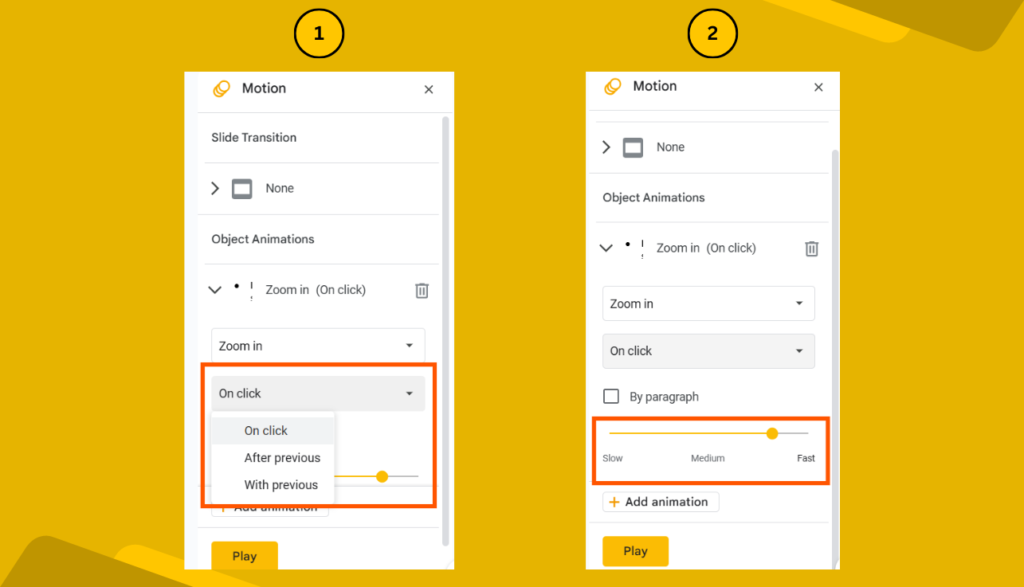
After choosing an effect, you’ll see options like:
- On Click (animation starts when you click).
- After Previous (automatically plays after the last animation).
- With Previous (plays at the same time as the last animation).
💡 Best practice? Use “On Click” if you want to reveal points one by one.
You can also adjust the speed (slow, medium, or fast) to match your speaking pace.
Step 5: Preview & Fine-Tune Your Animations
Click the “Play” button in the Motion panel to preview how your bullet points appear.
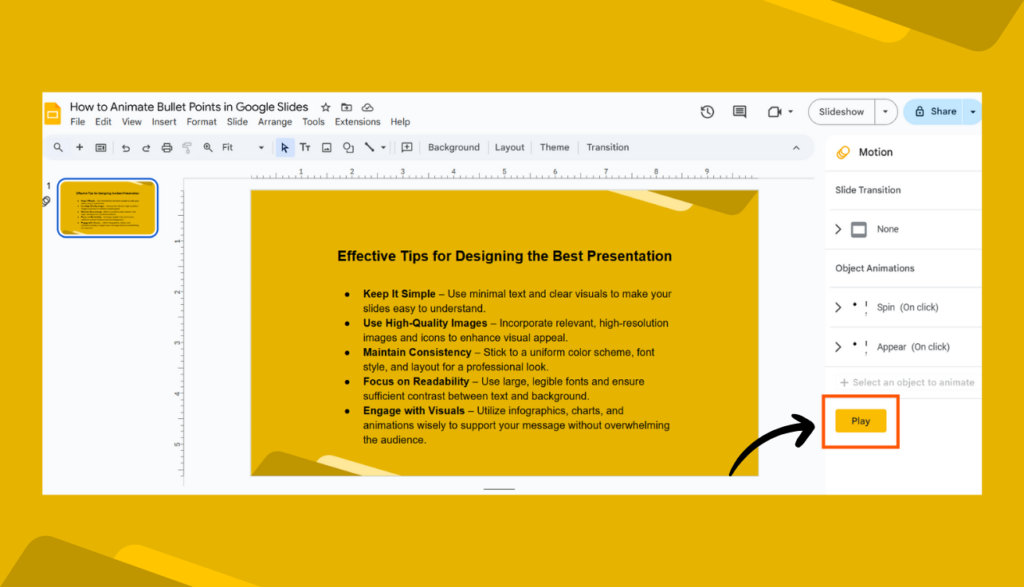
🎯 Pro Tip: If the animation feels too fast or too slow, tweak the speed slider until it looks just right!
Step 6: Apply Animations to All Slides (Optional)
Want to use the same effect on multiple slides?
- Click on another slide.
- Select the text box with bullet points.
- Click “Add Animation” and repeat the process.
If you have multiple slides with bullet points, this keeps your presentation consistent and professional.
Bonus Tip: Keep It Simple & Avoid Overuse
Animations are fun, but too much movement can be distracting. Stick to one or two animation styles for a polished look.
🎯 Golden Rule: If it enhances the message, keep it. If it’s just for show, skip it!
FAQs
1. Can I animate each bullet point separately in Google Slides?
Yes! Google Slides automatically animates each bullet point one by one when you apply an animation to the text box. You can control the timing using the “On Click” option.
2. Why can’t I find the animation option in Google Slides?
If you don’t see the Animation option, try clicking View > Motion or right-click your text box and select Animate.
3. Can I use different animations for different bullet points?
Not directly, but a workaround is putting each bullet point in a separate text box and animating them individually.
4. Will animations work in Google Slides when I present online?
Yes! If you’re presenting in Google Meet or Zoom, animations work normally. However, if you export your slides as a PDF, animations won’t be included.
5. Can I add sound effects to animations in Google Slides?
Unfortunately, Google Slides doesn’t have built-in sound effects for animations. But you can insert an audio file separately and sync it with your animations.
Final Thoughts
Animating bullet points in Google Slides is a simple yet powerful way to make your presentations more engaging. Whether you’re a teacher, student, or business professional, using animations the right way will help you communicate ideas more effectively.
Now, go ahead and try it yourself!